Day #28: Jenkins Agents

Release Management Professional | Transitioning to DevOps
With a proven track record in Release Management, I'm on an exciting journey to transition into the world of DevOps. I specialize in orchestrating the smooth deployment of software and applications, and I'm now gearing up to bridge the gap between development and operations.
My passion lies in optimizing release processes, automating deployments, and ensuring the efficiency of IT operations. I'm actively enhancing my skill set in DevOps practices, including cloud technologies, scripting, and CI/CD pipelines.
I'm keen to connect with professionals who share this enthusiasm and explore opportunities for mutual growth and collaboration in the DevOps domain. Let's connect and exchange insights about the evolving landscapes of Release Management and DevOps!
#ReleaseManagement #DevOps #EfficiencyOptimization
The Jenkins architecture is designed for distributed build environments. It allows us to use different environments for each build project balancing the workload among multiple agents running jobs in parallel.
The Jenkins controller is the original node in the Jenkins installation. The Jenkins controller administers the Jenkins agents and orchestrates their work, including scheduling jobs on agents and monitoring agents.
What is the Jenkins Master (Server)?
Jenkins’s server or master node holds all key configurations. Jenkins master server is like a control server that orchestrates all the workflow defined in the pipelines. For example, scheduling a job, monitoring the jobs, etc.
This node manages other nodes running the Jenkins Agent.
What is a Jenkins Agents (Formerly Slave)?
An agent is typically a machine, or container, which connects to a Jenkins controller and executes tasks when directed by the controller.
Agents may be connected to the Jenkins controller using either local or cloud computers. It requires a Java installation and a network connection to the Jenkins controller.
Jenkins Agent is a worker node that executes the tasks and builds assigned by the Jenkins Master. It works as a distributed system where the Jenkins Master assigns tasks to Jenkins Agents, which then execute the tasks on the machines they are running on.
When you create a Jenkins job, you have to assign an agent to it. Every agent has a label as a unique identifier. The agent section in the Pipeline specifies where the entire Pipeline, or a specific stage, will execute in the Jenkins environment.
What is a Jenkins Node?
A Jenkins node is an umbrella term for Agents and Controllers, regardless of their actual roles. A node is a machine on which you can build projects and pipelines. Jenkins automatically monitors the health of all connected nodes, and if metrics go below a threshold, it takes the node offline.
Pre-requisites
Let’s say we’re starting with a fresh Ubuntu 22.04 Linux installation. To get an agent working make sure you install Java ( same version as jenkins master server ) and Docker on it.
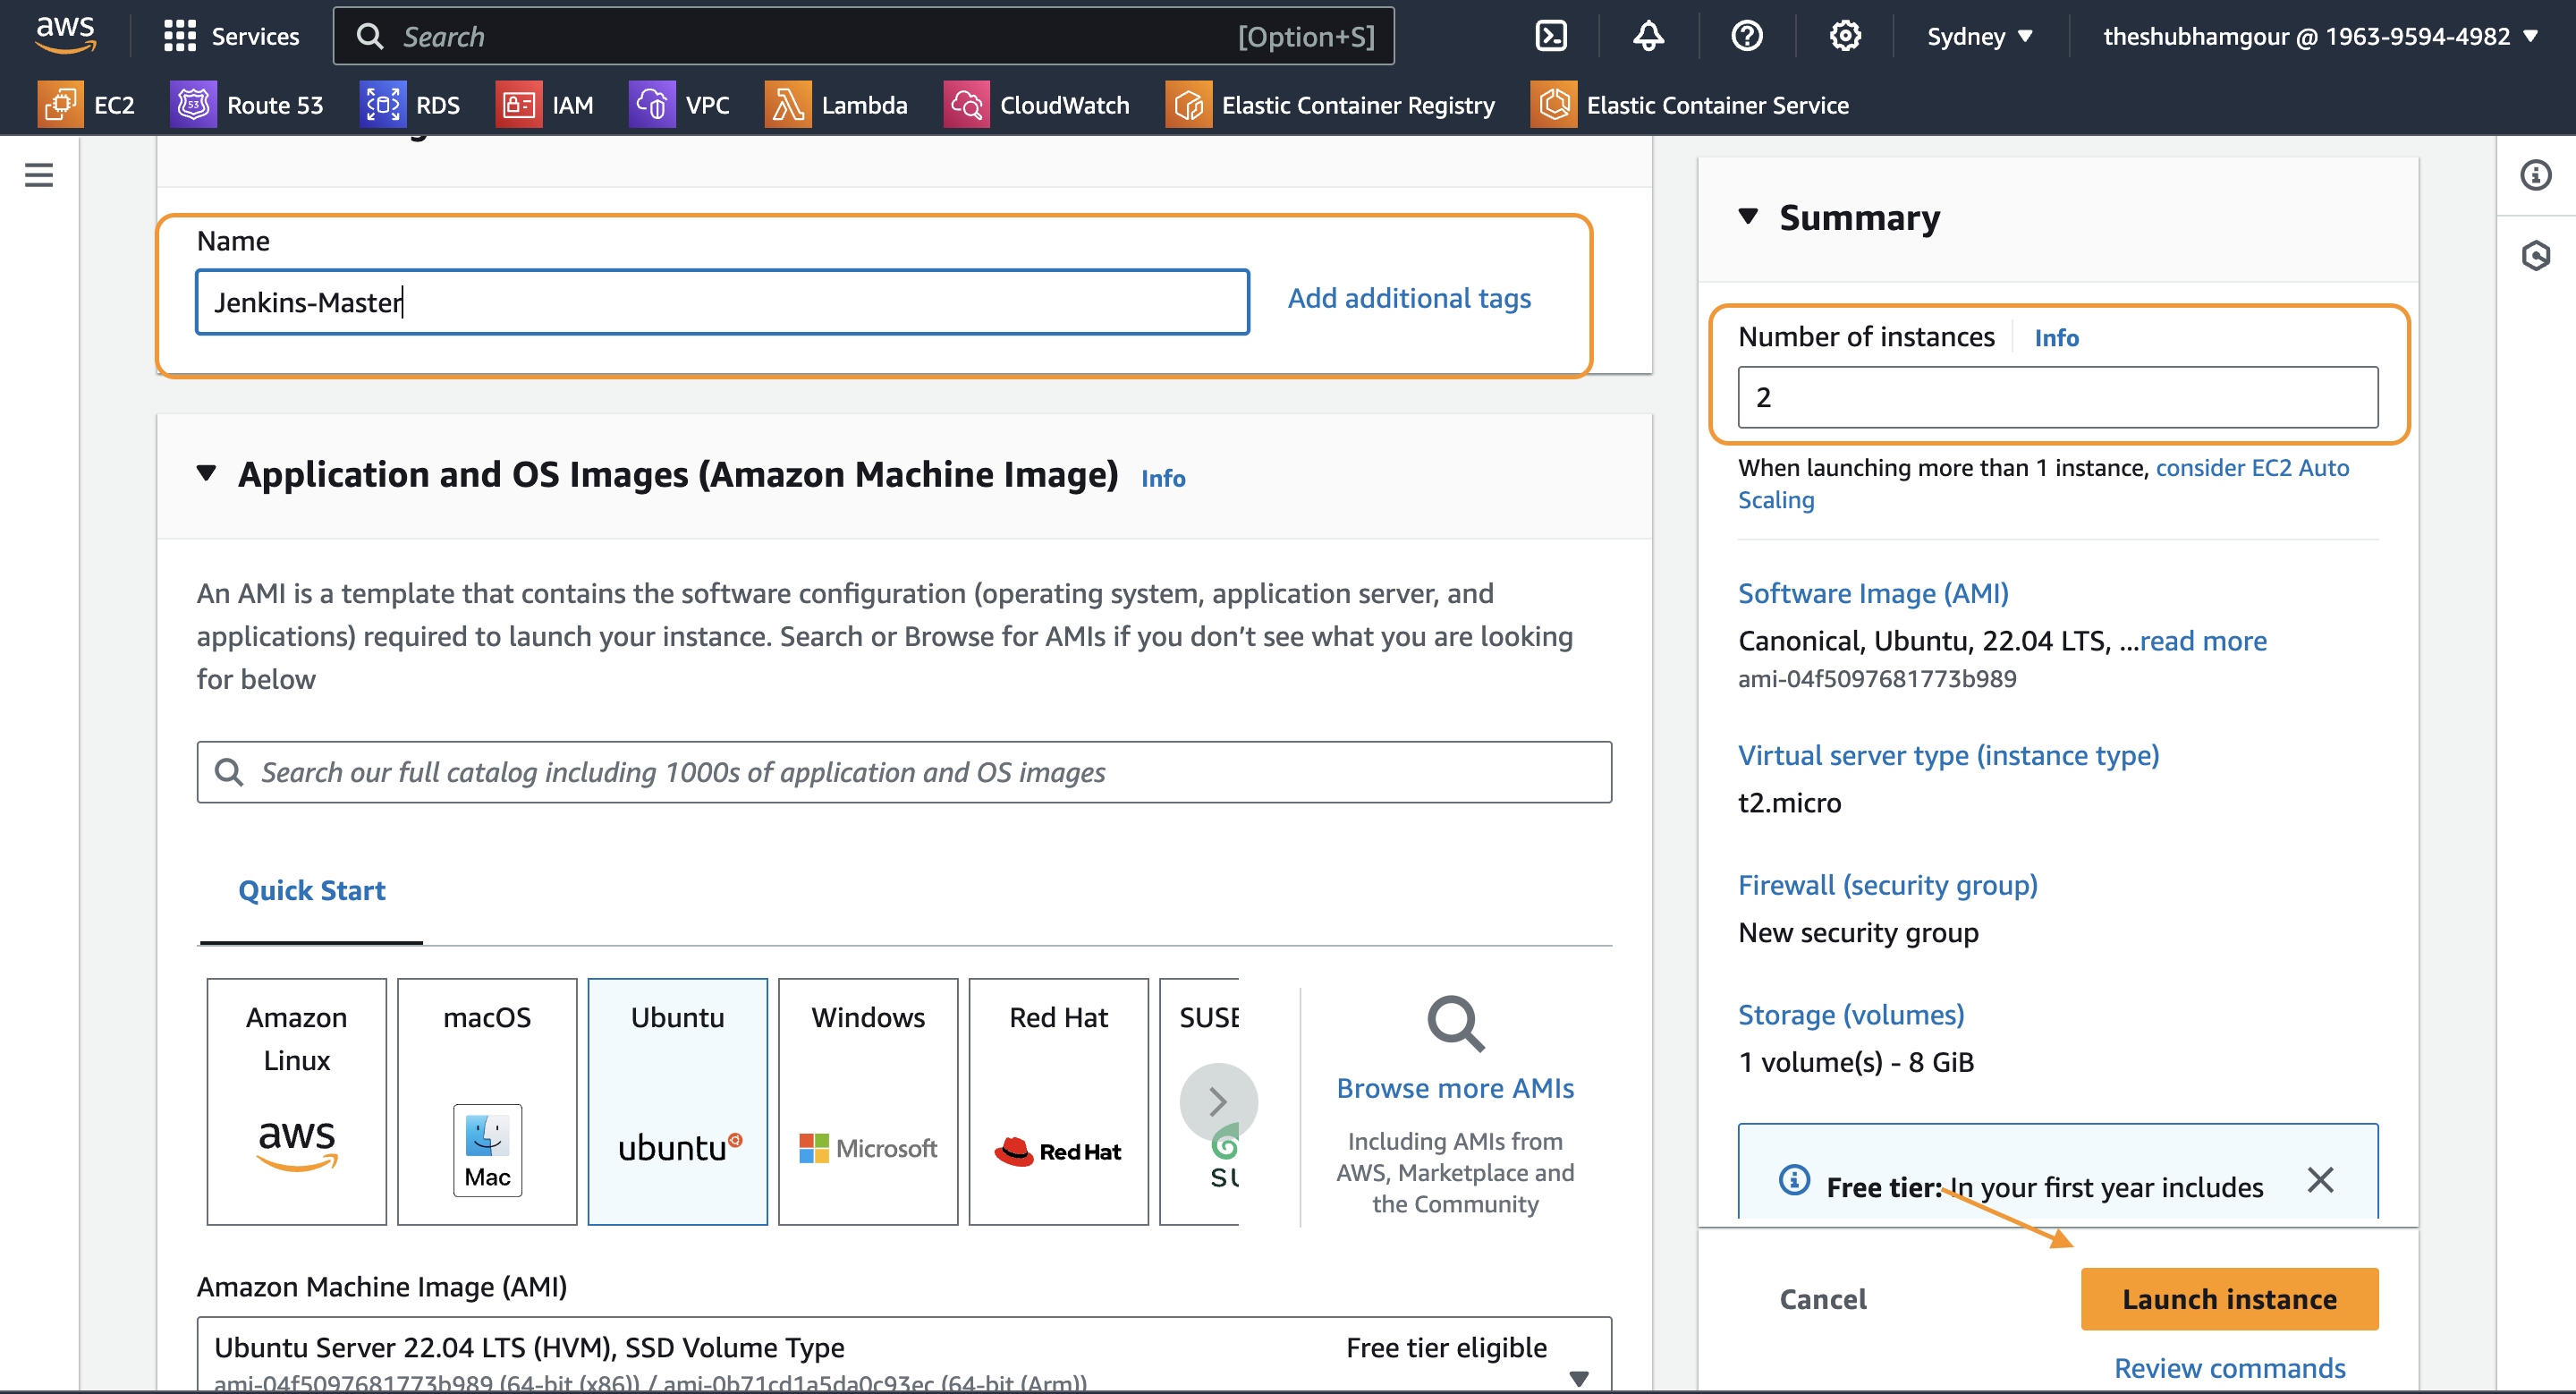
Install Jenkins on Jenkins-Master : Refer this - Getting Started with Jenkins 😃
Jenkins Master is installed and running on another machine.
Docker is installed on the Ubuntu machine.
sudo apt update
sudo apt install fontconfig openjdk-17-jre
Generate an SSH key on the Jenkins master to establish a secure connection with the agent:
ssh-keygen

Copy the generated public key (id_rsa.pub) and add it to the authorized_keys file on the agent.
Verify the Master-Agent connectivity:
cat id_rsa.pub

Now go to agent and paste the file on authorized_keys

Now to verify the Master-Agent connectivity we will execute the below command
ssh ubuntu@<public-ip>
ssh ubuntu@3.106.133.96

See the above was success which means master and node can be connected via ssh
Jenkins Agent Setup
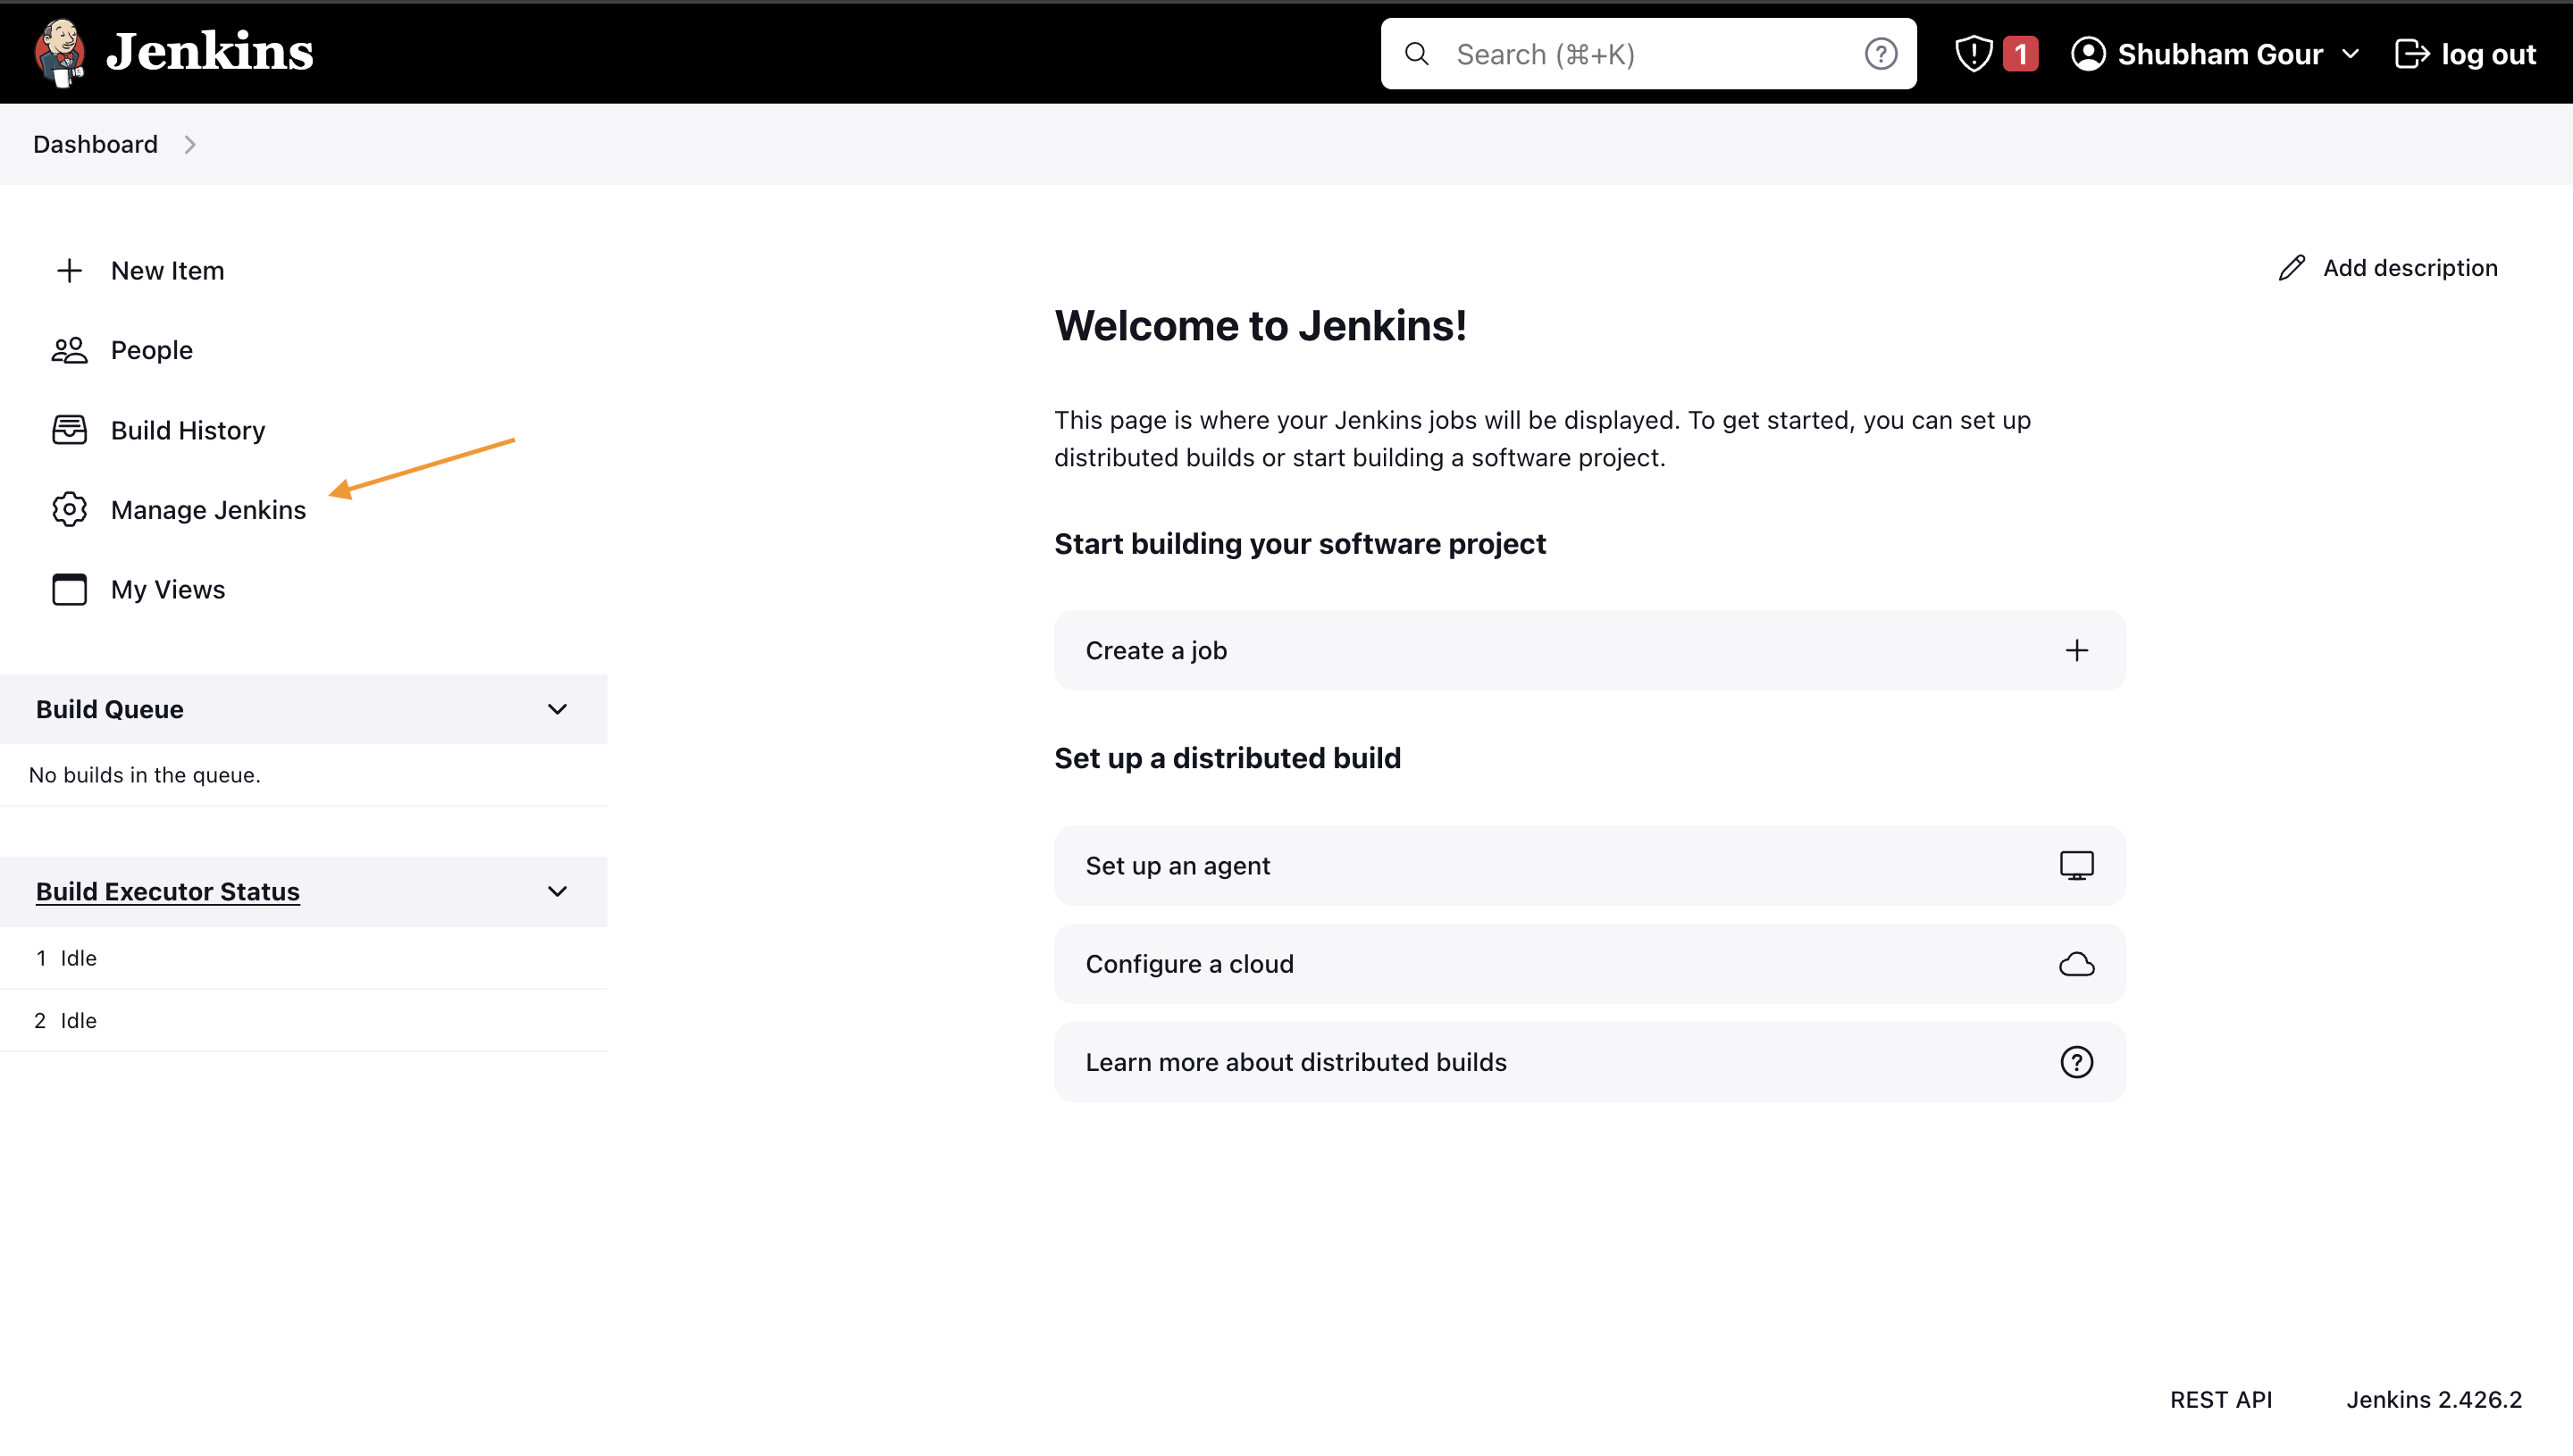
Navigate to Jenkins and click on "Manage Jenkins."
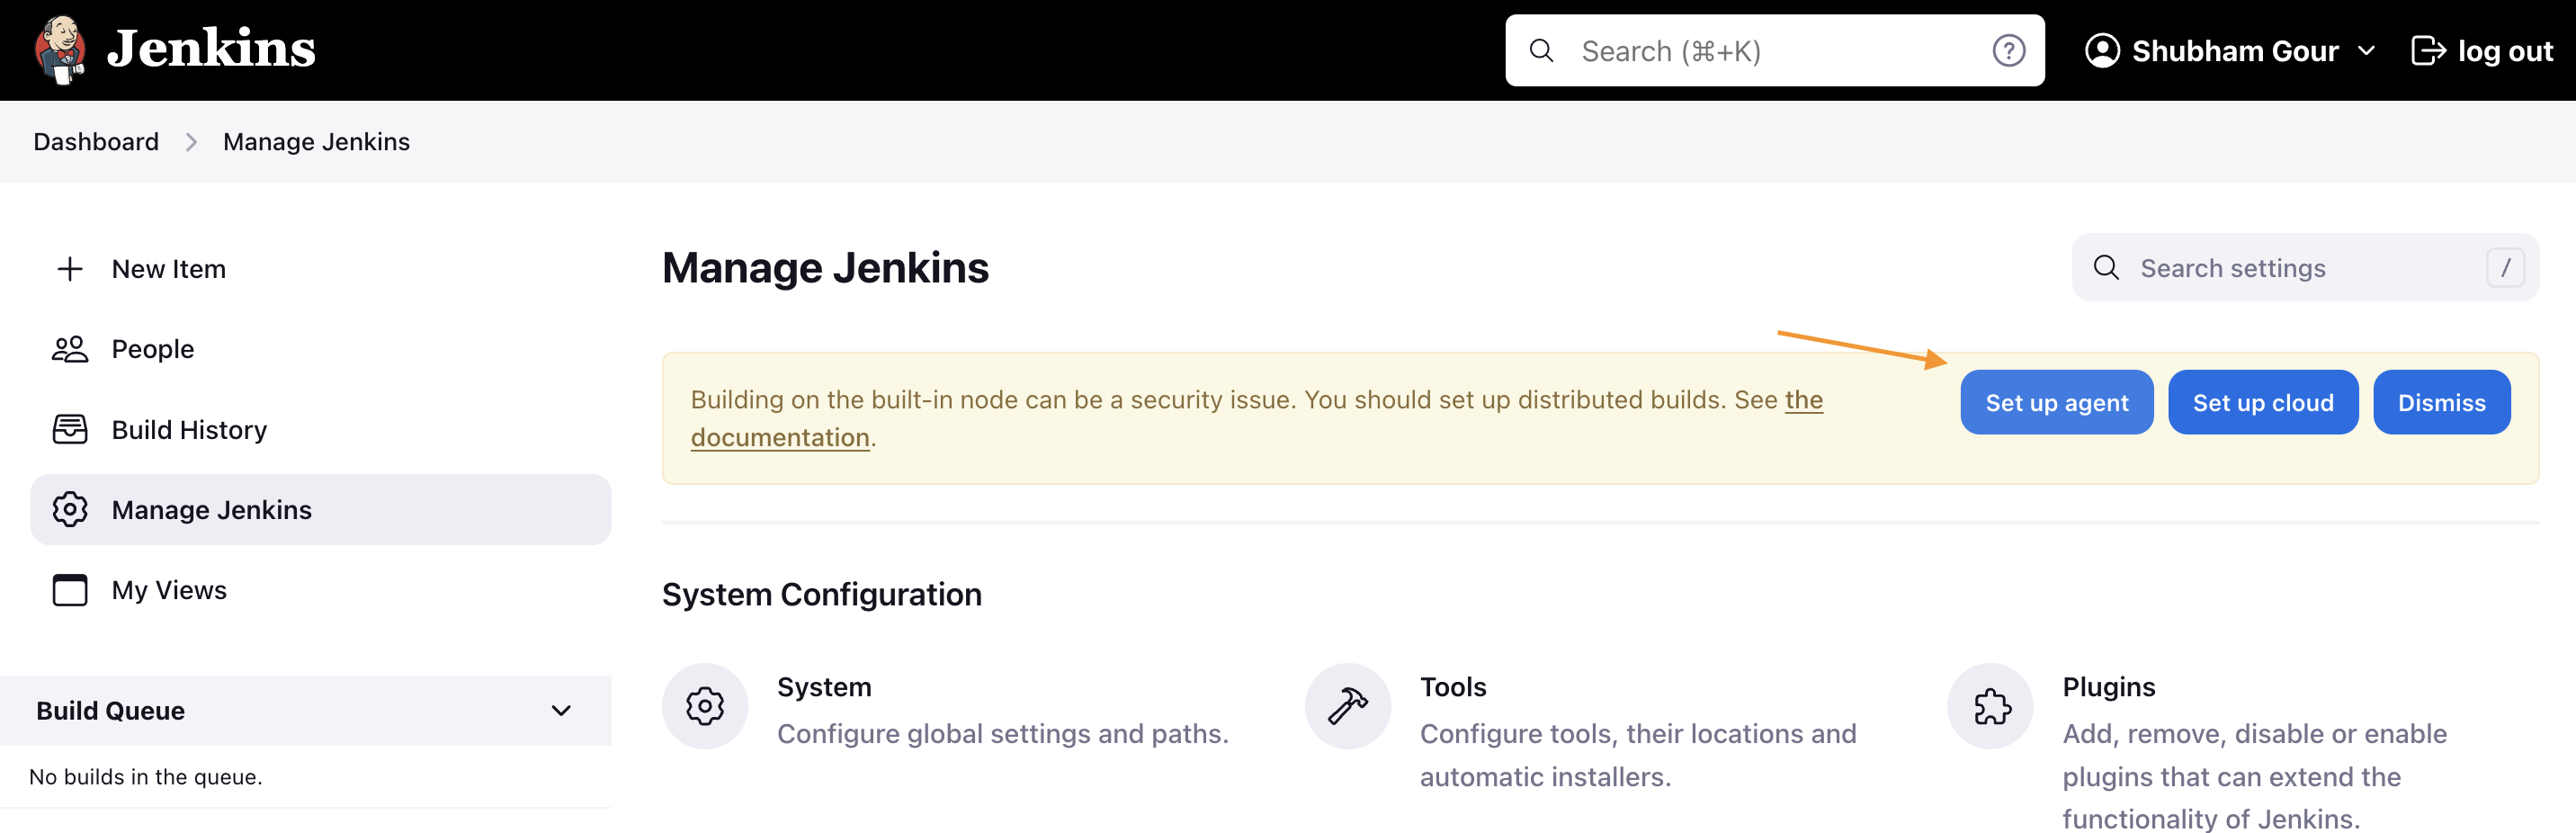
Select "Manage Nodes and Clouds."
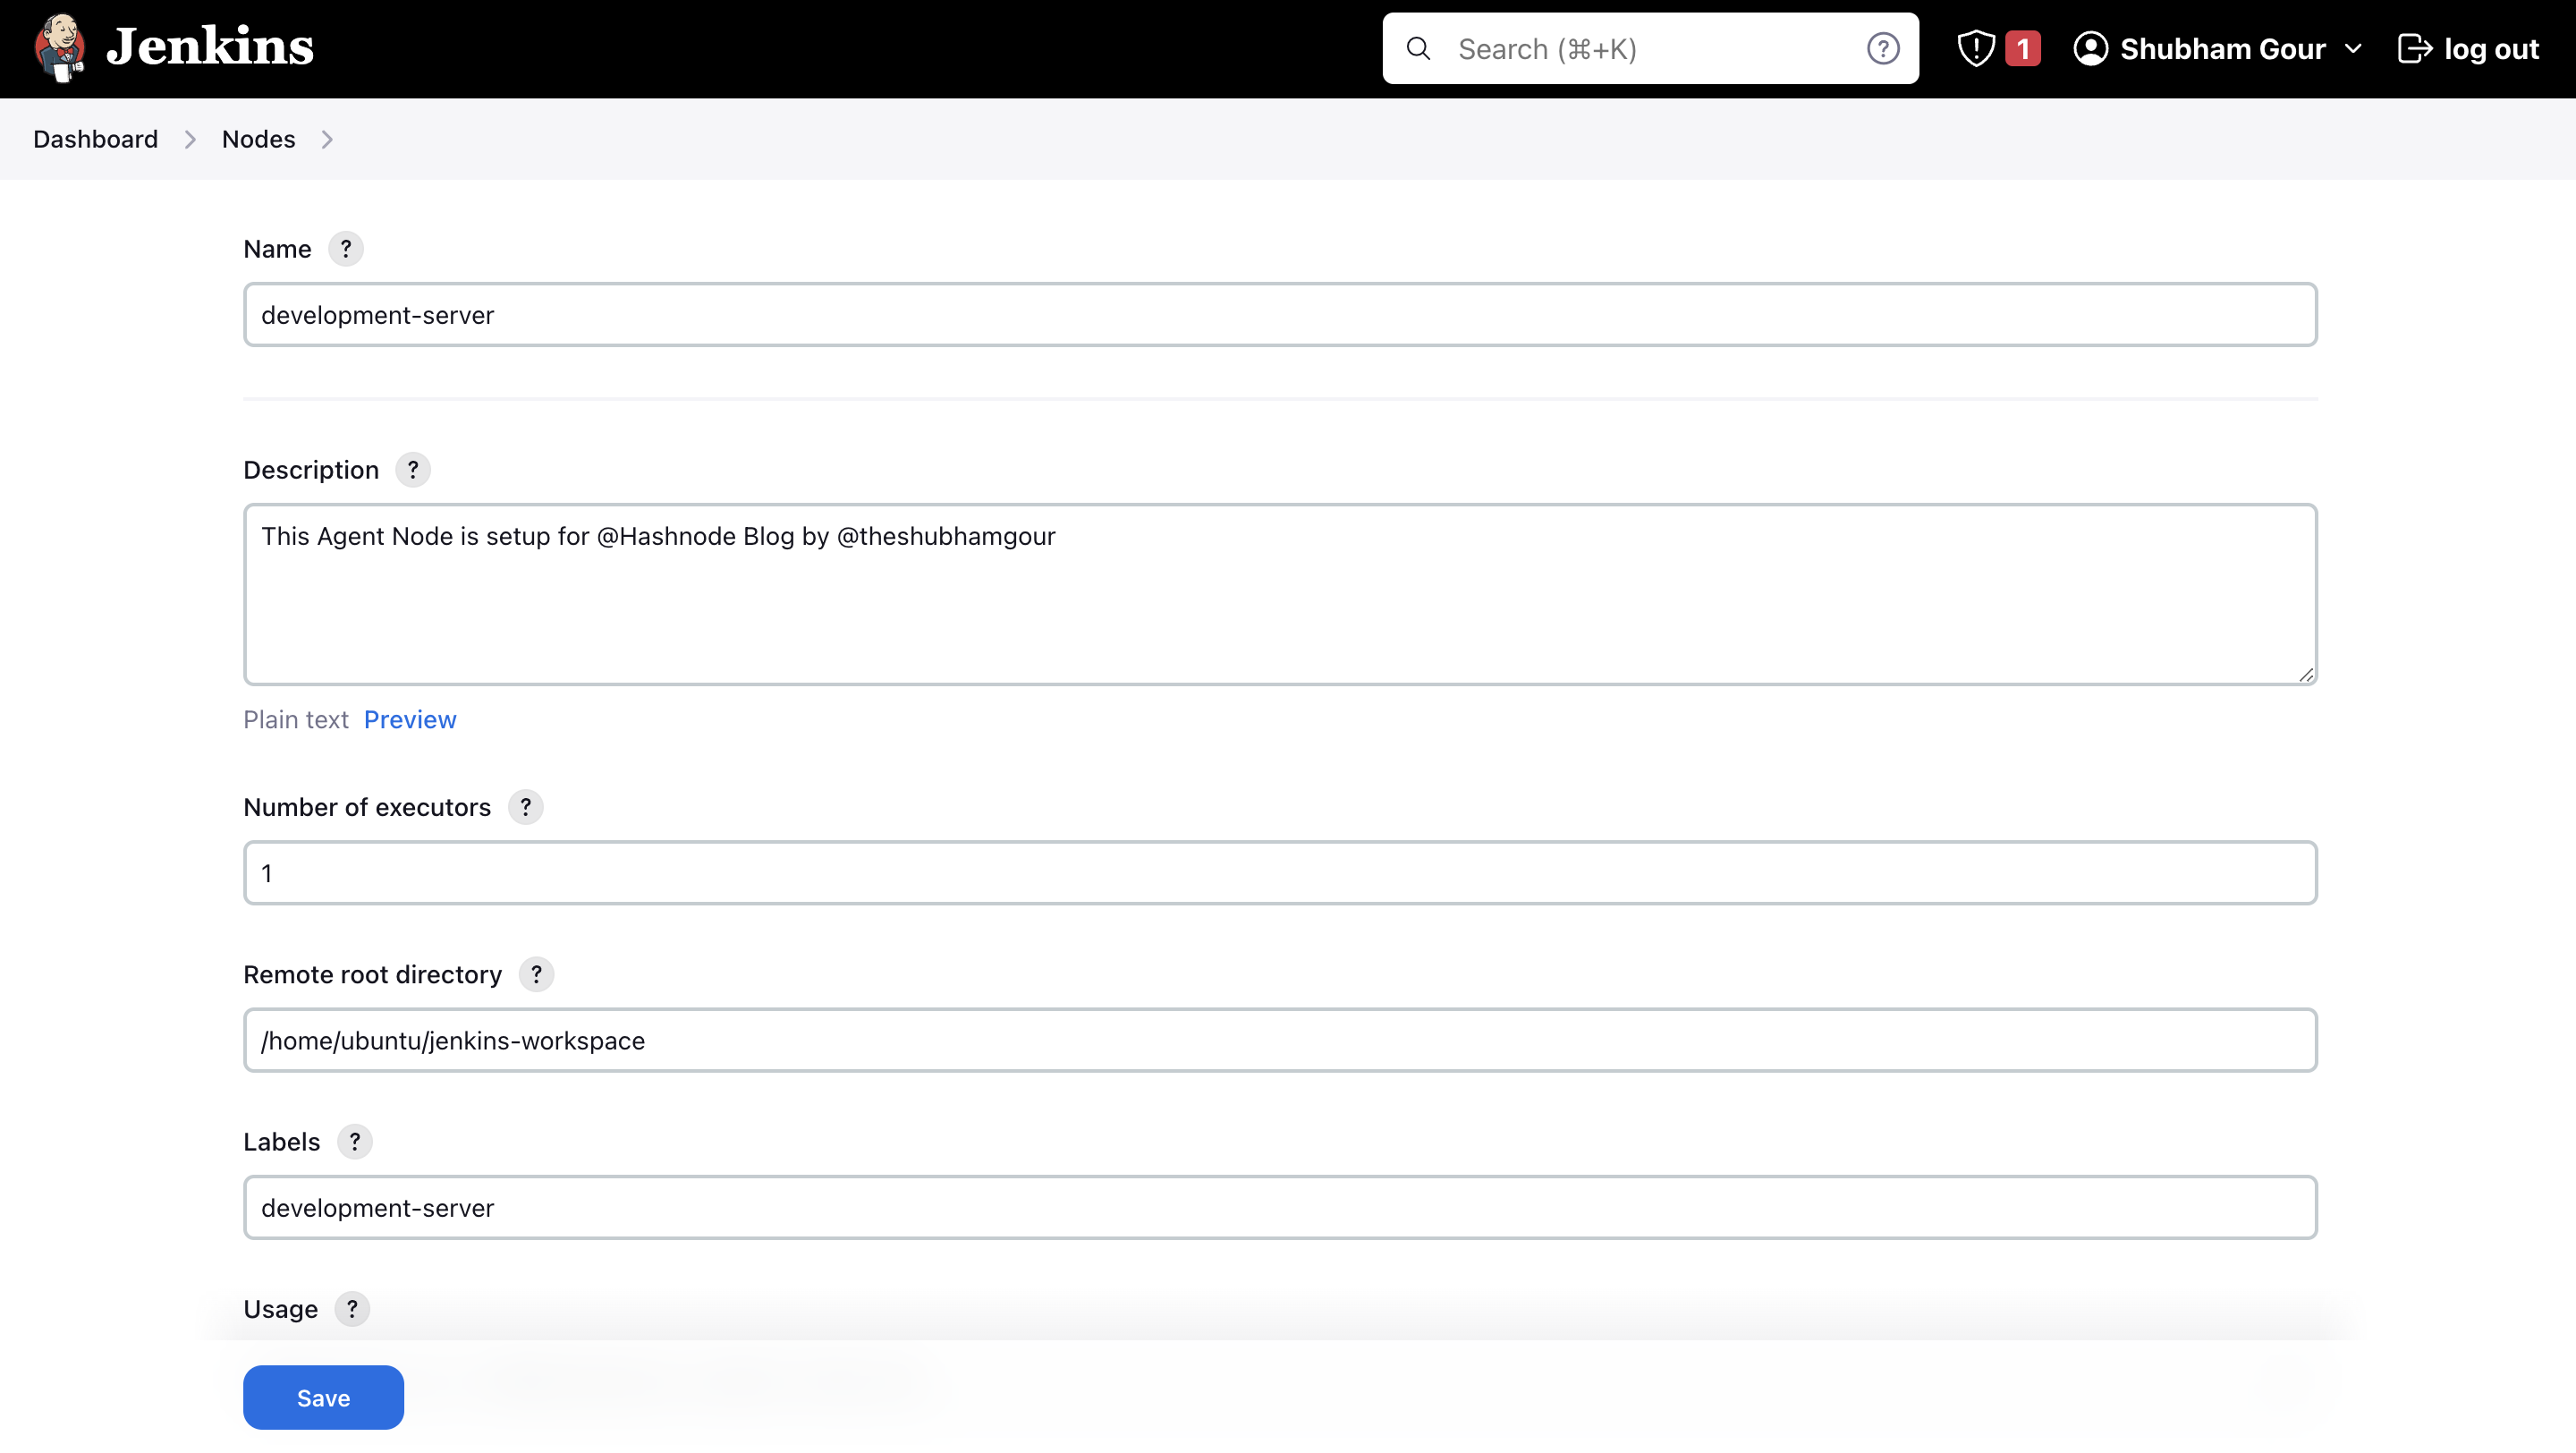
Click on "New Node" to set up a new agent.
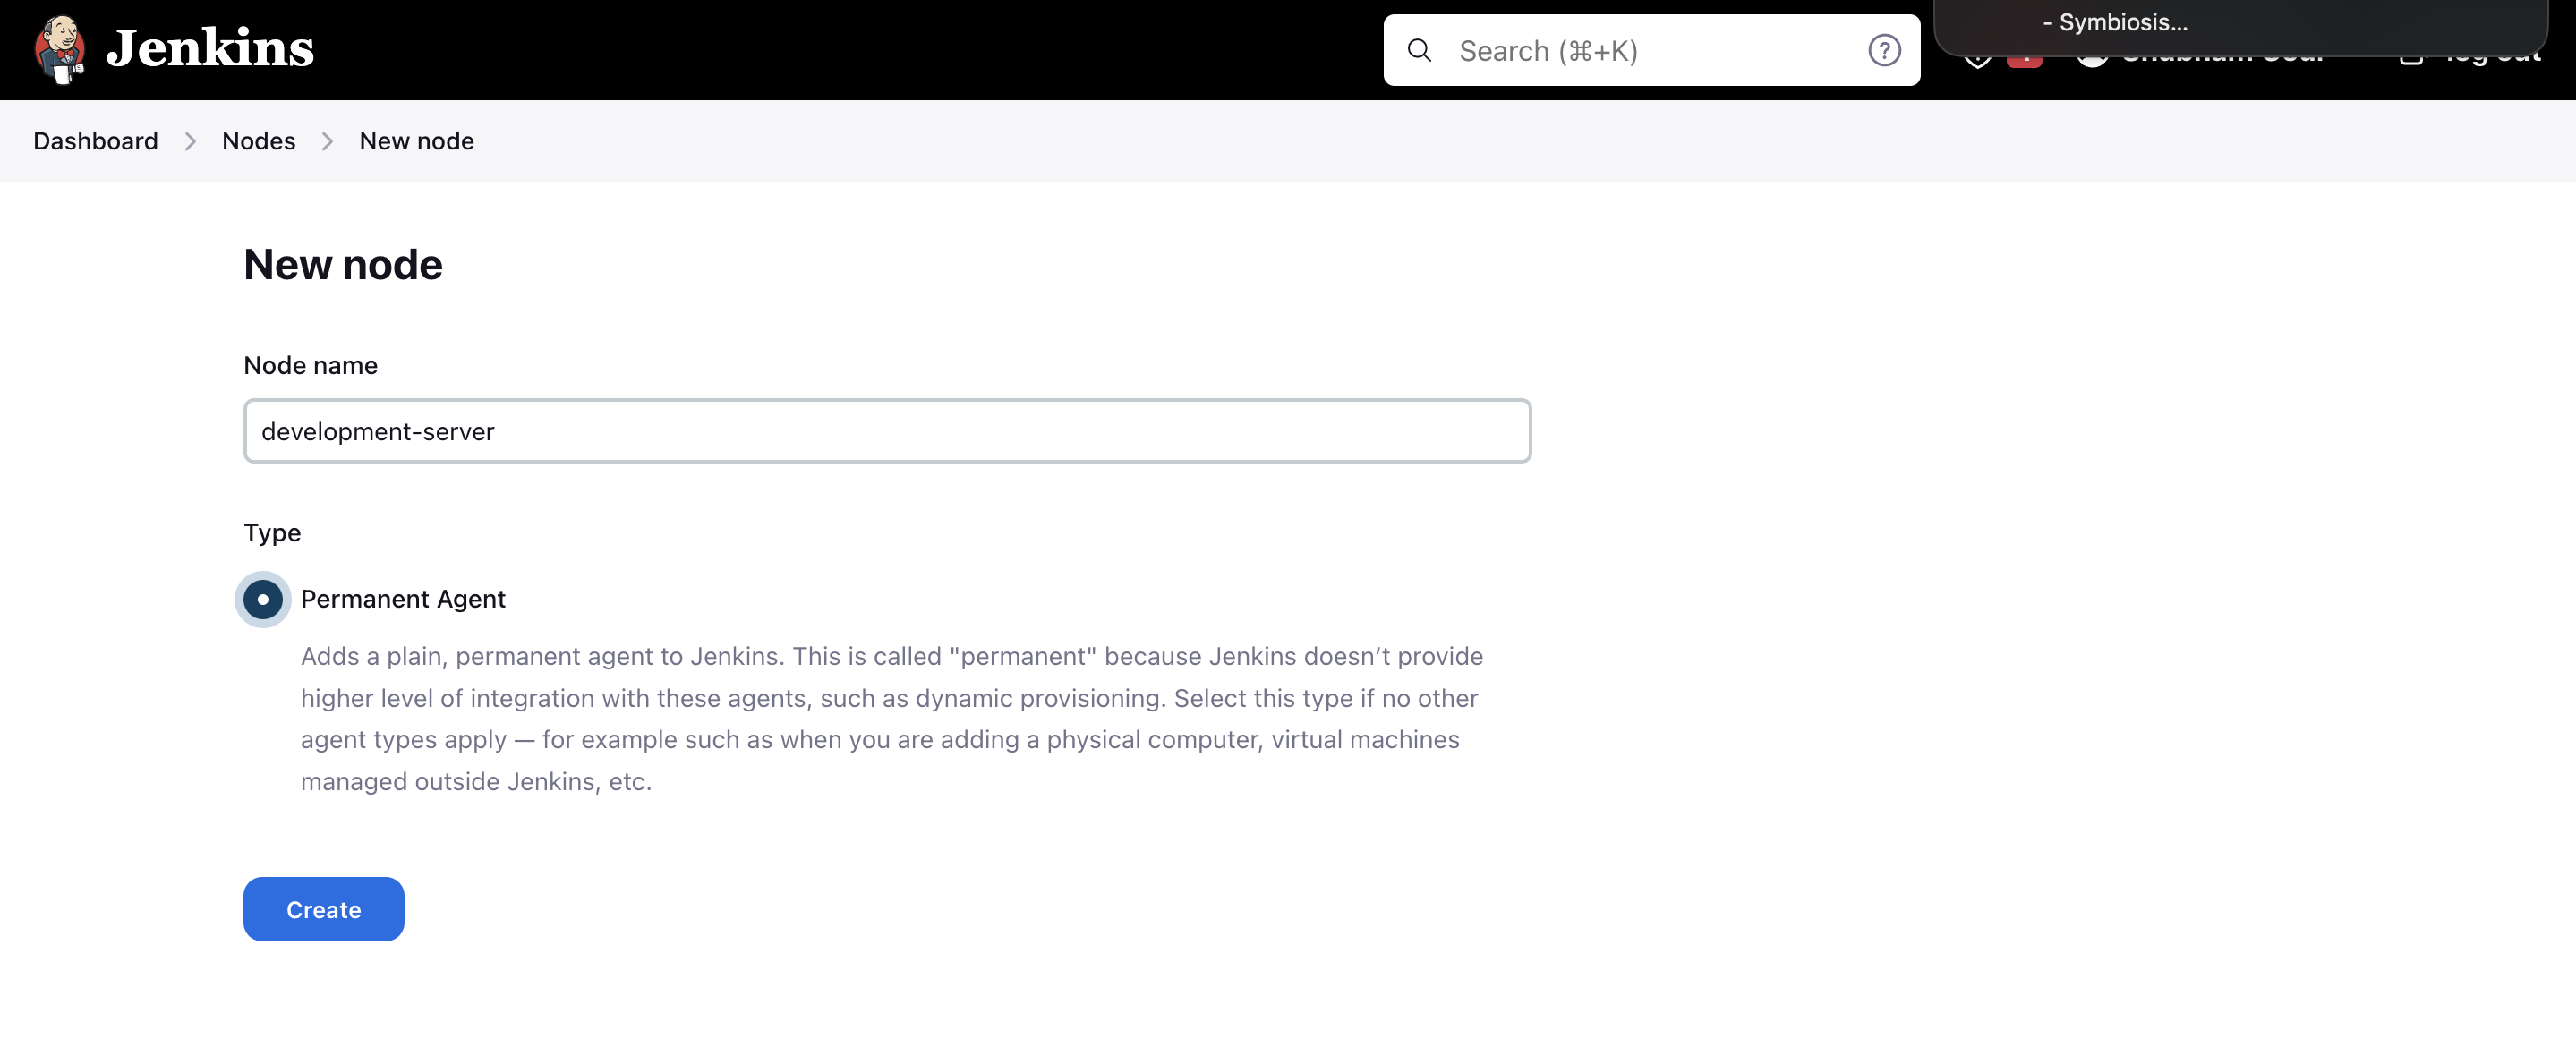
- Provide a Node name (e.g.,
development-server) and set the number of Executors (CPU cores).
Now Create a directory in agent and copy the directory path using pwd

Number of Executors meaning the number of CPU's form the node we want to dedicate for builds and operations
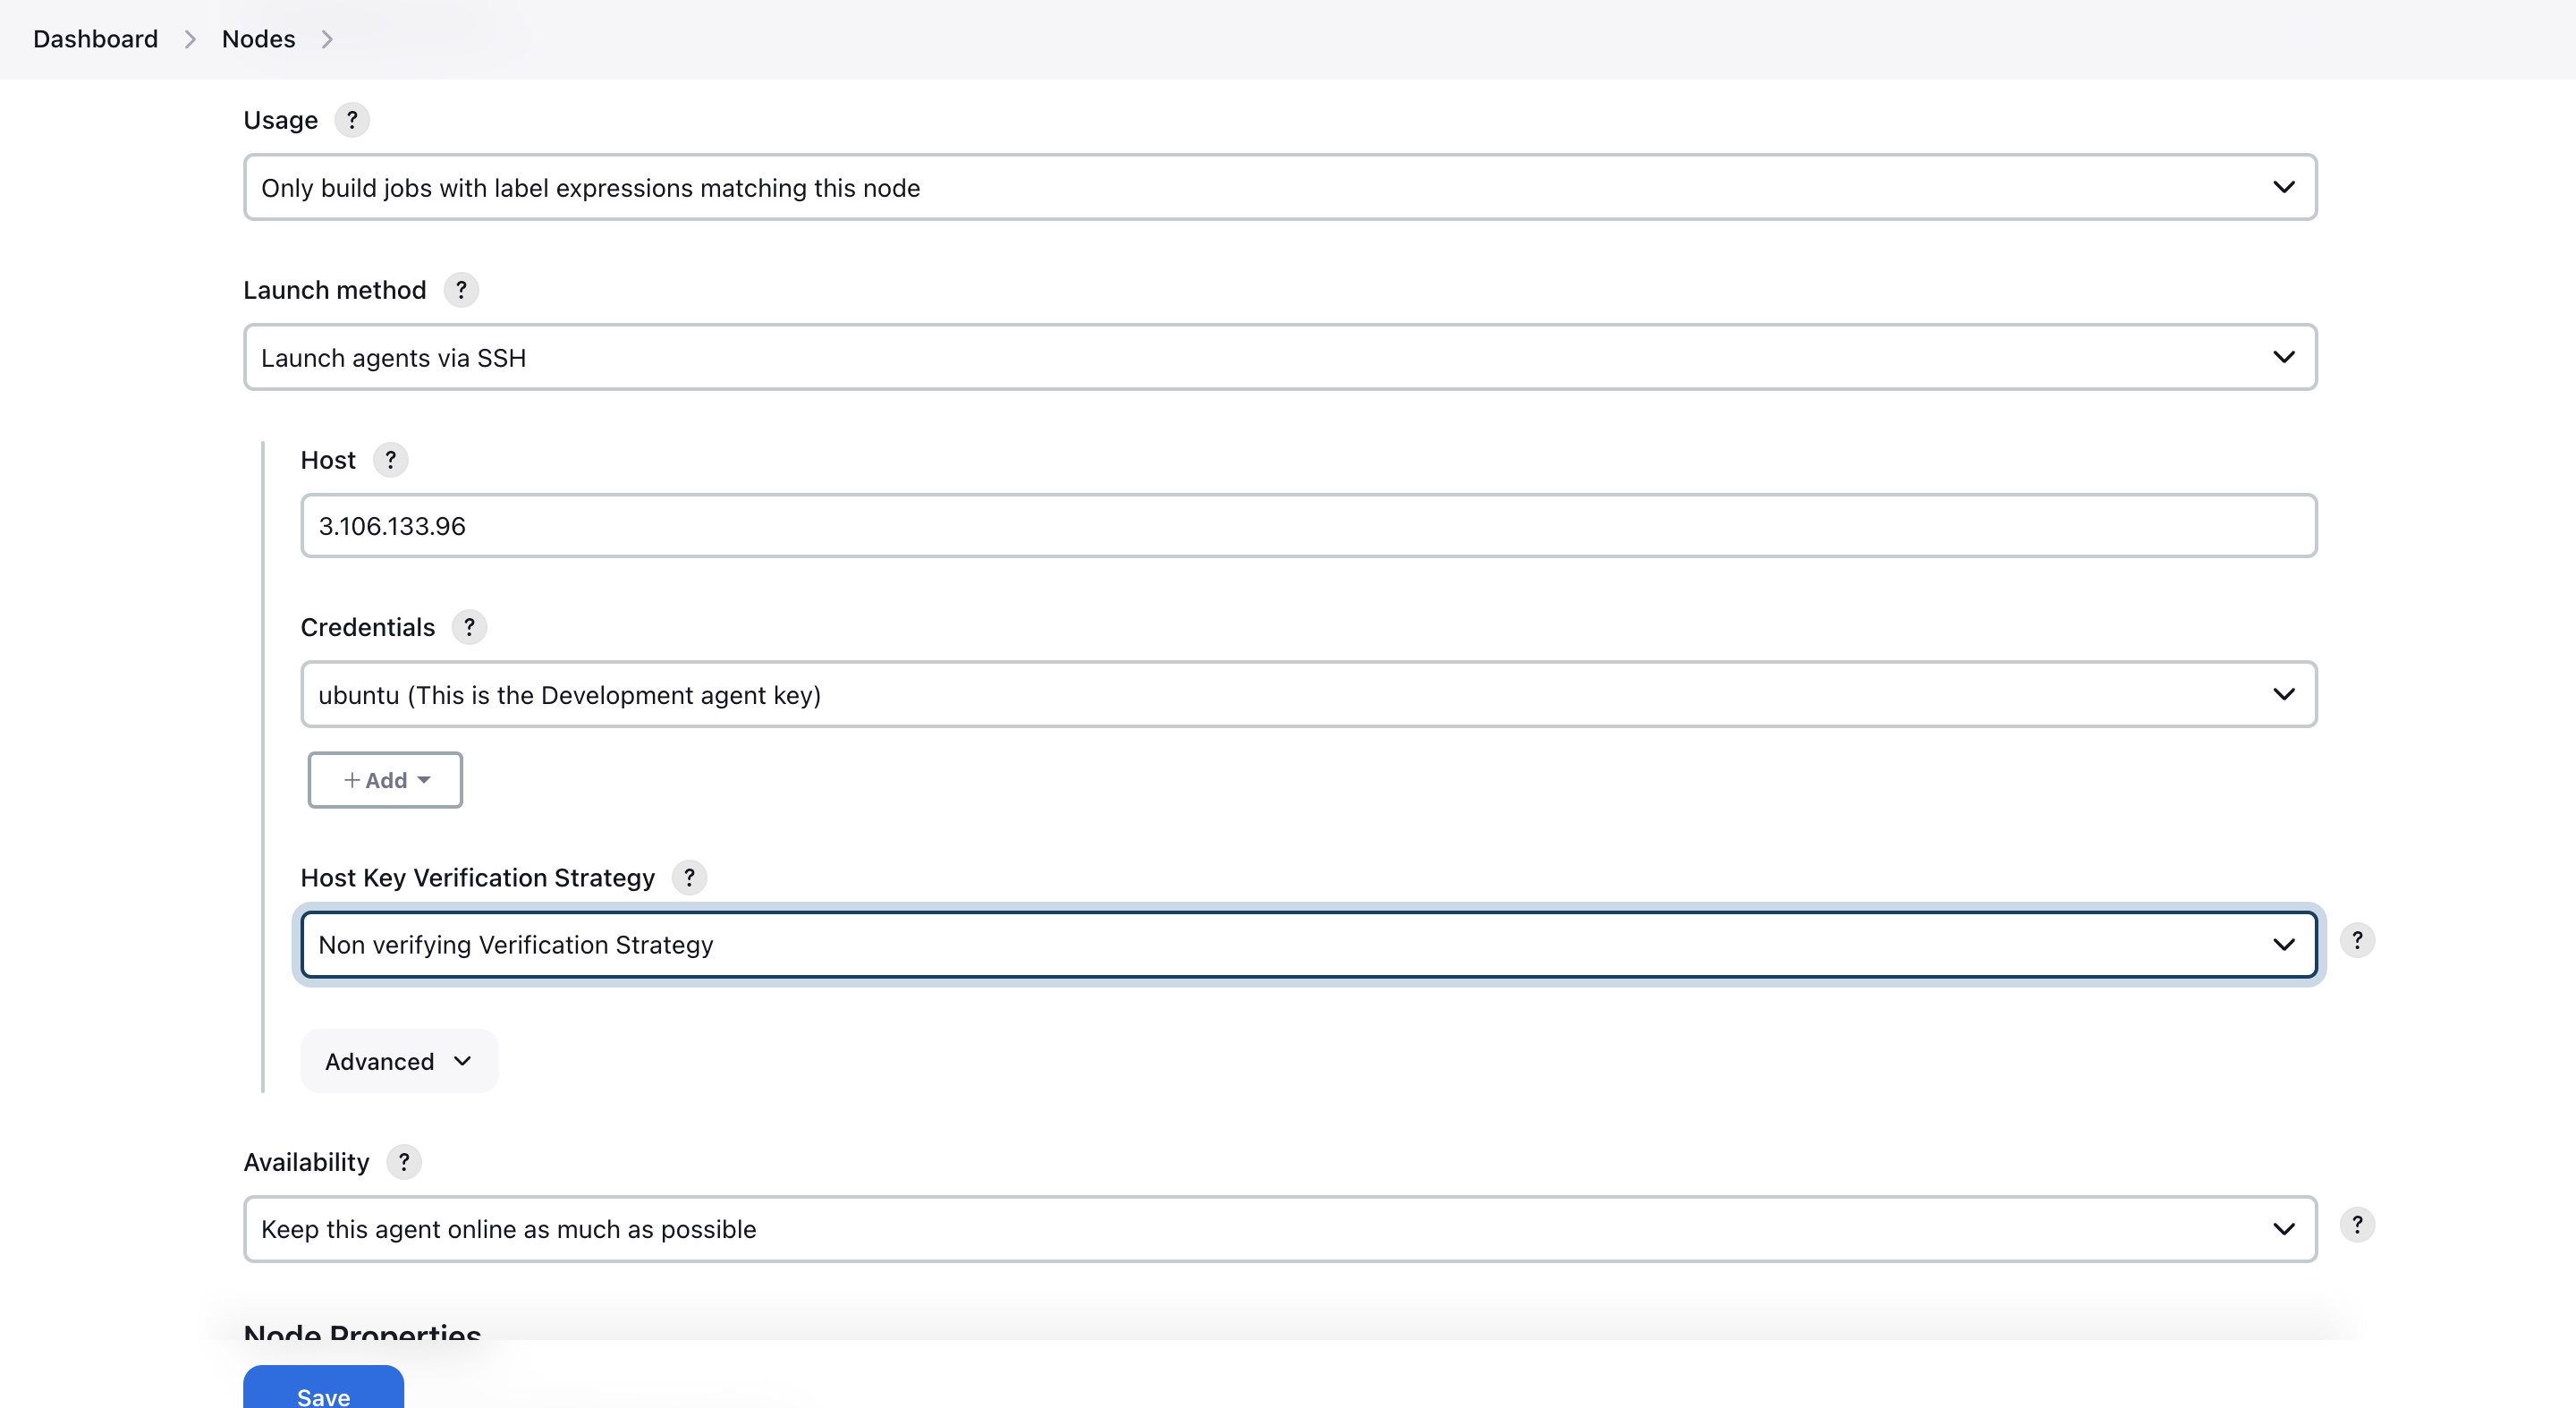
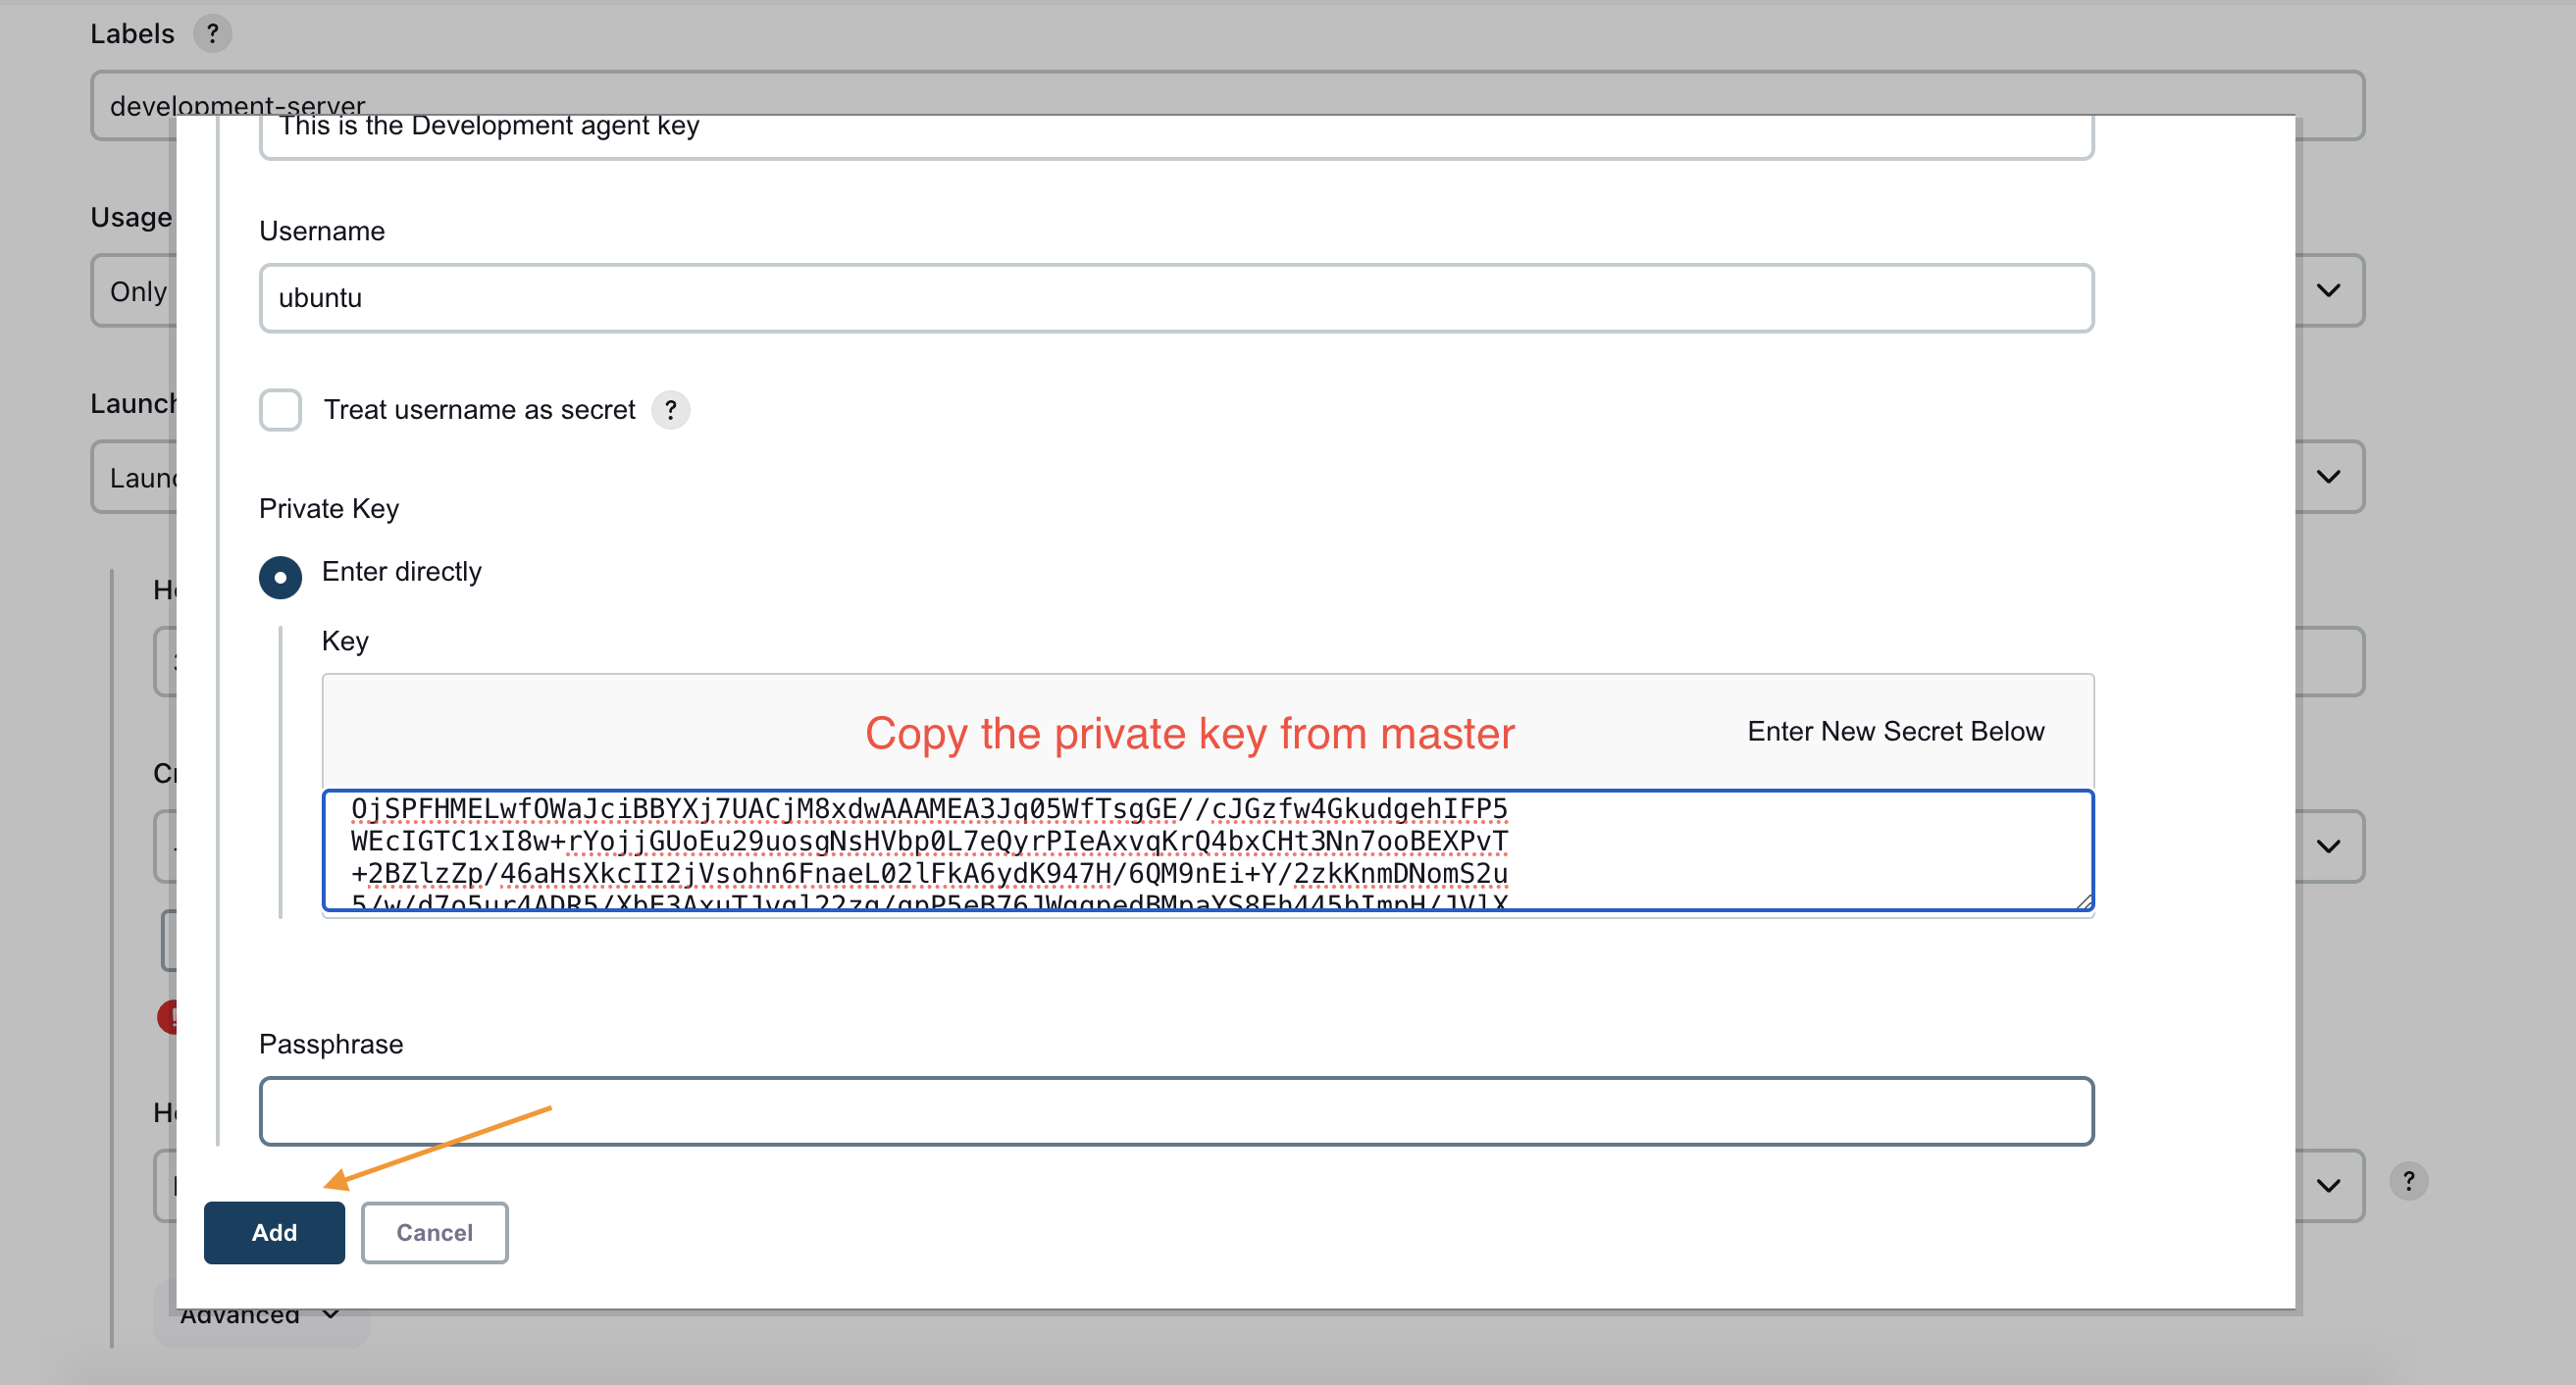
Add credentials by entering the private key from the Master node.
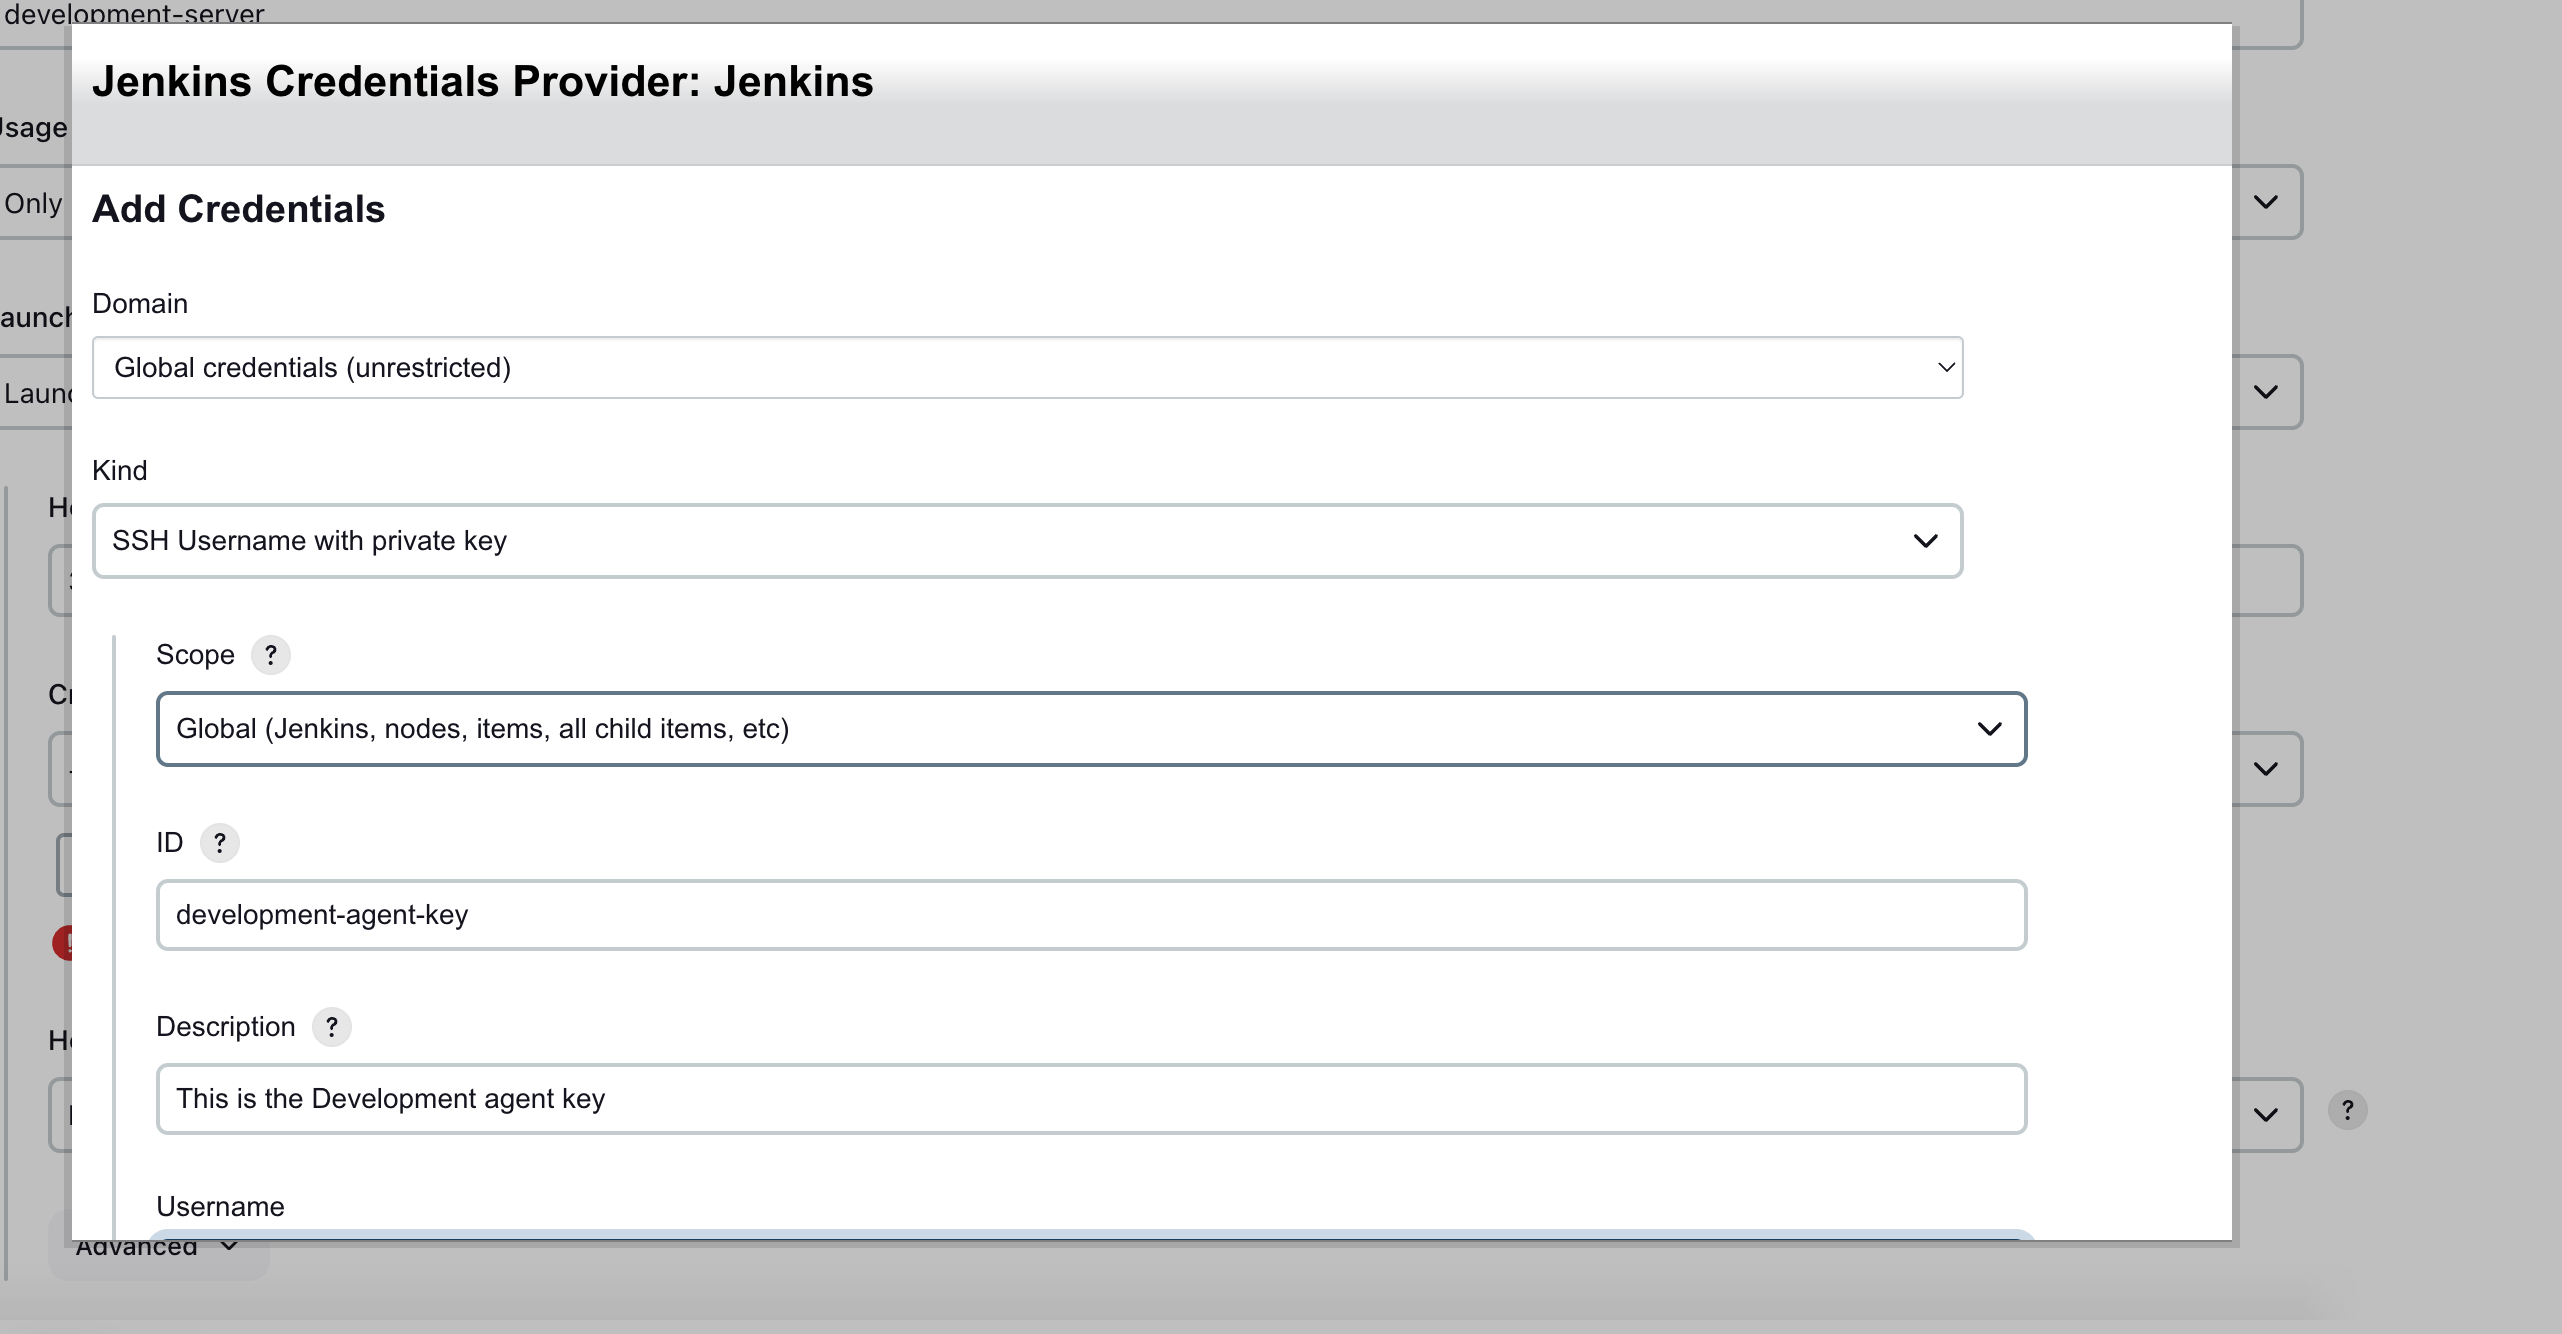
To get the private key you need to navigtate to .ssh/id_rsa
cd .ssh
cat id_rsa

Your Node is configured let's check the connectivity

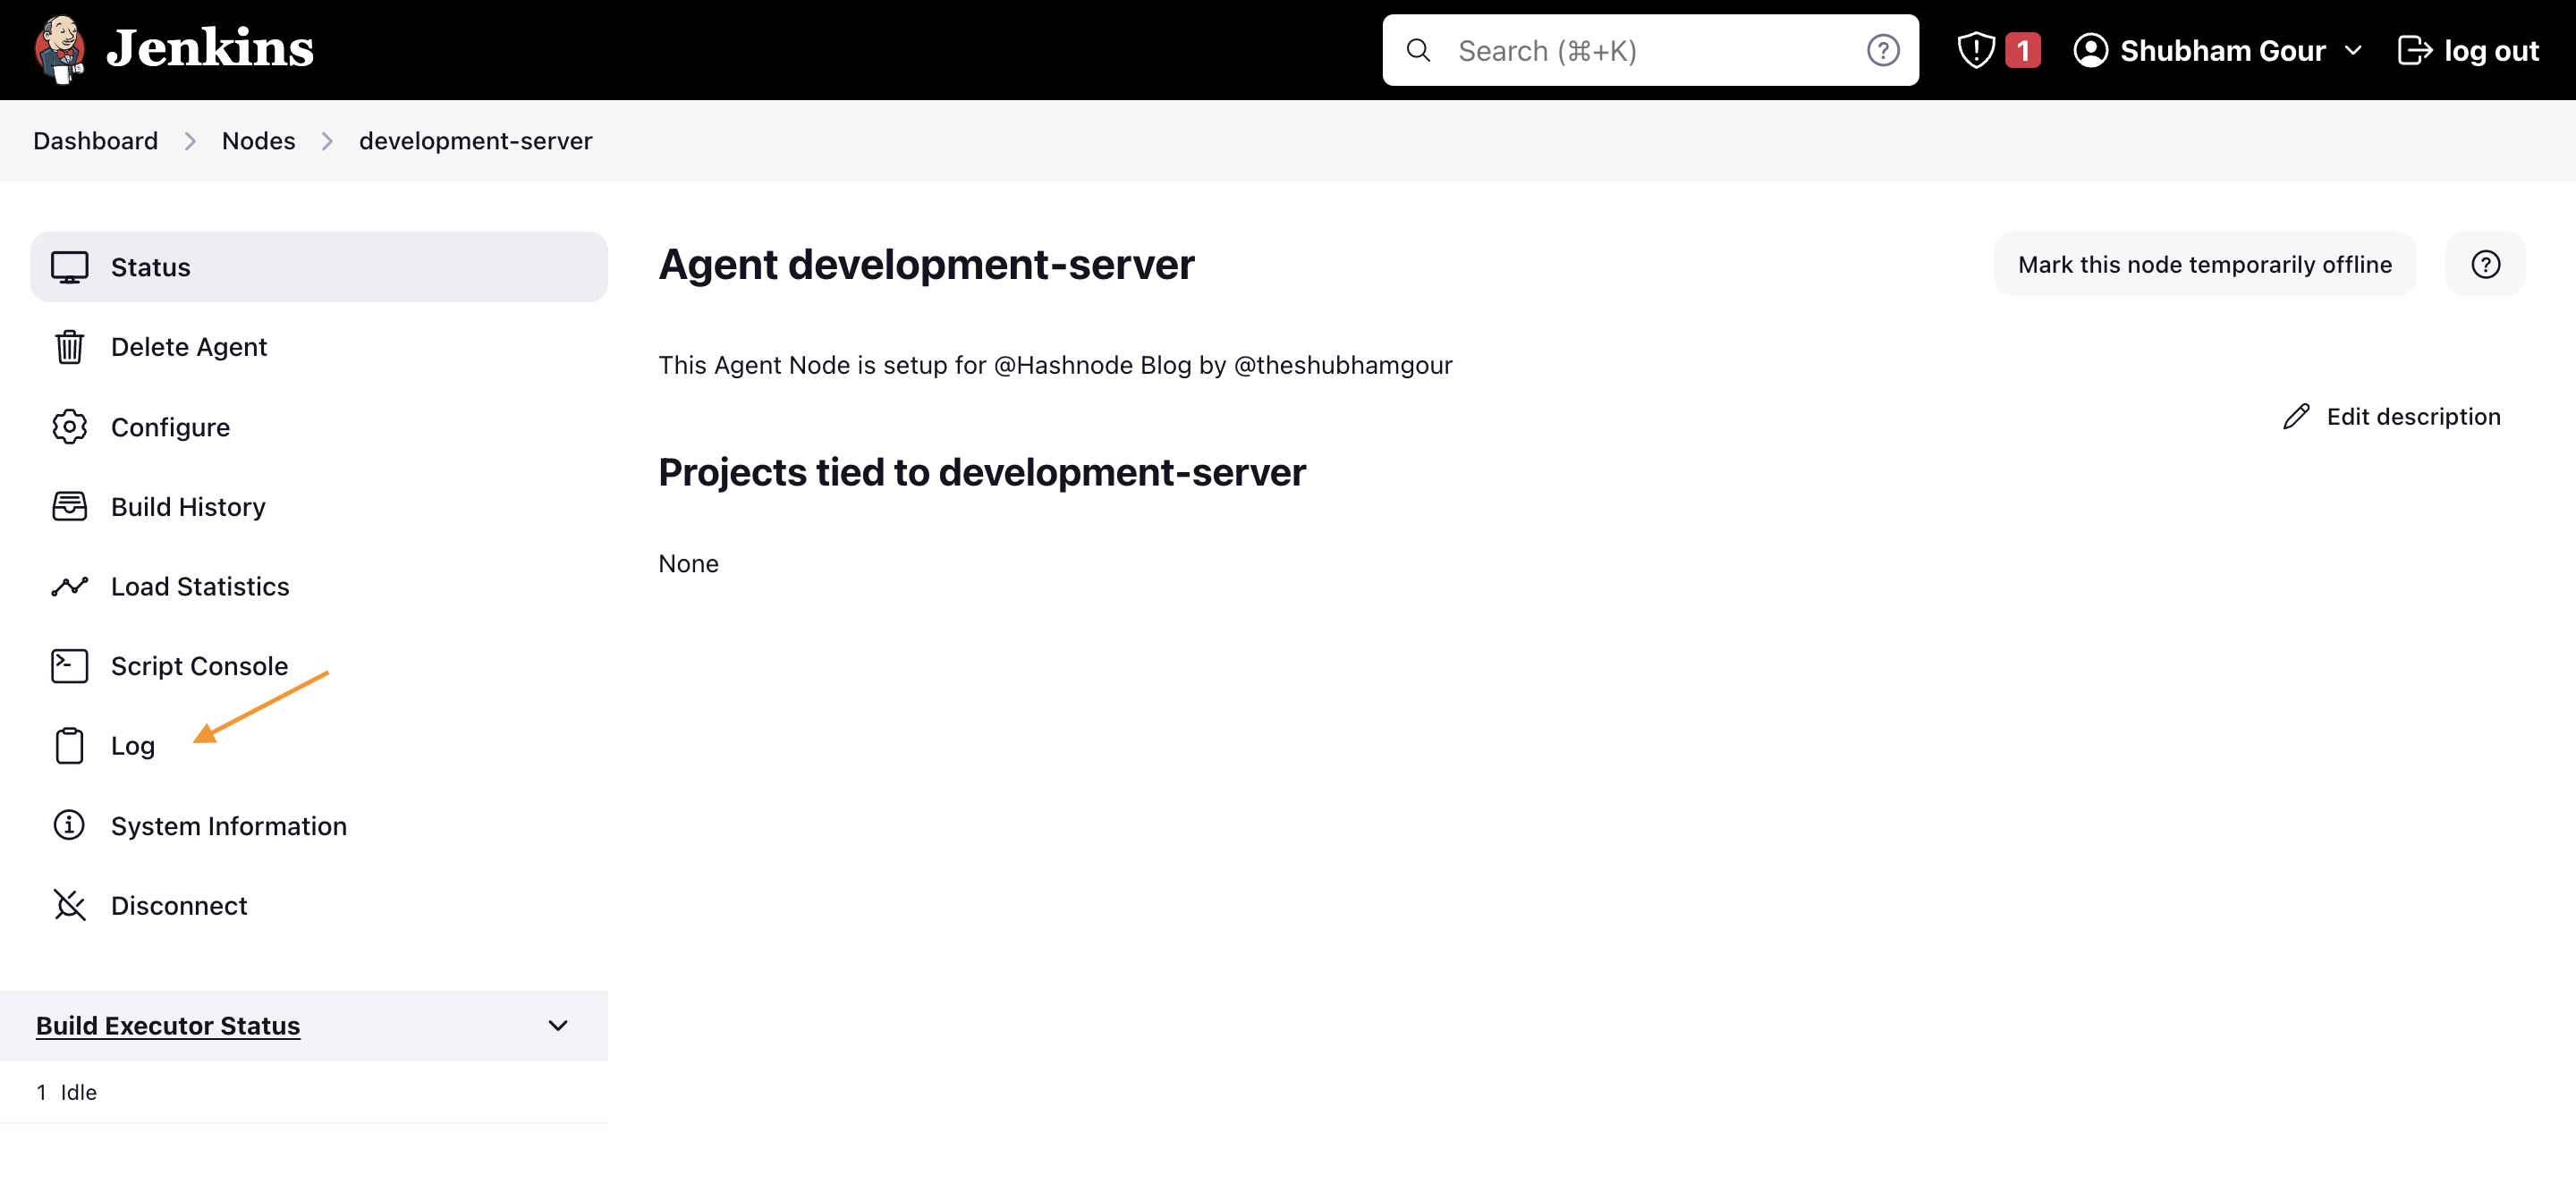
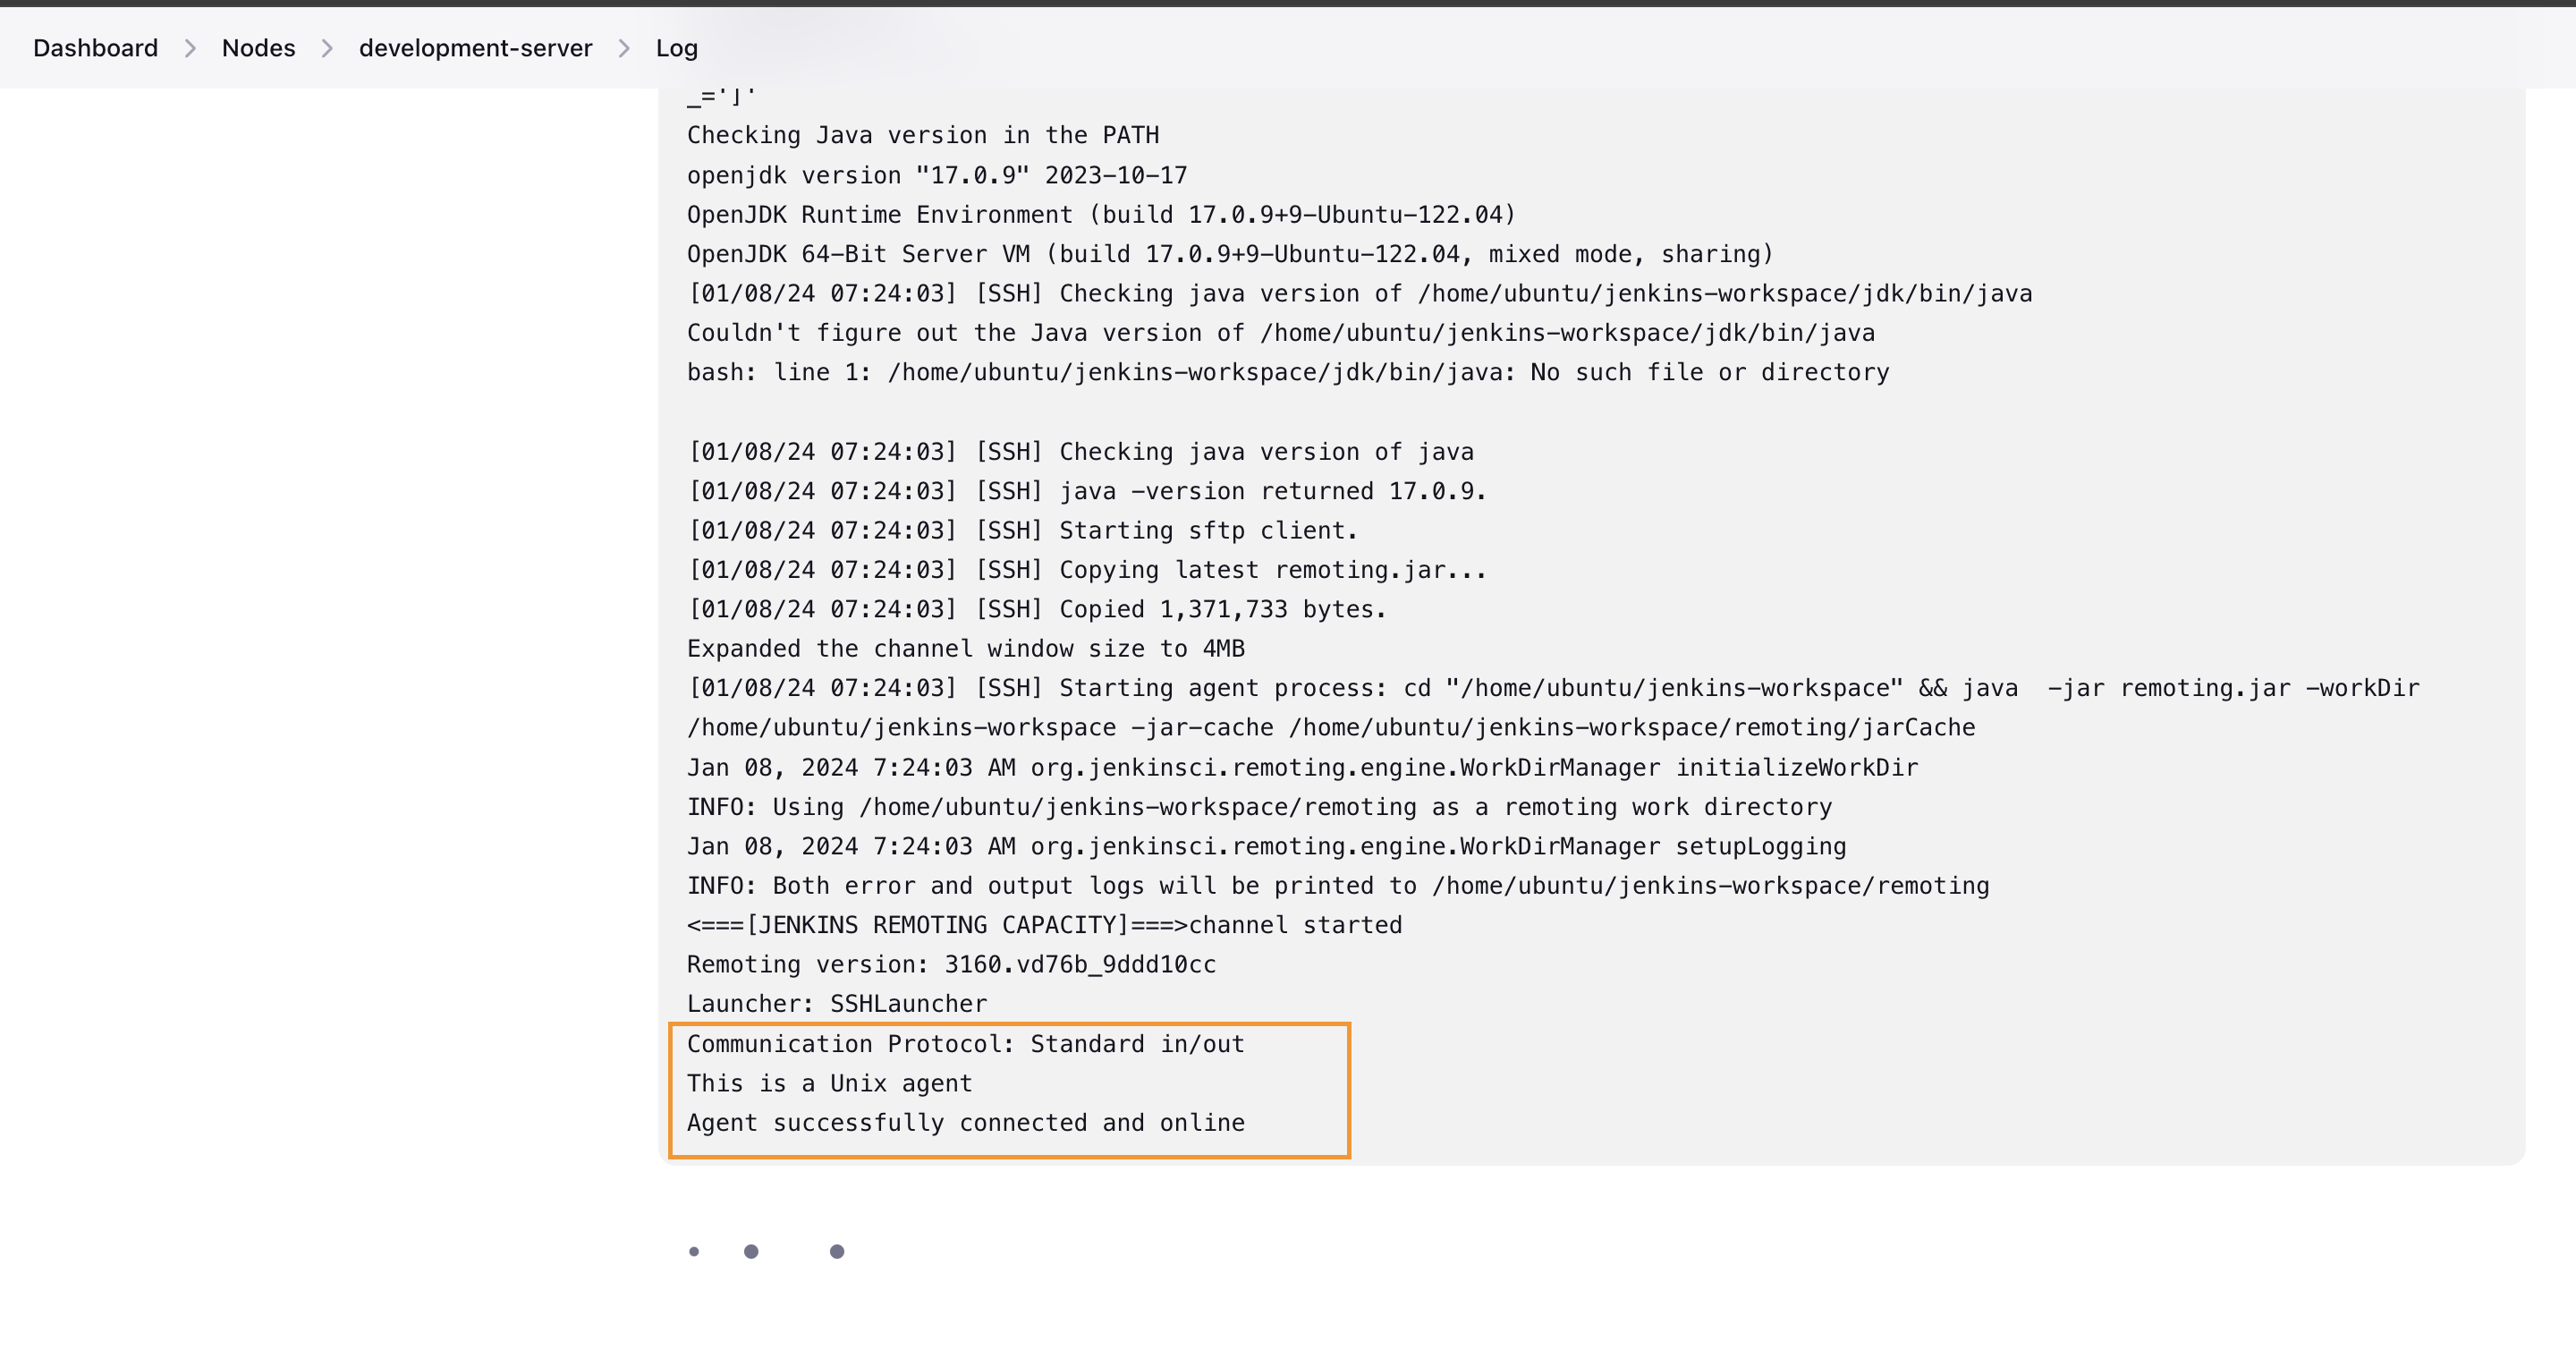
The above message indicates that the node is connected to the master and is ready for build execution
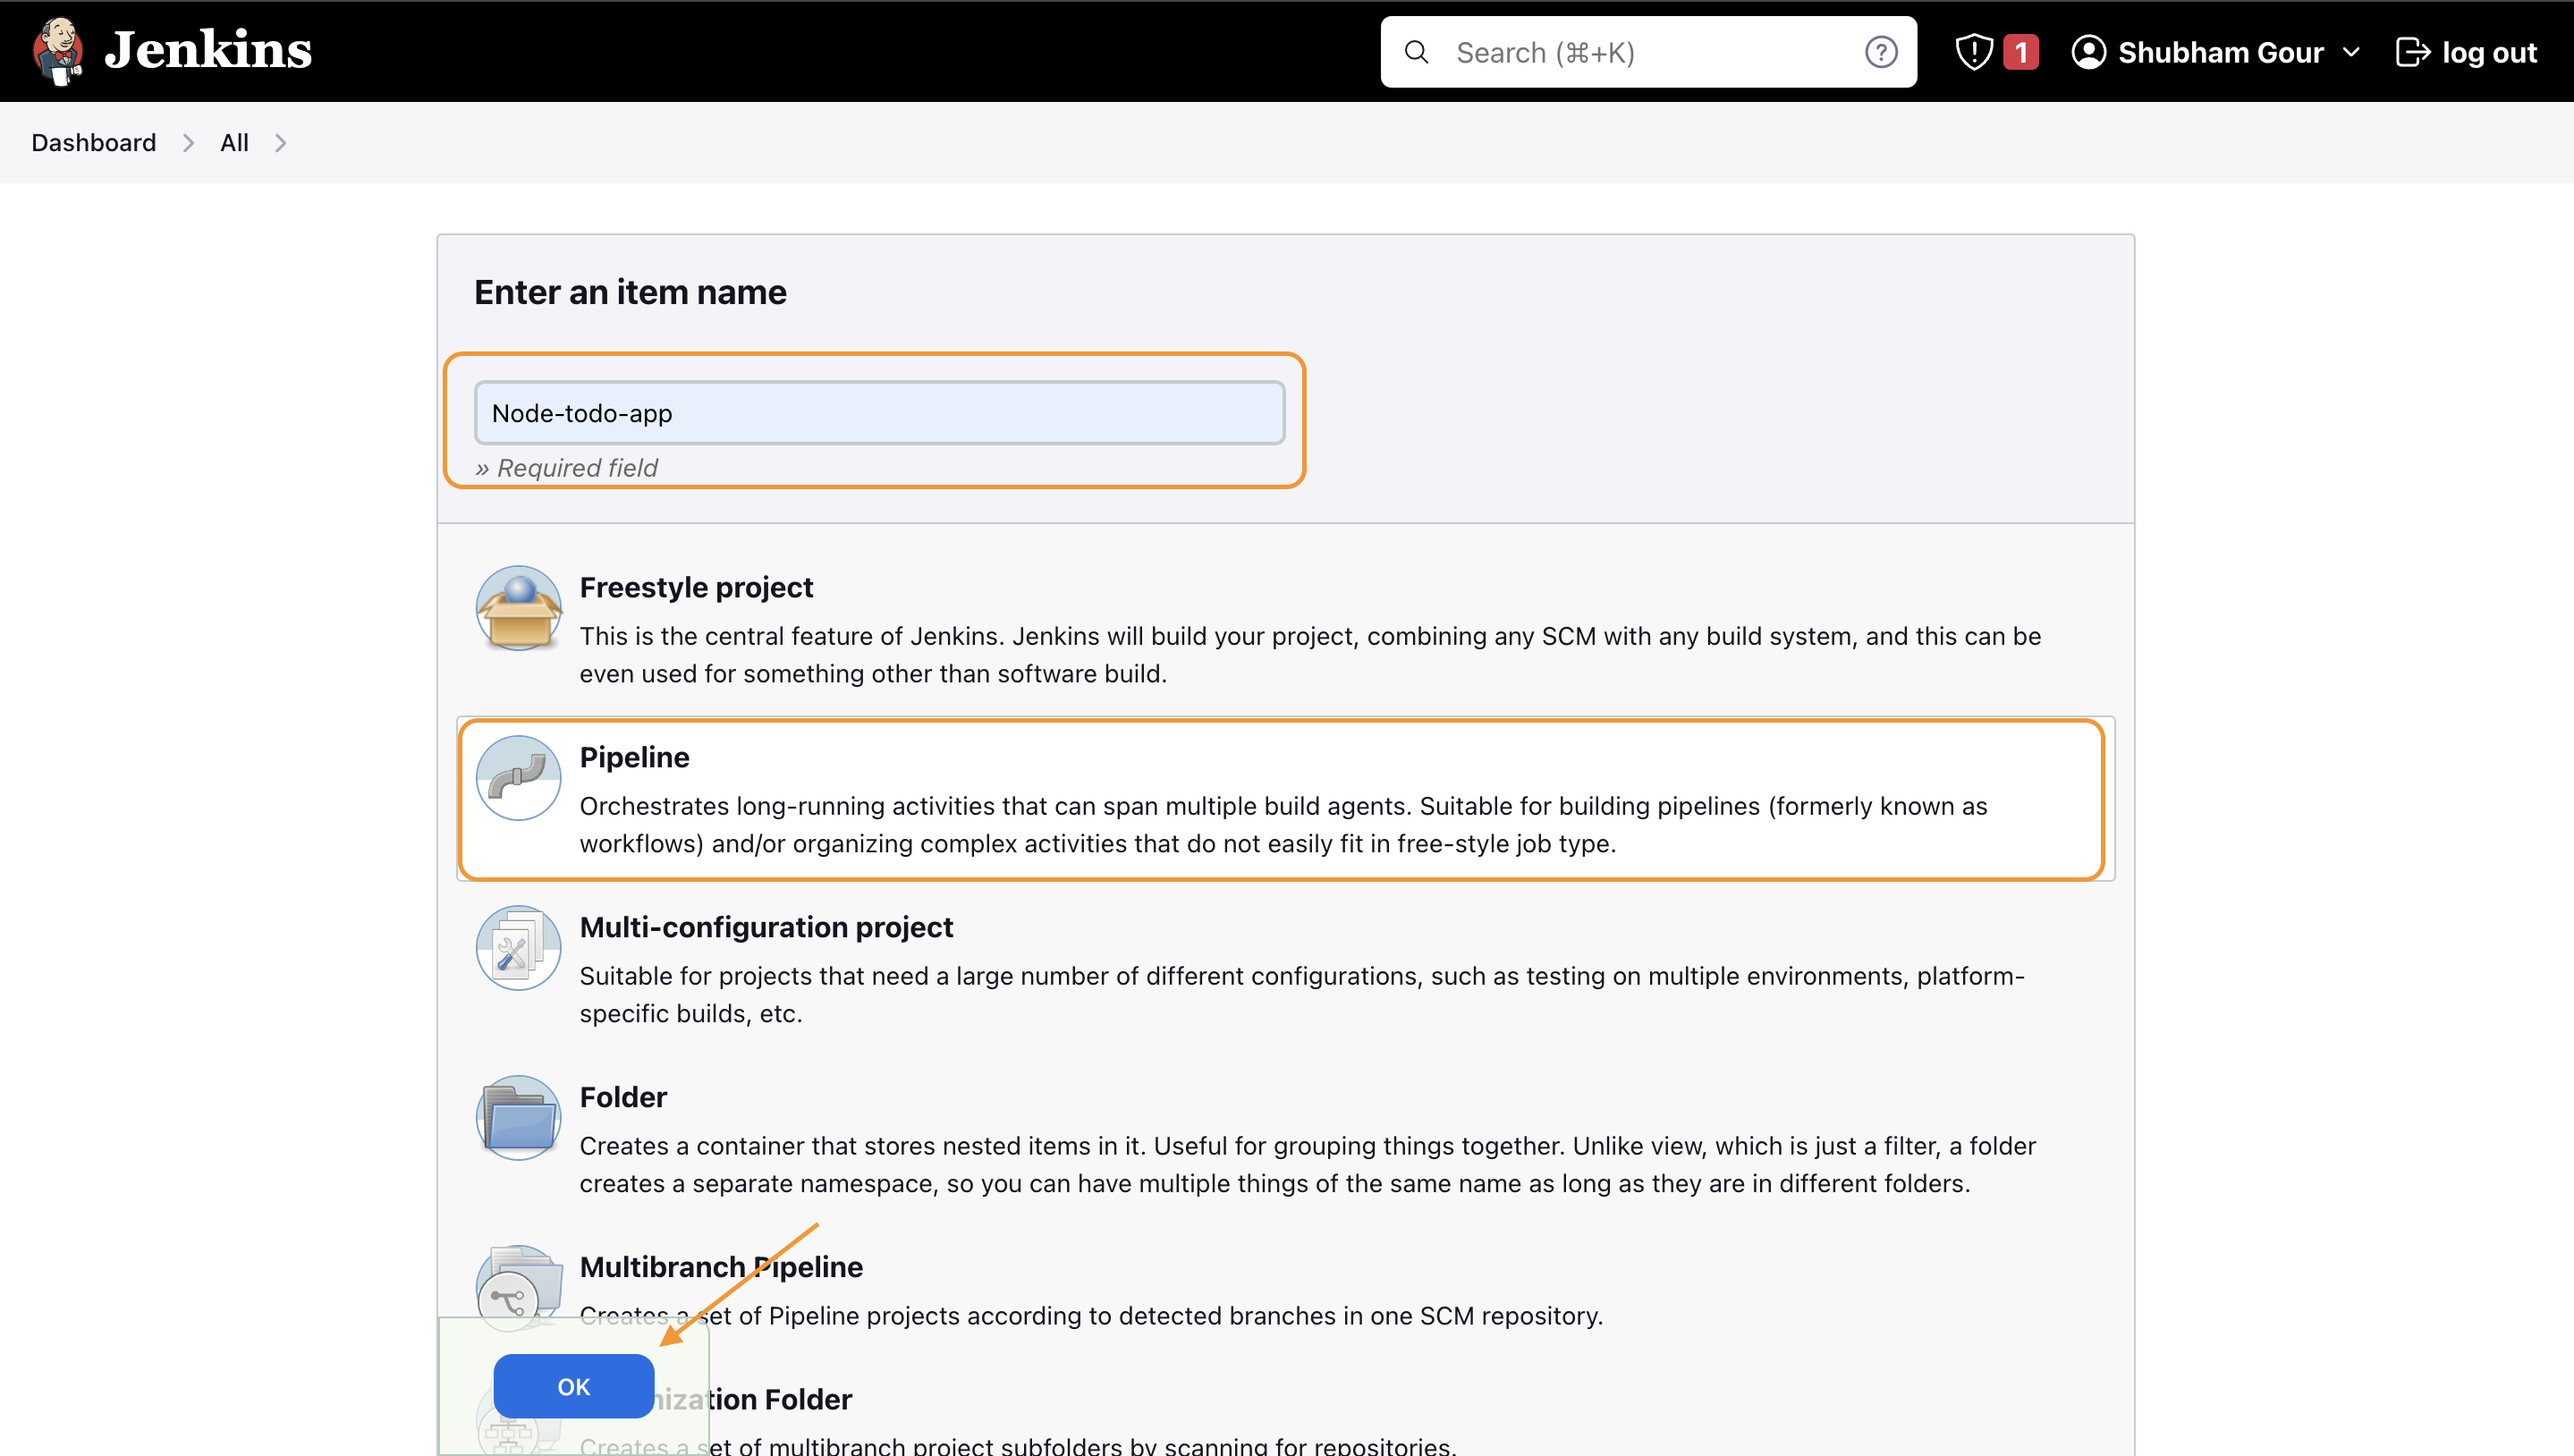
Creating a Jenkins Job with Node Configuration:
- Create a new Jenkins freestyle project (e.g., "Node-todo-cicd").
Enter the details in the pipeline by choosing pipeline script from SCM as we will use the jenkins file from our central repo and we are using development branch as this is for the development environment
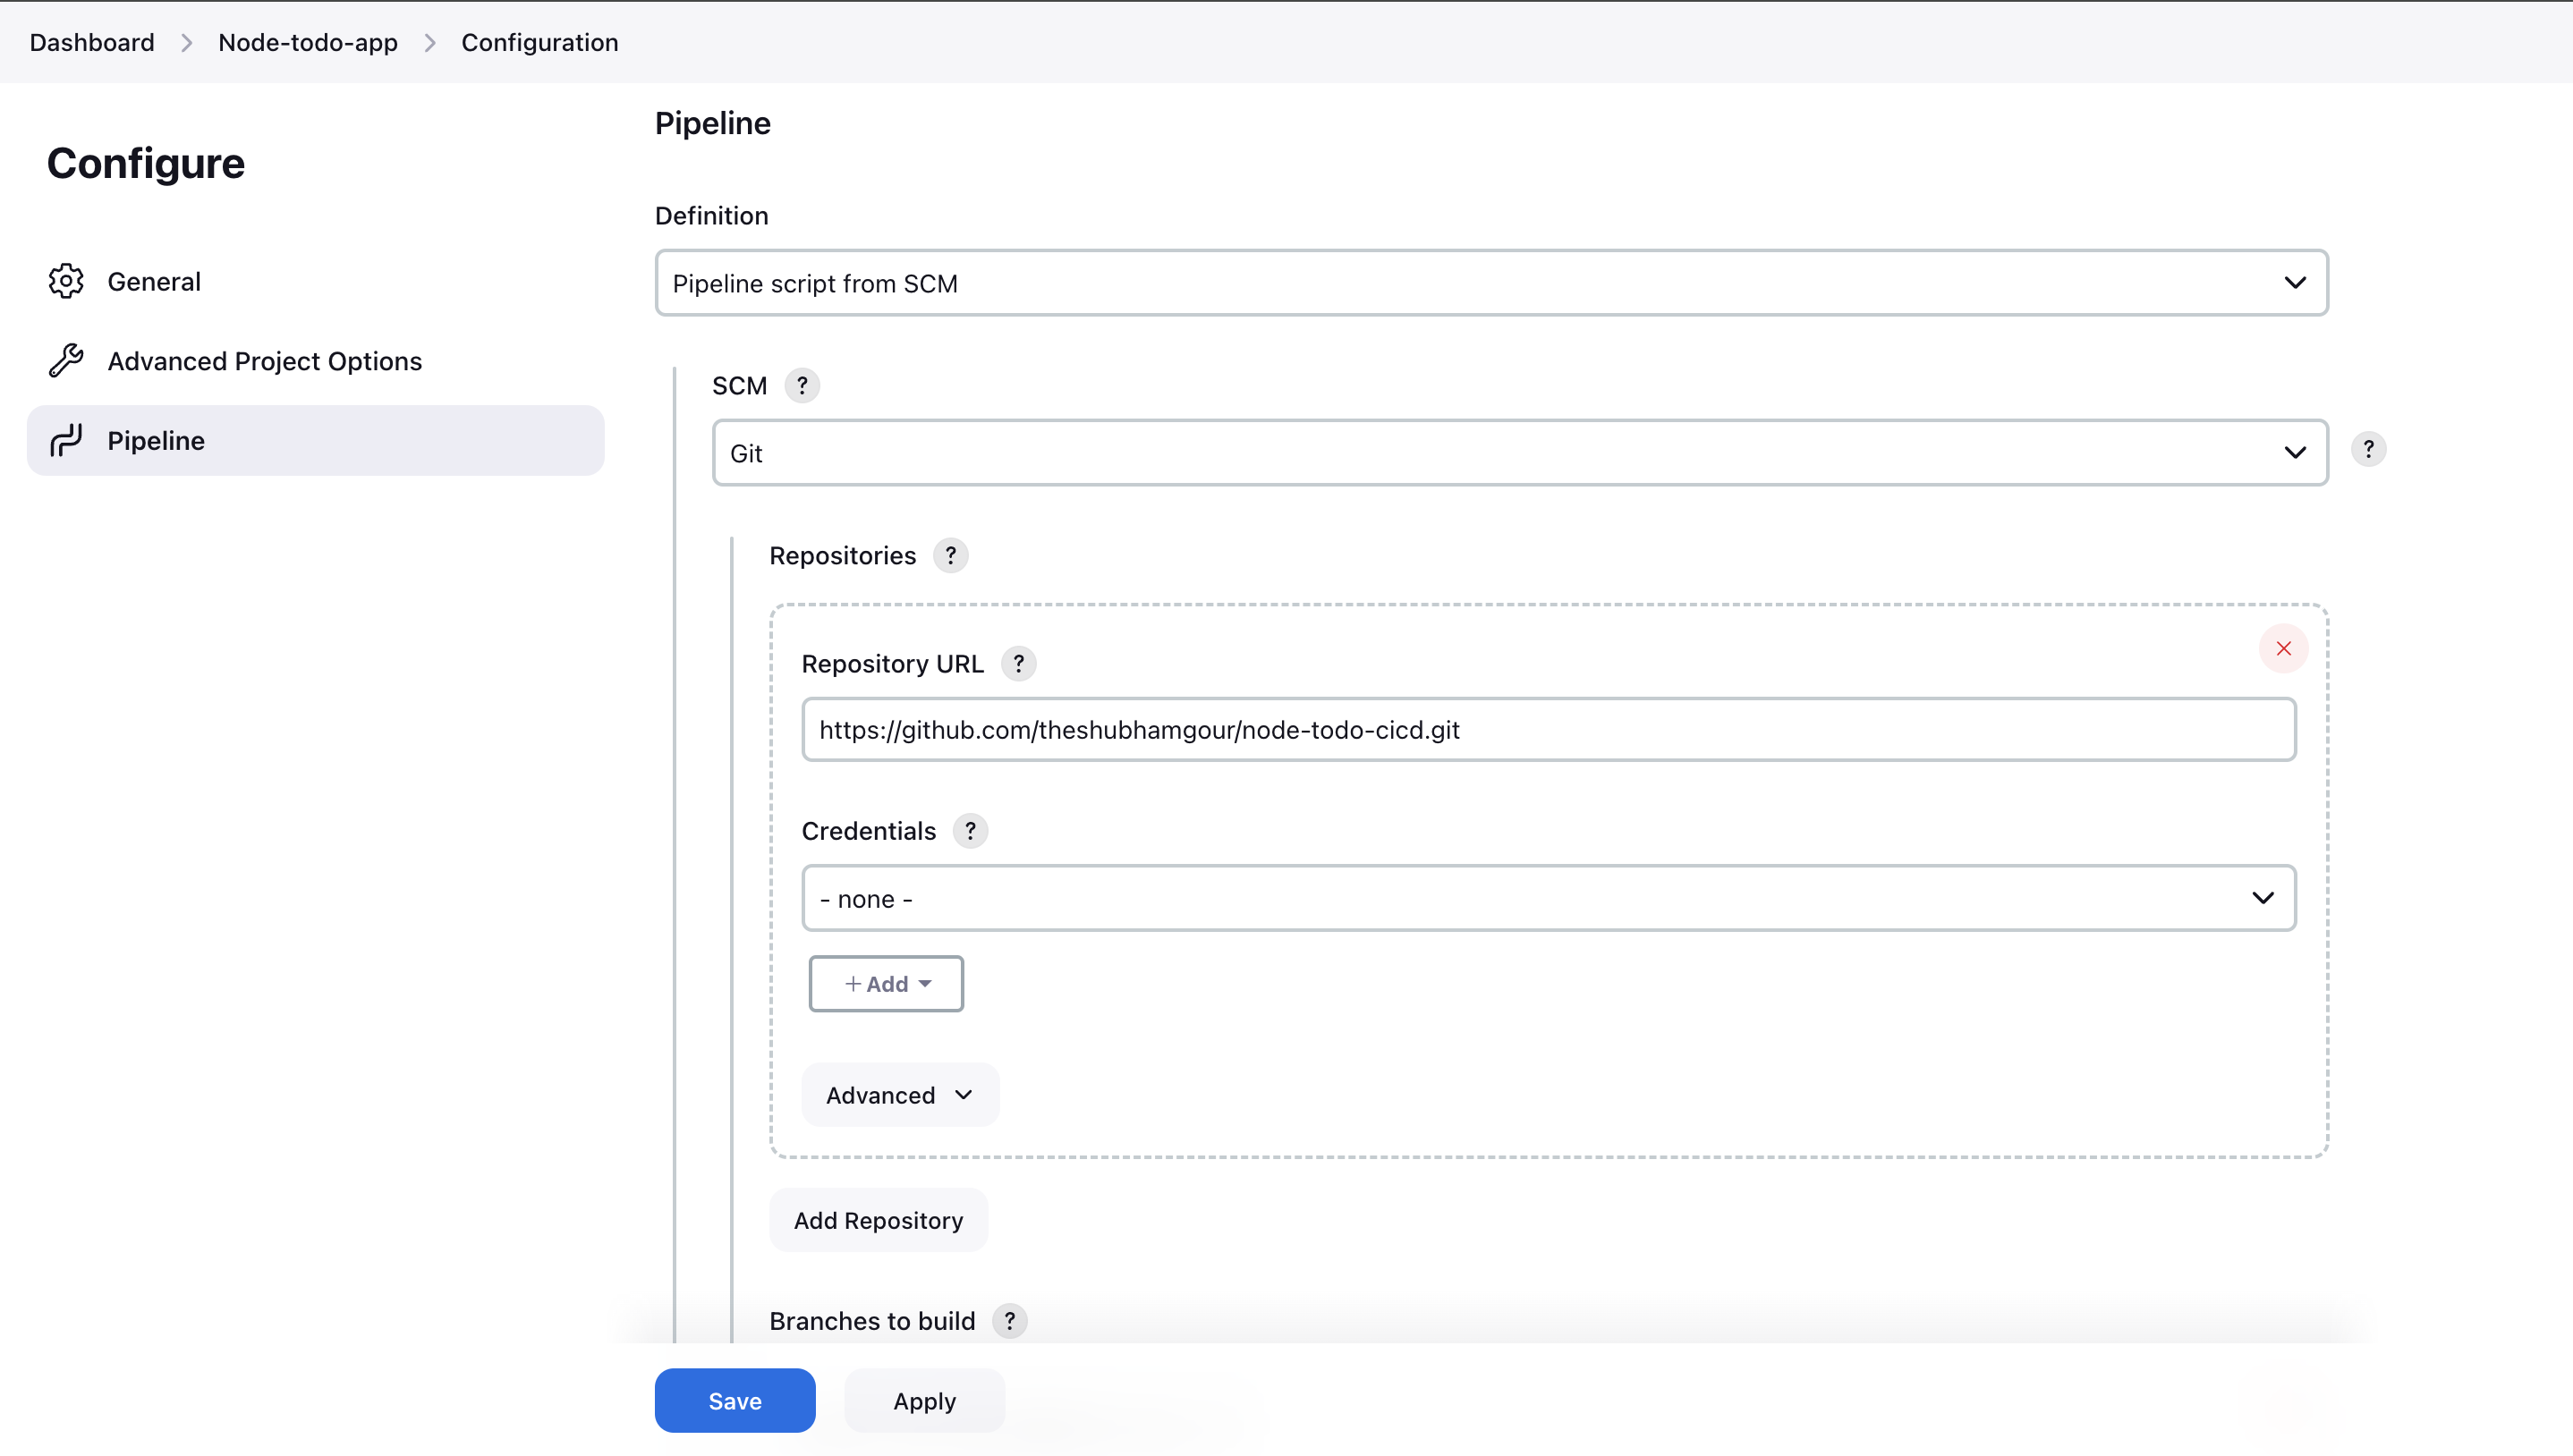
In order to run it on the node we will need to setup the agent to development-server which is the name we have given earlier to our node


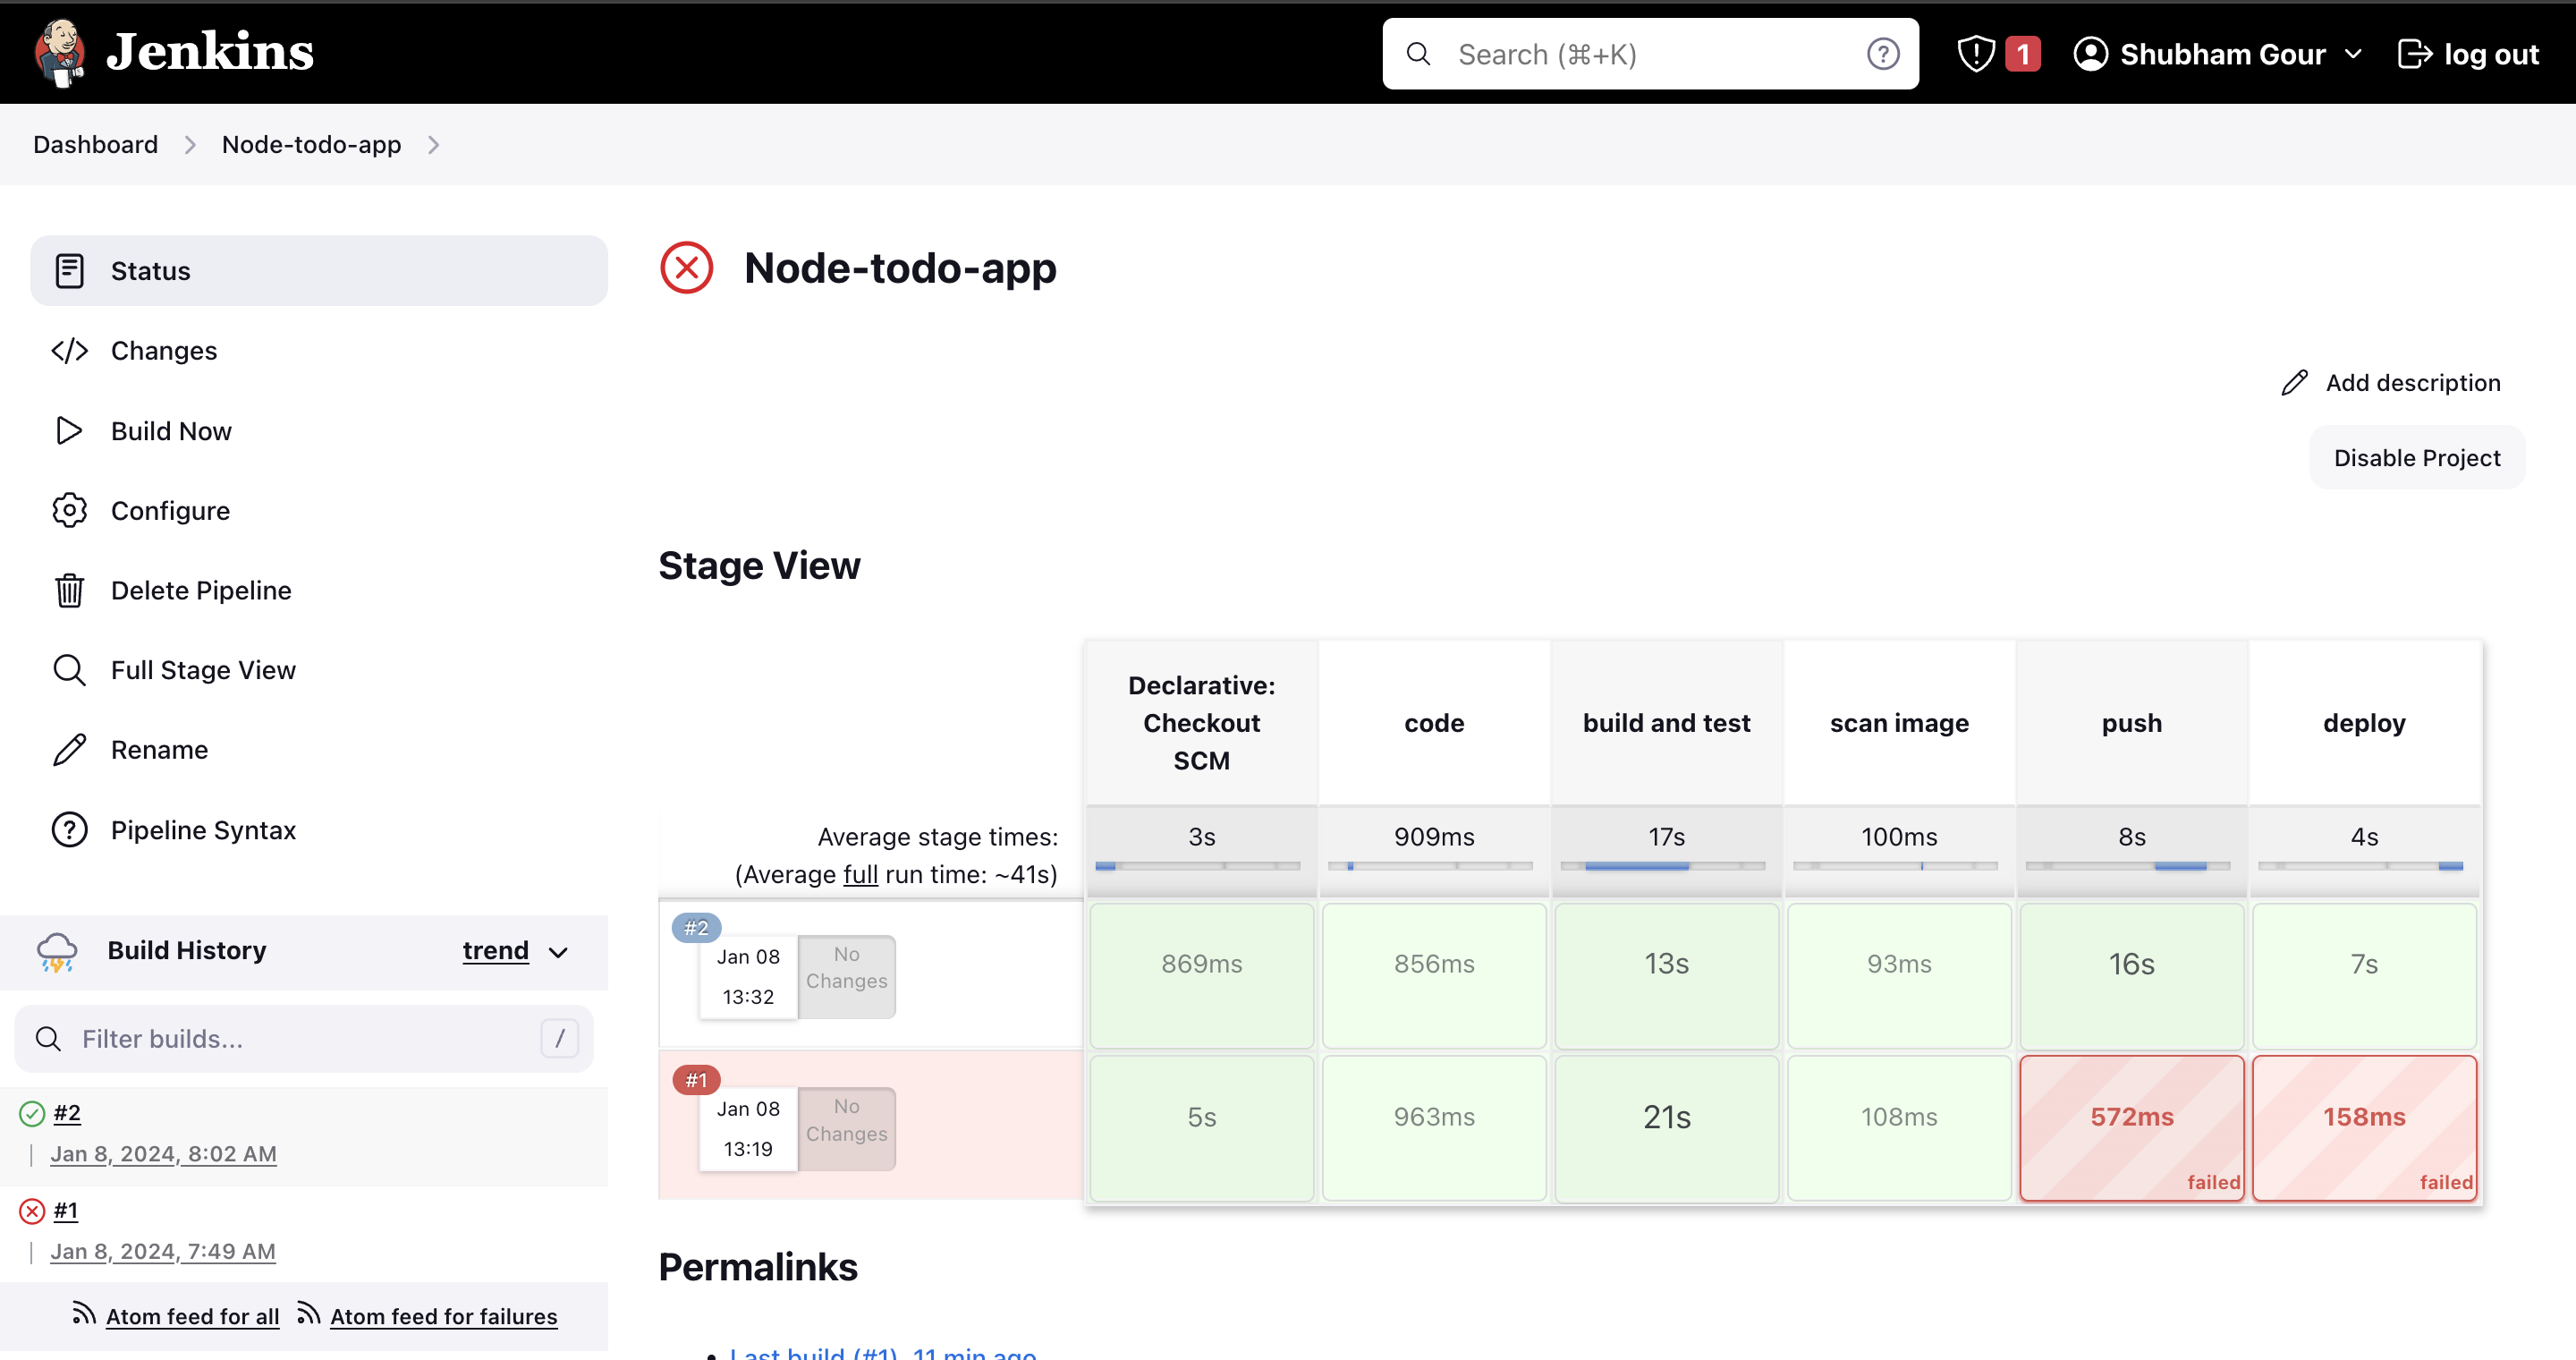
Once the above is configured we will now build the project
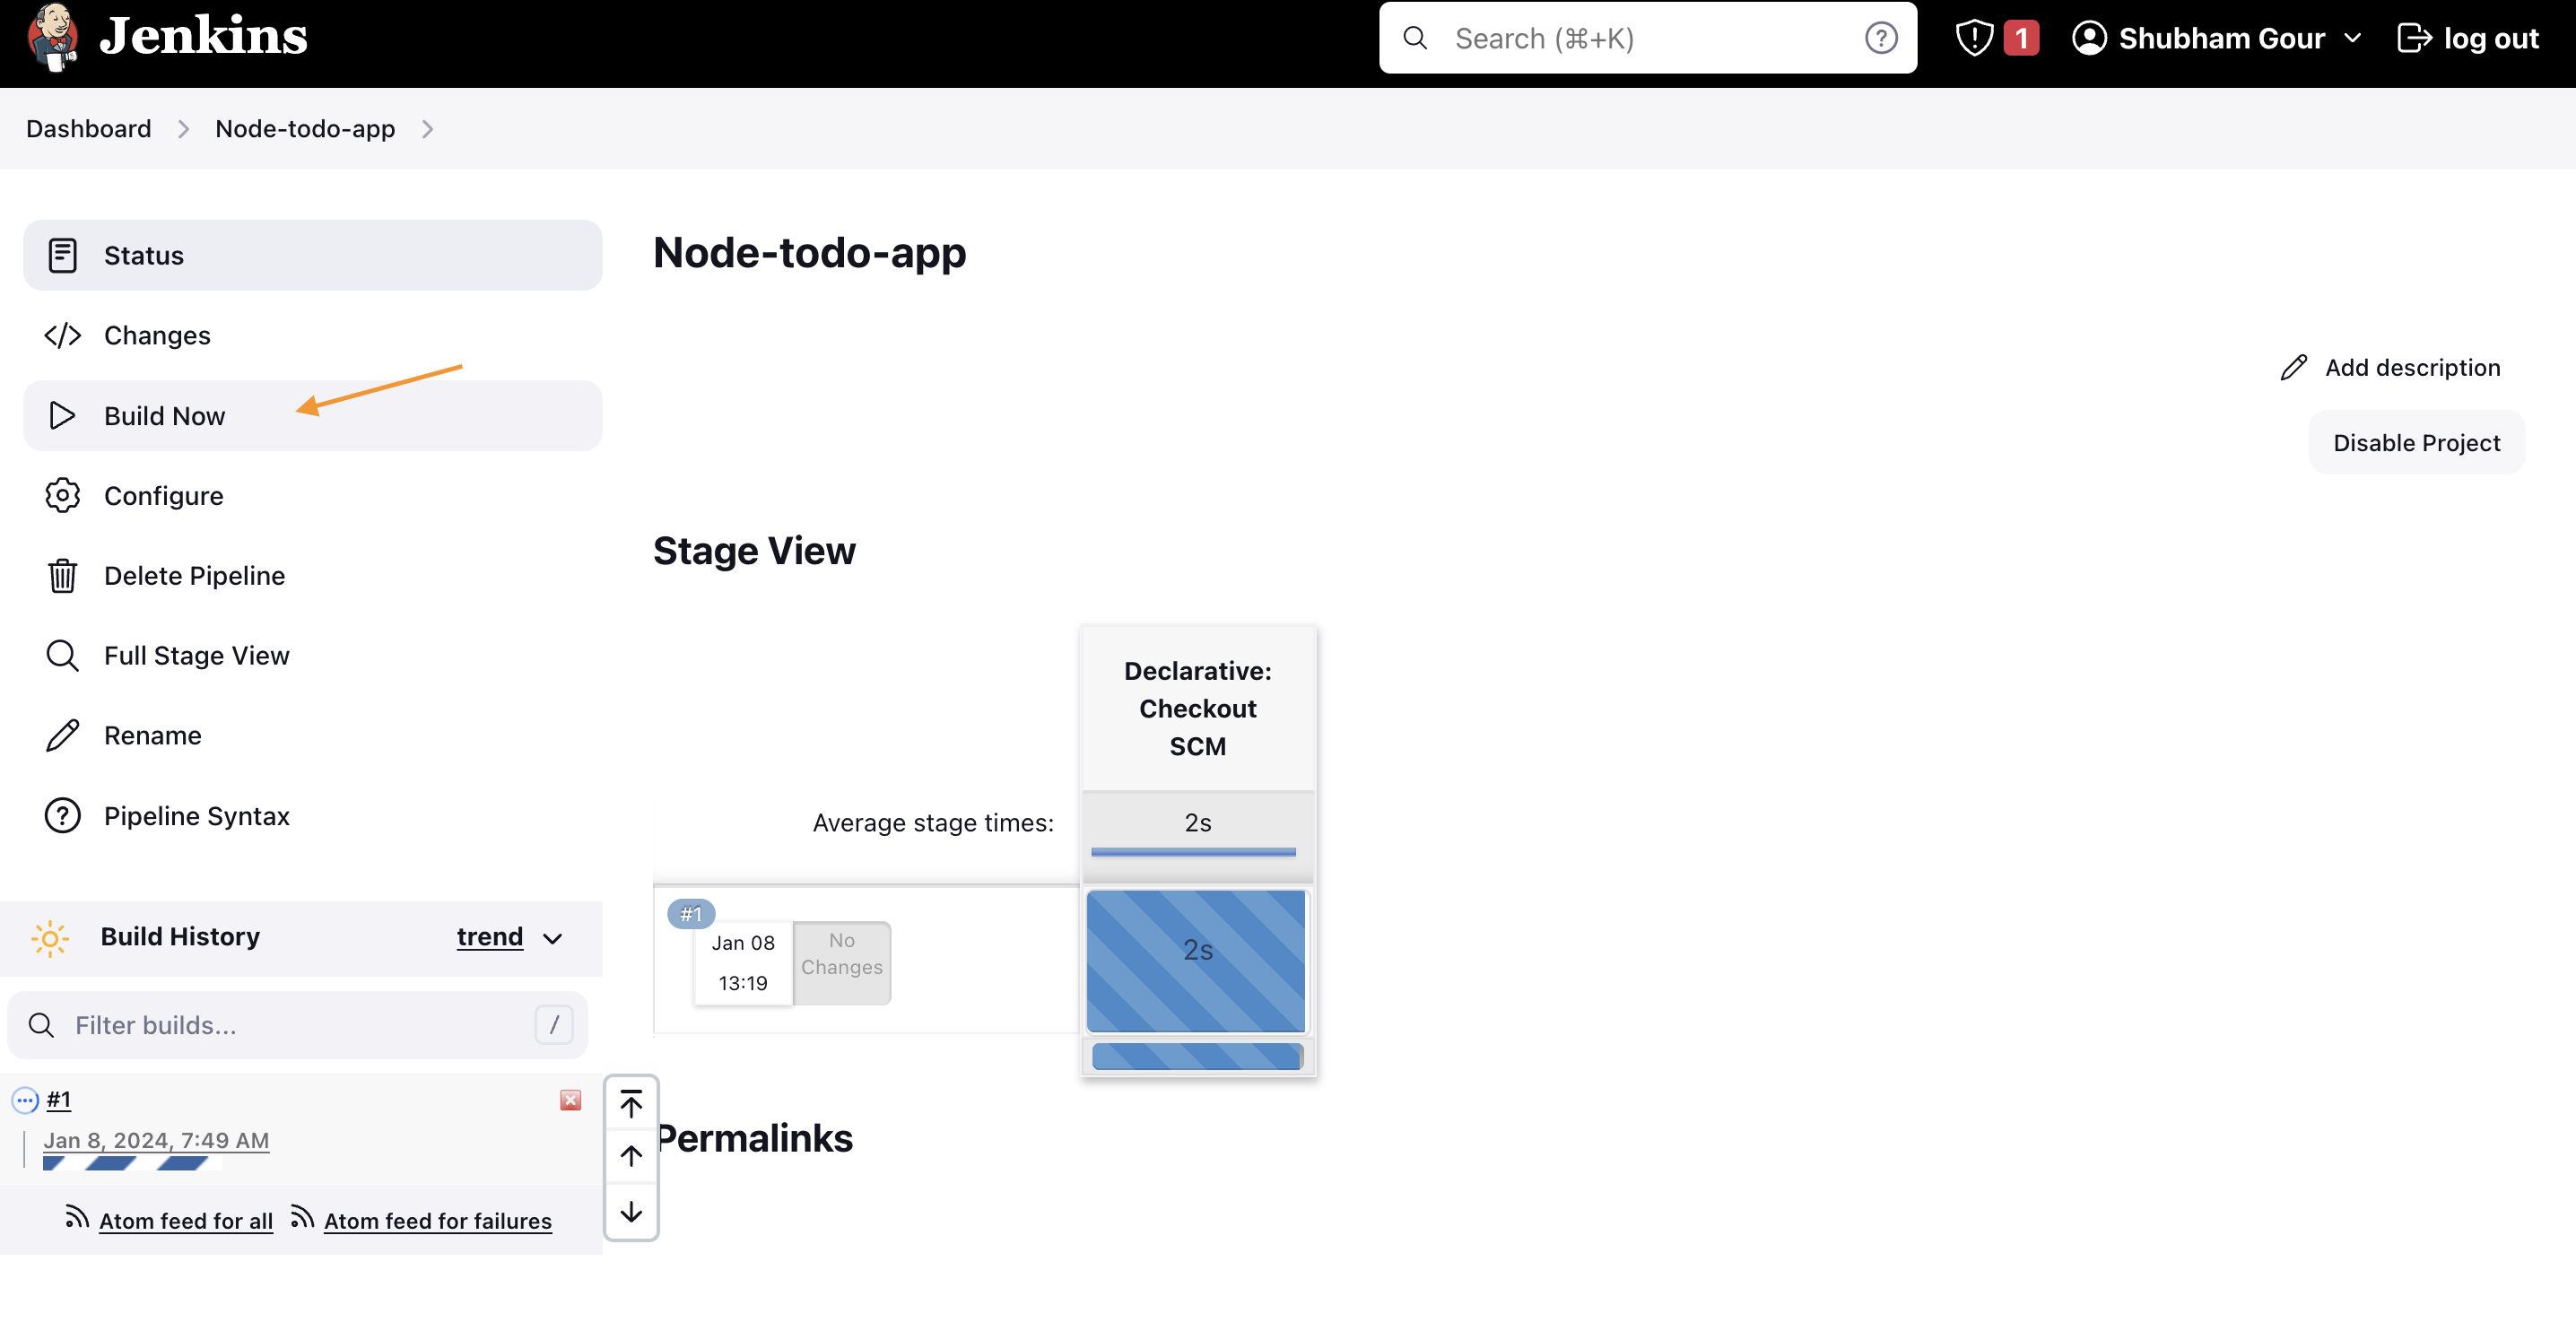
As expected the build failed it is because we haven't added the credentials of docker

This can be validated on the logs

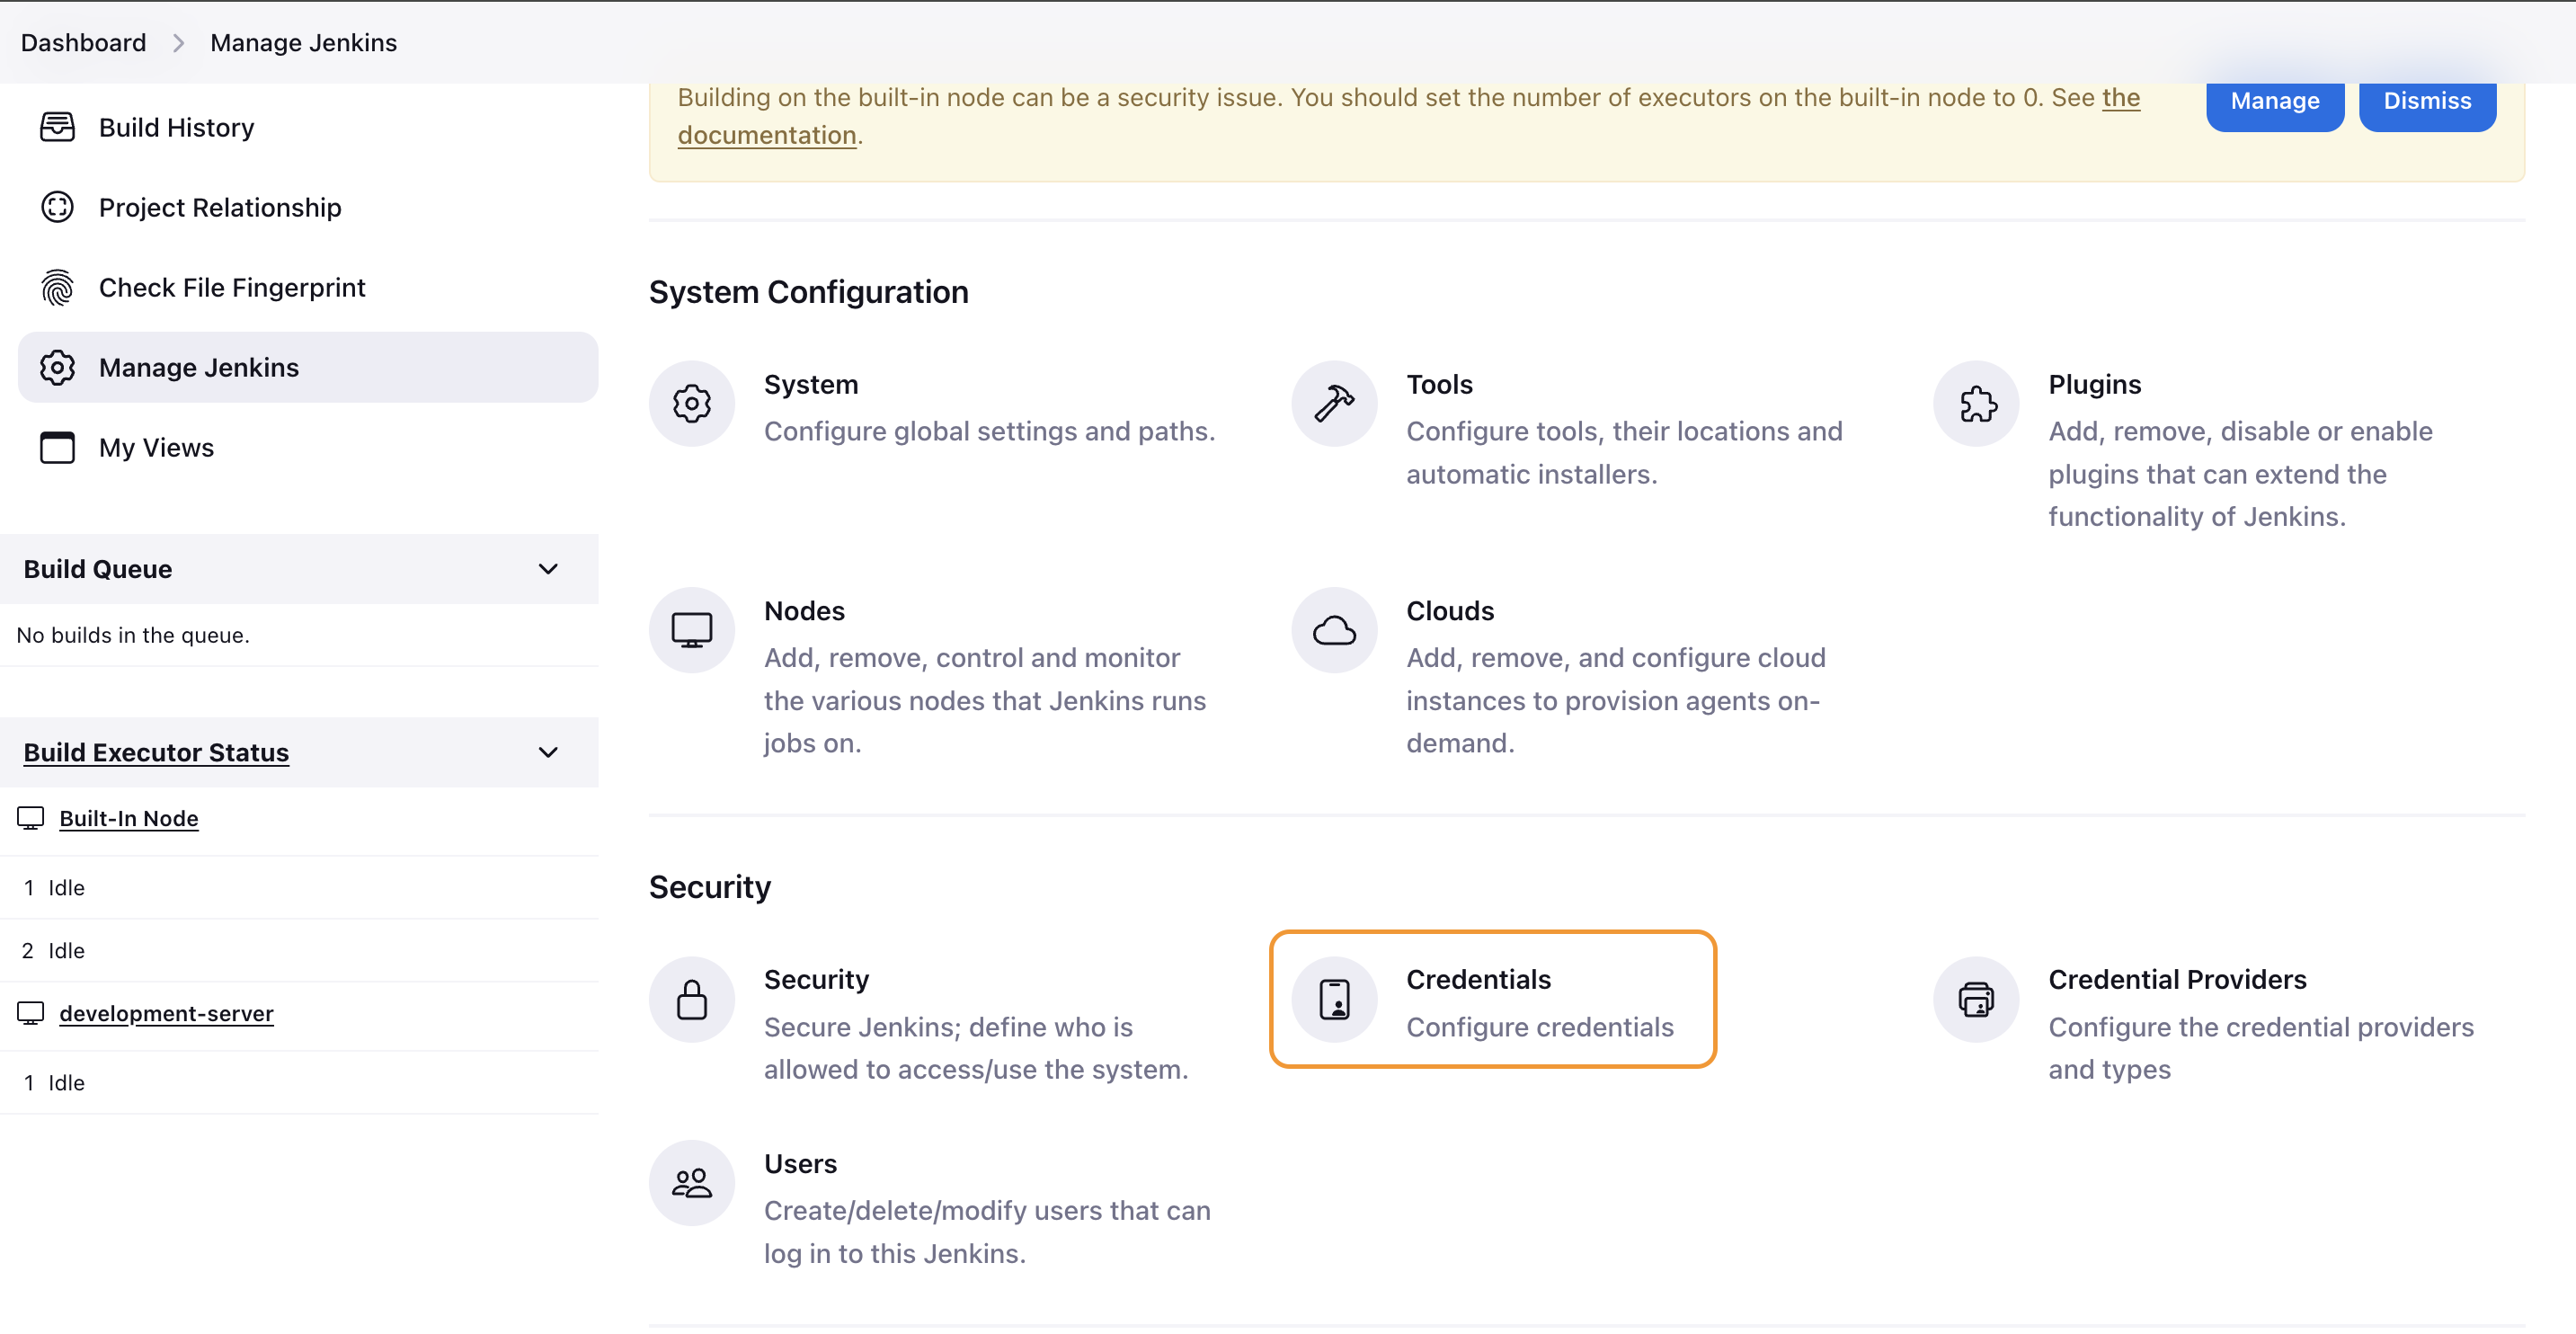
Navigate to "Manage Jenkins" > "Credentials."
Select global credentials and add Docker credentials.
Use the ID as the label, which will be referenced in the Jenkinsfile.

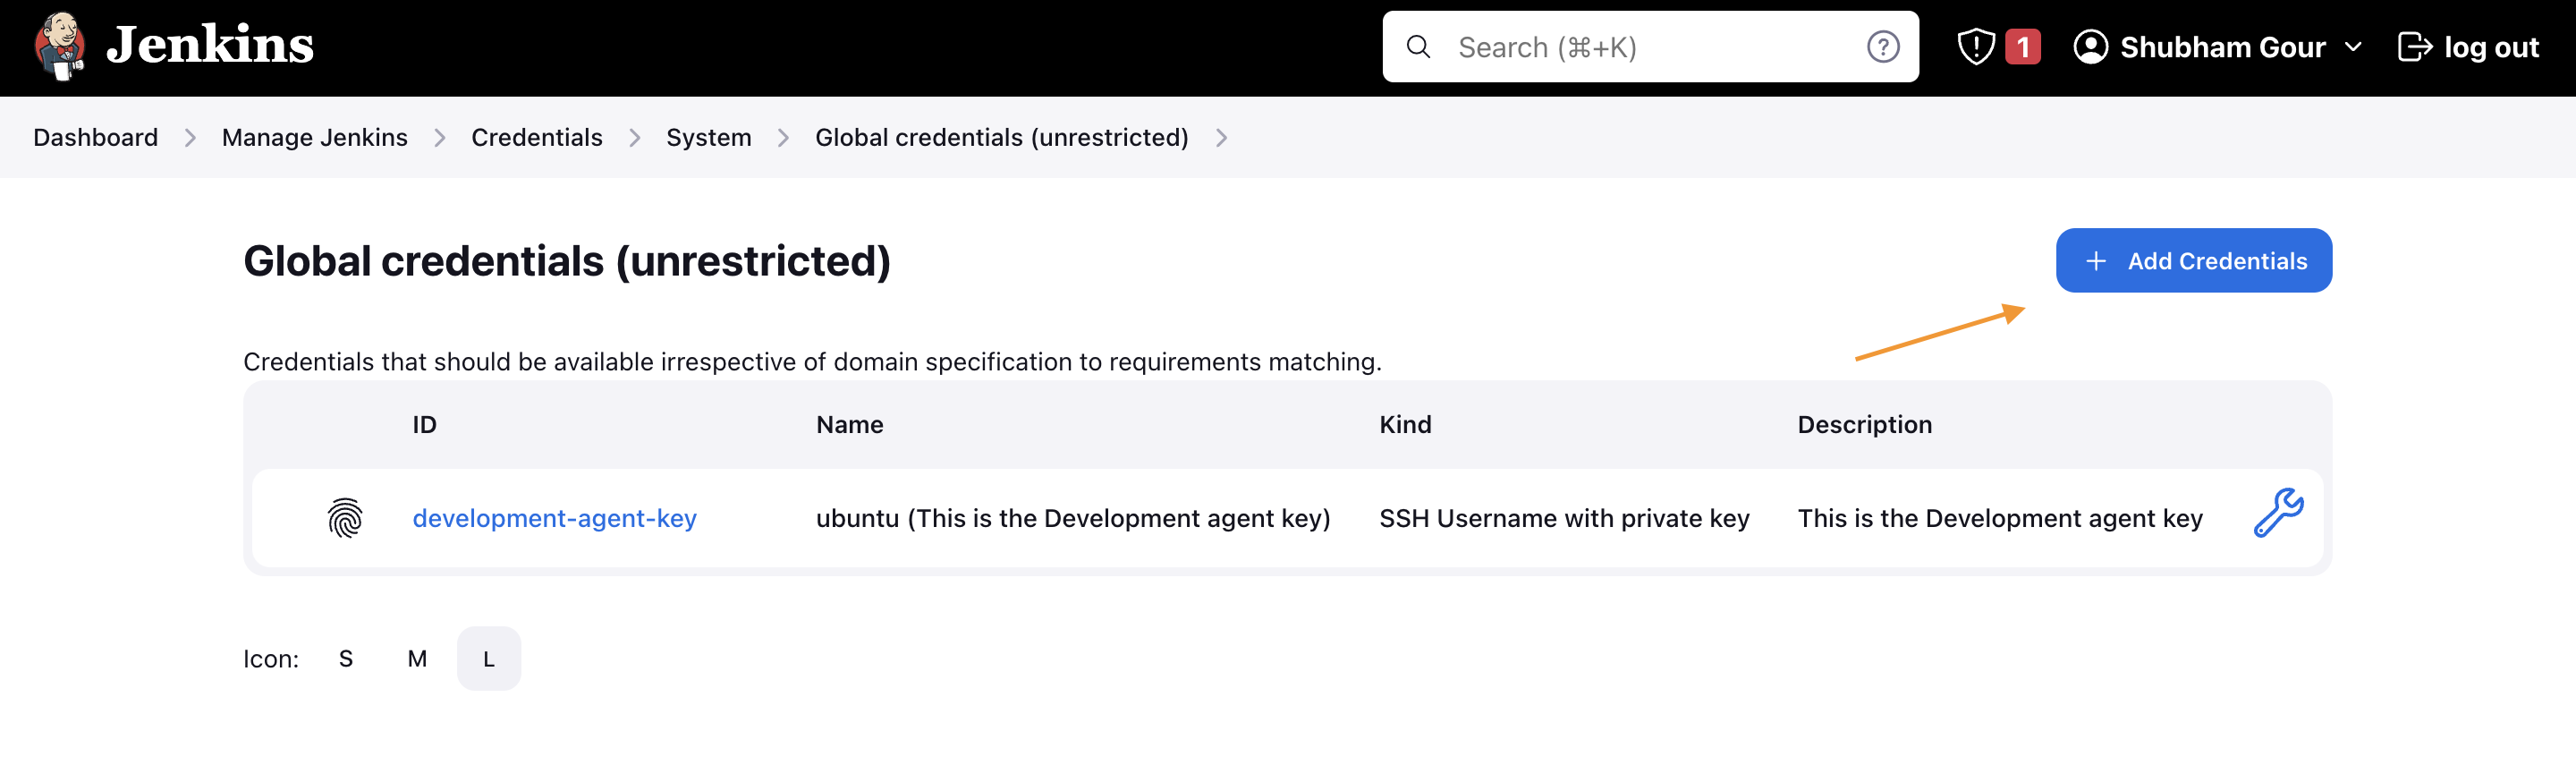
Here the ID is our Label which we ar going to user in the Jenkins File
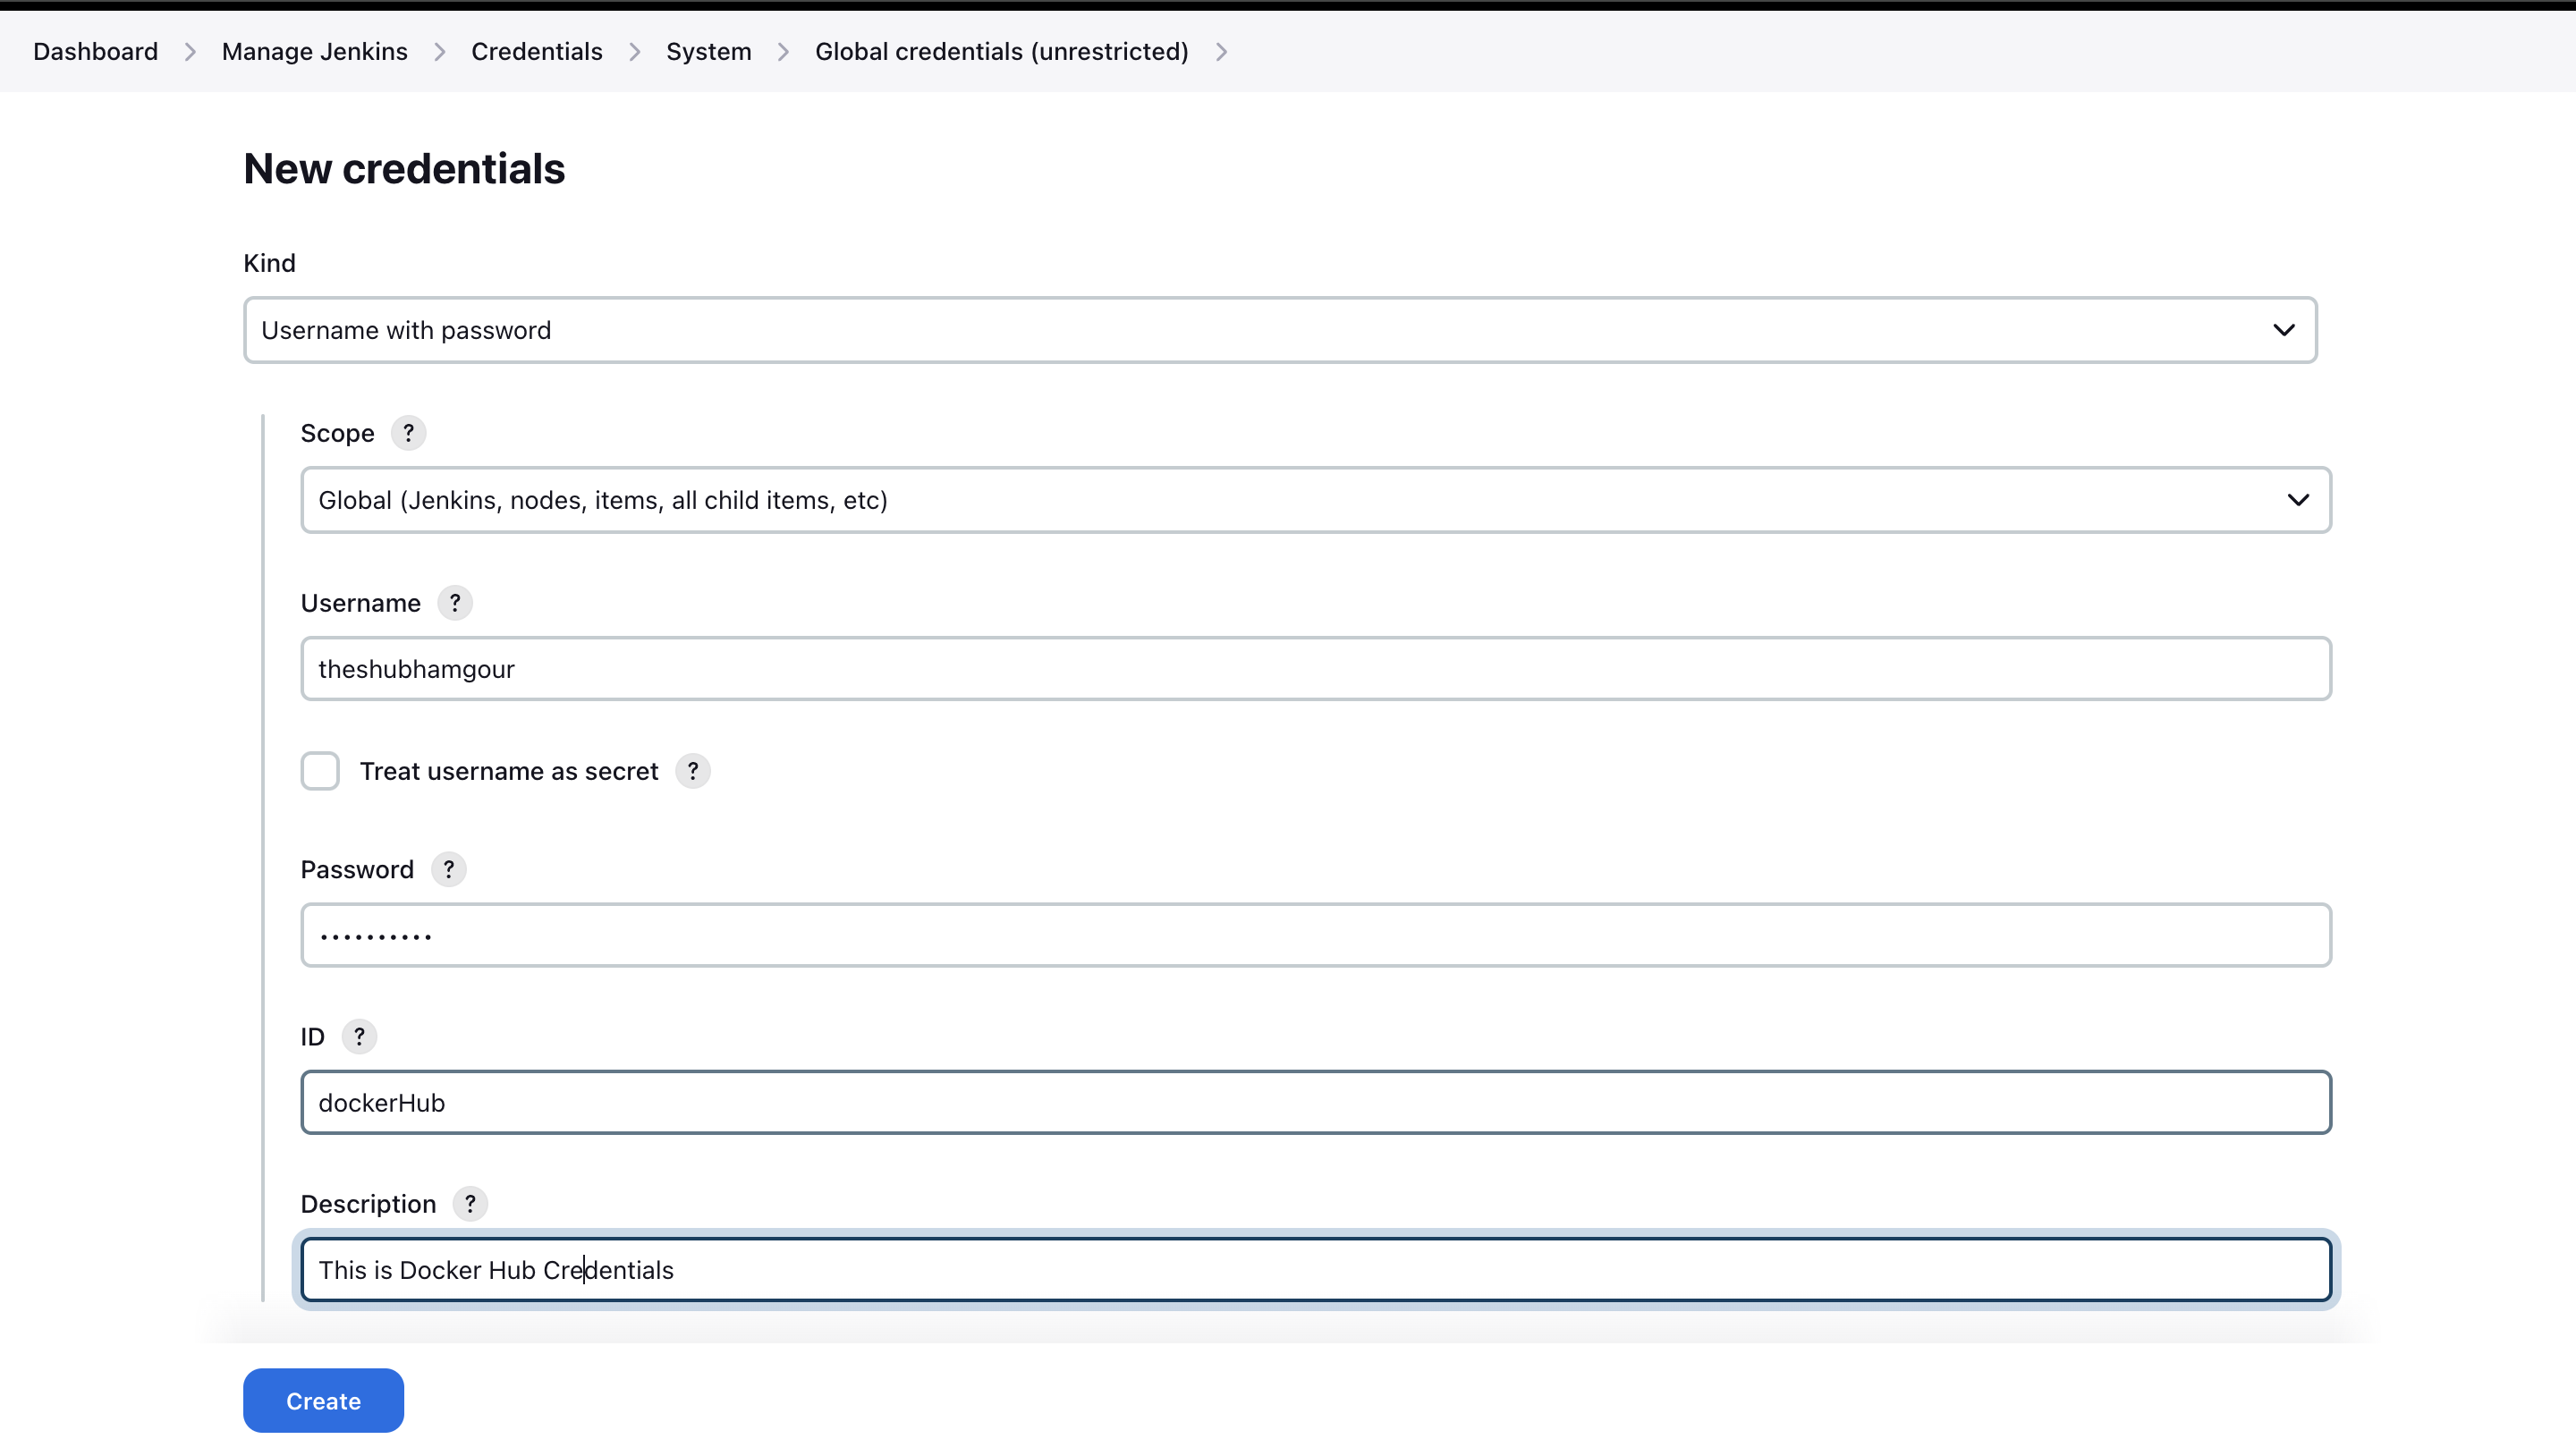
Run the Jenkins job again, and if it fails due to missing Docker credentials, configure Docker credentials in the Jenkins global settings.
Once configured, run the job again, and this time, it should be successful.
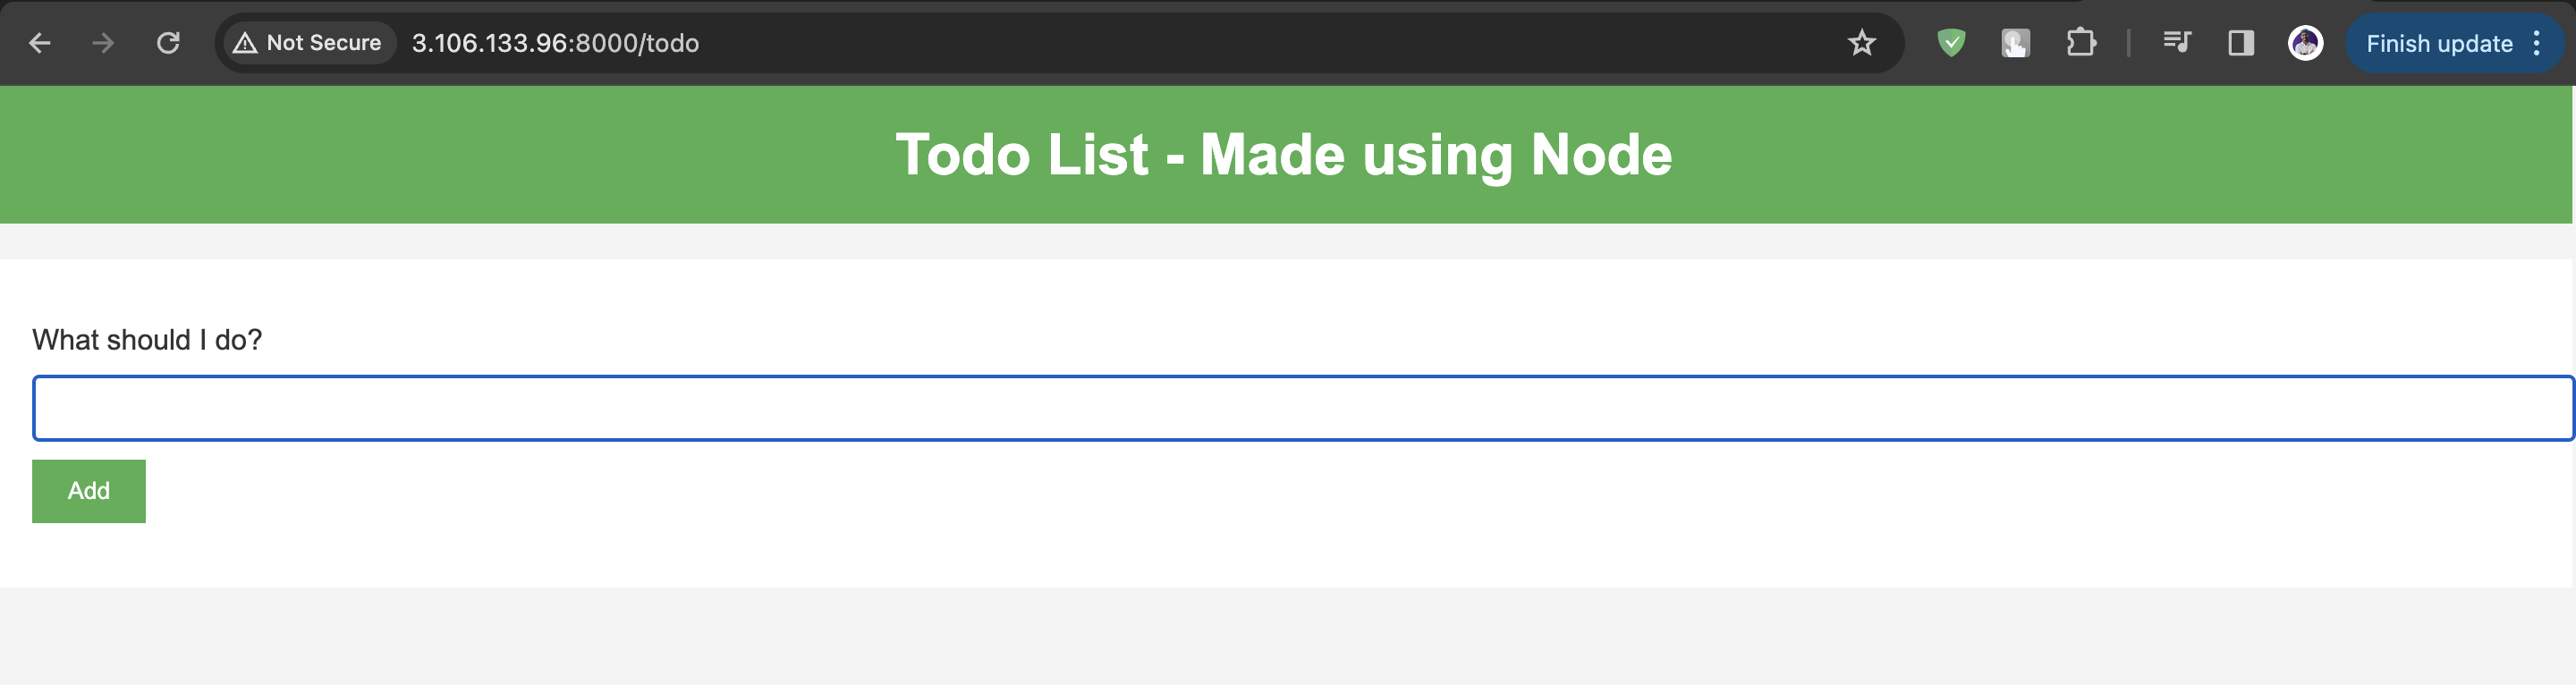
Accessing the Jenkins Agent:
In the browser, navigate to
<agent-public-ip>:8000.Congratulations! You have successfully set up and run a Jenkins job on your agent.
By following these steps, you've created a scalable and distributed Jenkins environment, enabling efficient CI/CD processes. Adjust the configurations based on your specific requirements for development, testing, and deployment workflows.
Conclusion
In conclusion, setting up a Jenkins agent on Ubuntu opens doors to a distributed and efficient CI/CD environment. This guide has walked you through the process, from installing Java to configuring Docker and running successful Jenkins jobs. By leveraging agents, you've optimized your workflows, enabling seamless collaboration and scaling your development and deployment processes. Cheers to a well-configured Jenkins setup!


