Demonstrate Docker Volume - Deploying a Todo app

Release Management Professional | Transitioning to DevOps
With a proven track record in Release Management, I'm on an exciting journey to transition into the world of DevOps. I specialize in orchestrating the smooth deployment of software and applications, and I'm now gearing up to bridge the gap between development and operations.
My passion lies in optimizing release processes, automating deployments, and ensuring the efficiency of IT operations. I'm actively enhancing my skill set in DevOps practices, including cloud technologies, scripting, and CI/CD pipelines.
I'm keen to connect with professionals who share this enthusiasm and explore opportunities for mutual growth and collaboration in the DevOps domain. Let's connect and exchange insights about the evolving landscapes of Release Management and DevOps!
#ReleaseManagement #DevOps #EfficiencyOptimization
Installing Docker:
Walk through the process of installing Docker on your machine. Provide step-by-step instructions for different operating systems. Here we are using ubuntu as a base machine.
- Run the following command to uninstall all conflicting packages:
for pkg in docker.io docker-doc docker-compose docker-compose-v2 podman-docker containerd runc; do sudo apt-get remove $pkg; done

Before you install Docker Engine for the first time on a new host machine, you need to set up the Docker repository. Afterward, you can install and update Docker from the repository.
- Set up Docker's
aptrepository. Press Yes or Y in case of prompt.
# Add Docker's official GPG key:
sudo apt-get update
sudo apt-get install ca-certificates curl gnupg
sudo install -m 0755 -d /etc/apt/keyrings
curl -fsSL https://download.docker.com/linux/ubuntu/gpg | sudo gpg --dearmor -o /etc/apt/keyrings/docker.gpg
sudo chmod a+r /etc/apt/keyrings/docker.gpg

# Add the repository to Apt sources:
echo \
  "deb [arch="$(dpkg --print-architecture)" signed-by=/etc/apt/keyrings/docker.gpg] https://download.docker.com/linux/ubuntu \
  "$(. /etc/os-release && echo "$VERSION_CODENAME")" stable" | \
  sudo tee /etc/apt/sources.list.d/docker.list > /dev/null
sudo apt-get update

To install the latest version, run:
sudo apt-get install docker-ce docker-ce-cli containerd.io docker-buildx-plugin docker-compose-plugin
If you're getting any errors i recommend you to visit here: Documentation

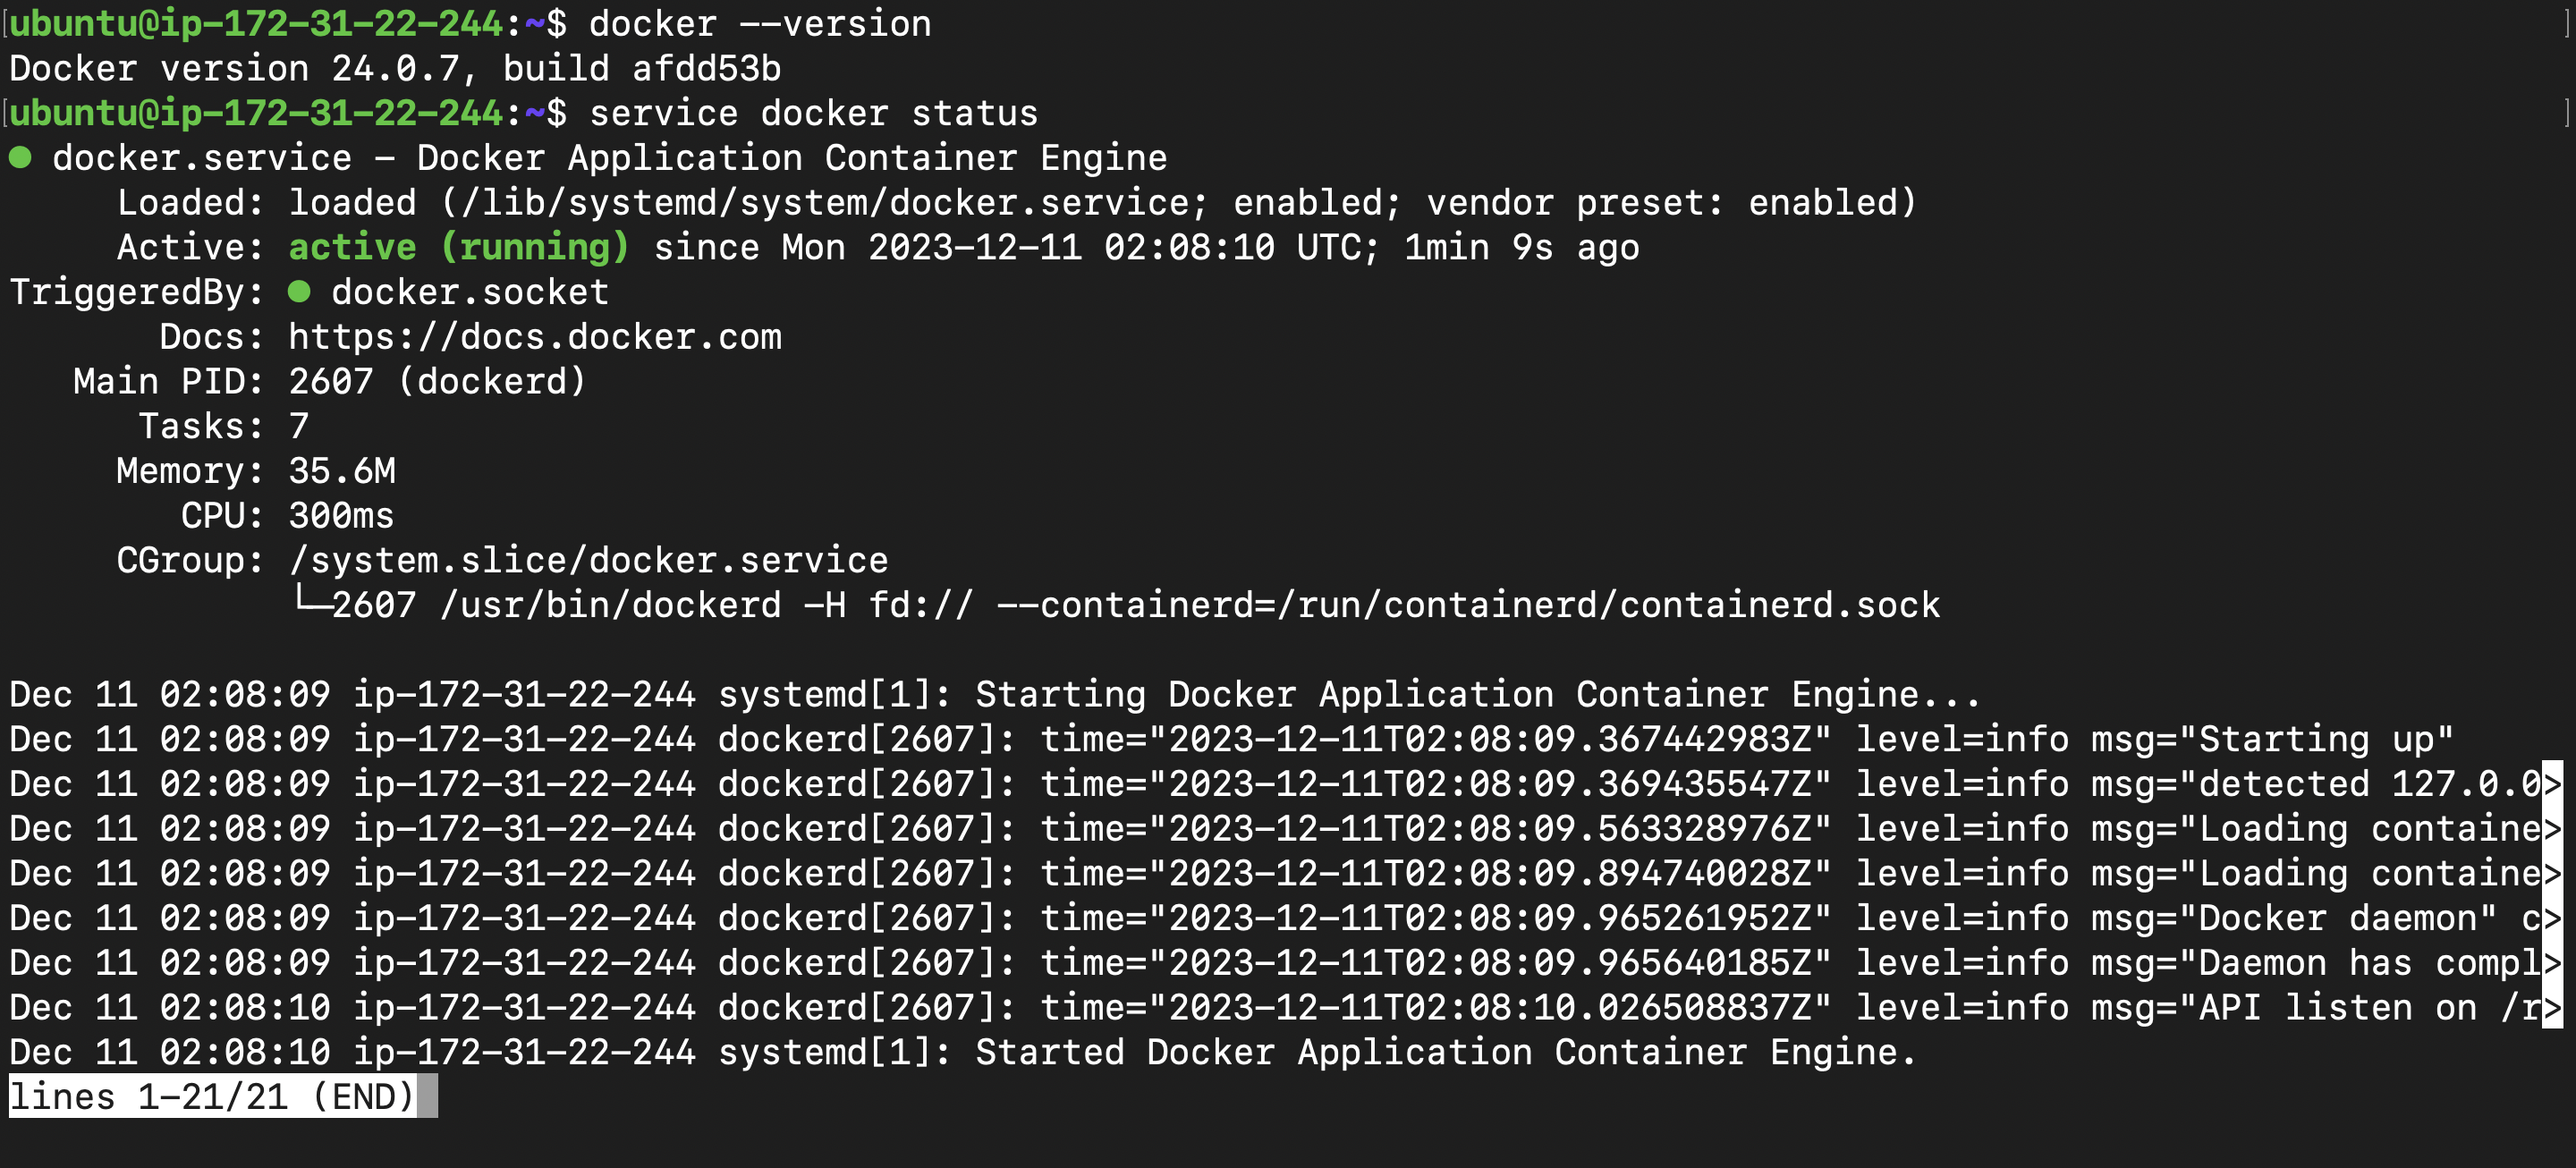
Now verify the installation execute the below command
docker --version
Enable docker service
service docker start
service docker status
Adding Super user privileges
sudo usermod -aG docker $USER
Setting up the GitHub project: Below is the project we will be using :
https://github.com/theshubhamgour/django-todo-cicd.gitClone the project
git clone https://github.com/theshubhamgour/django-todo-cicd.git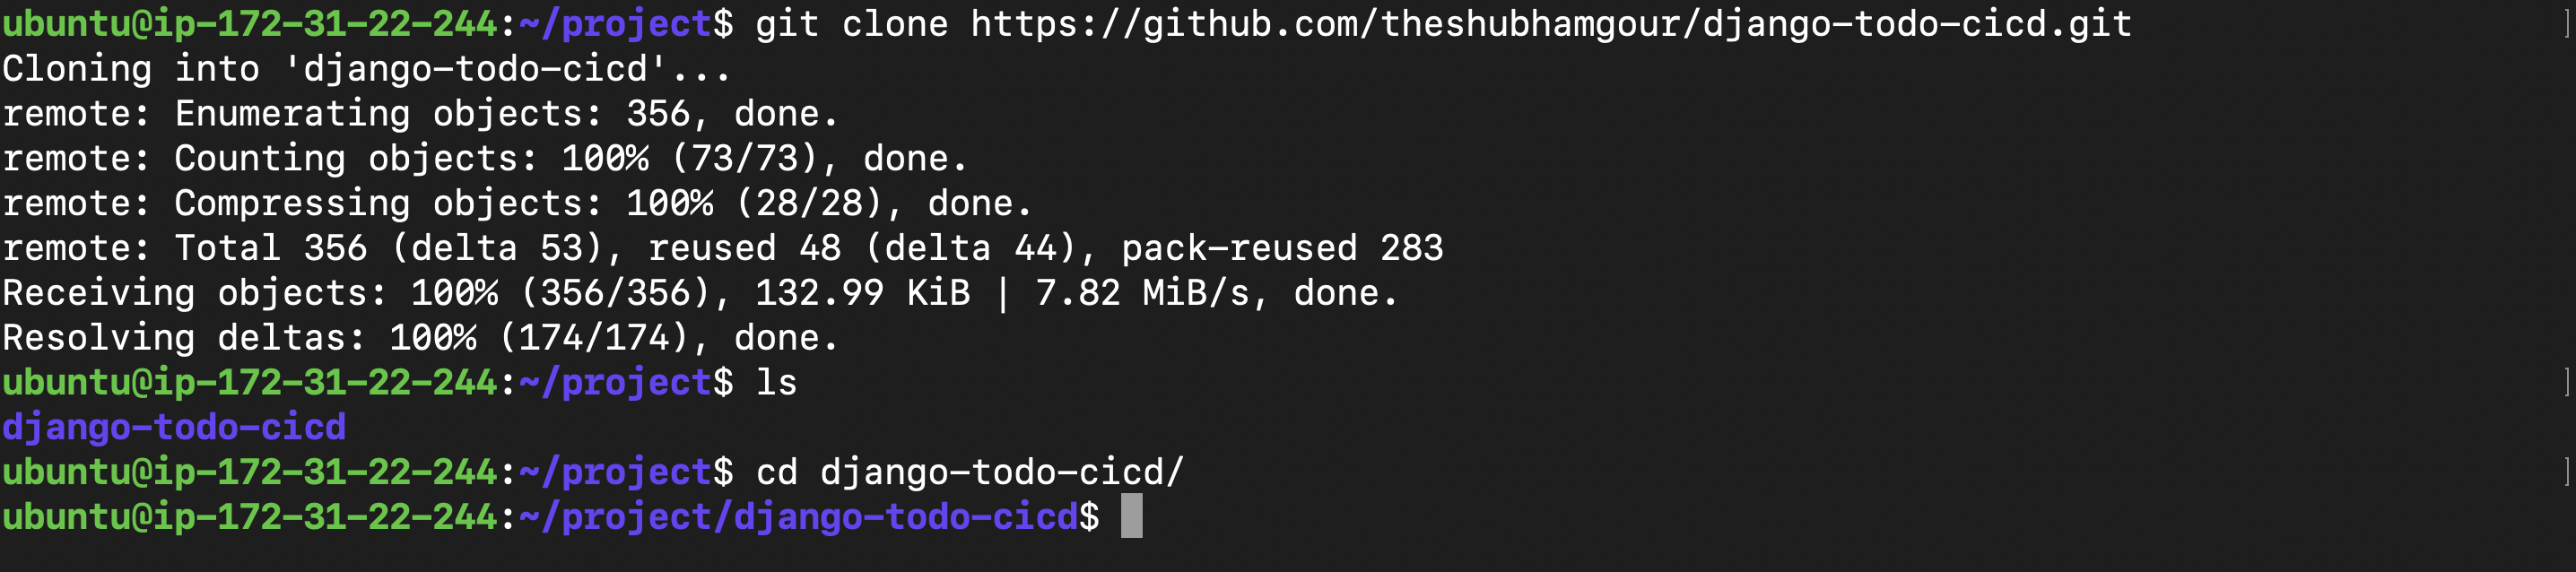
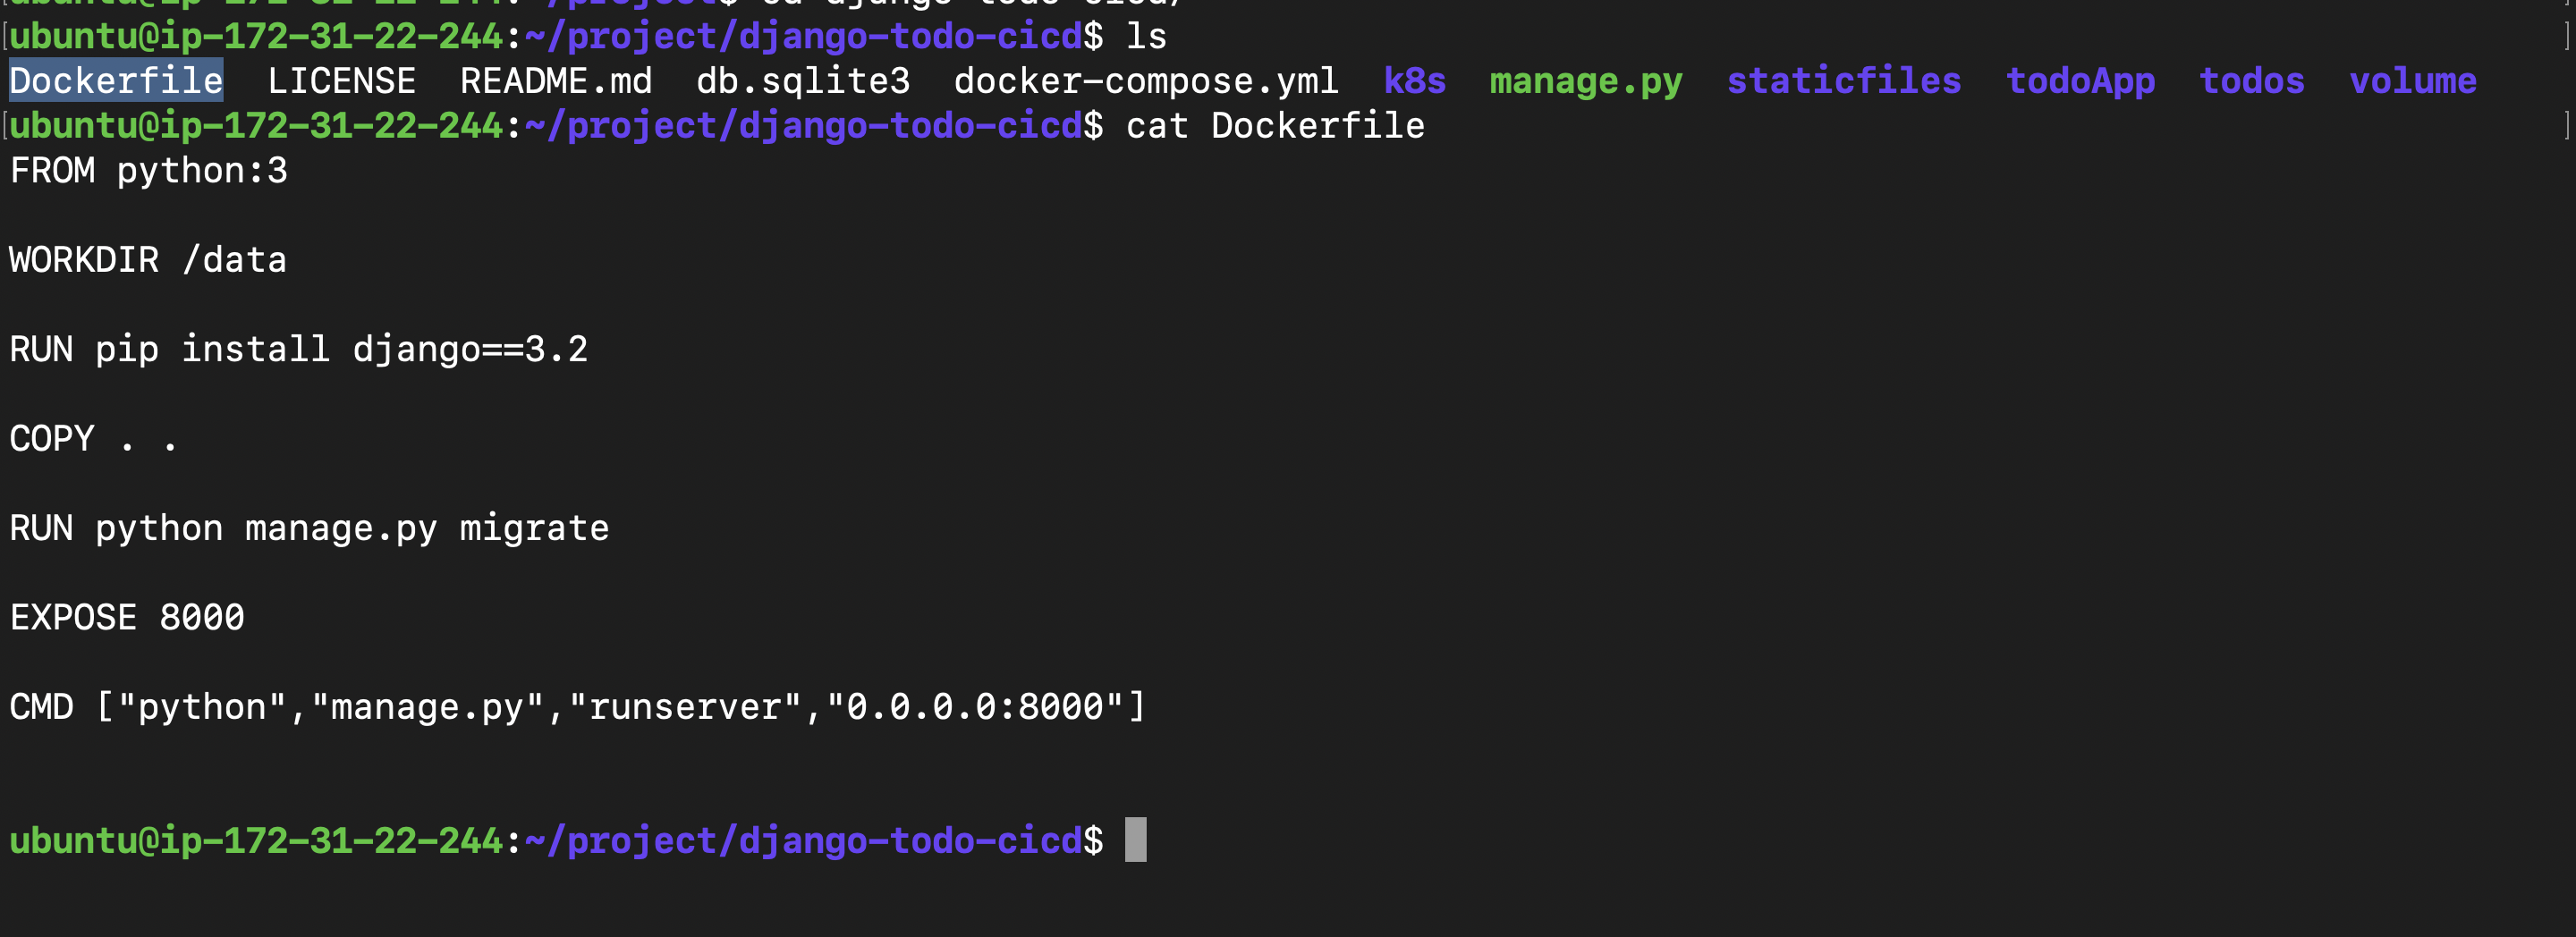
You can see the docker file is already present
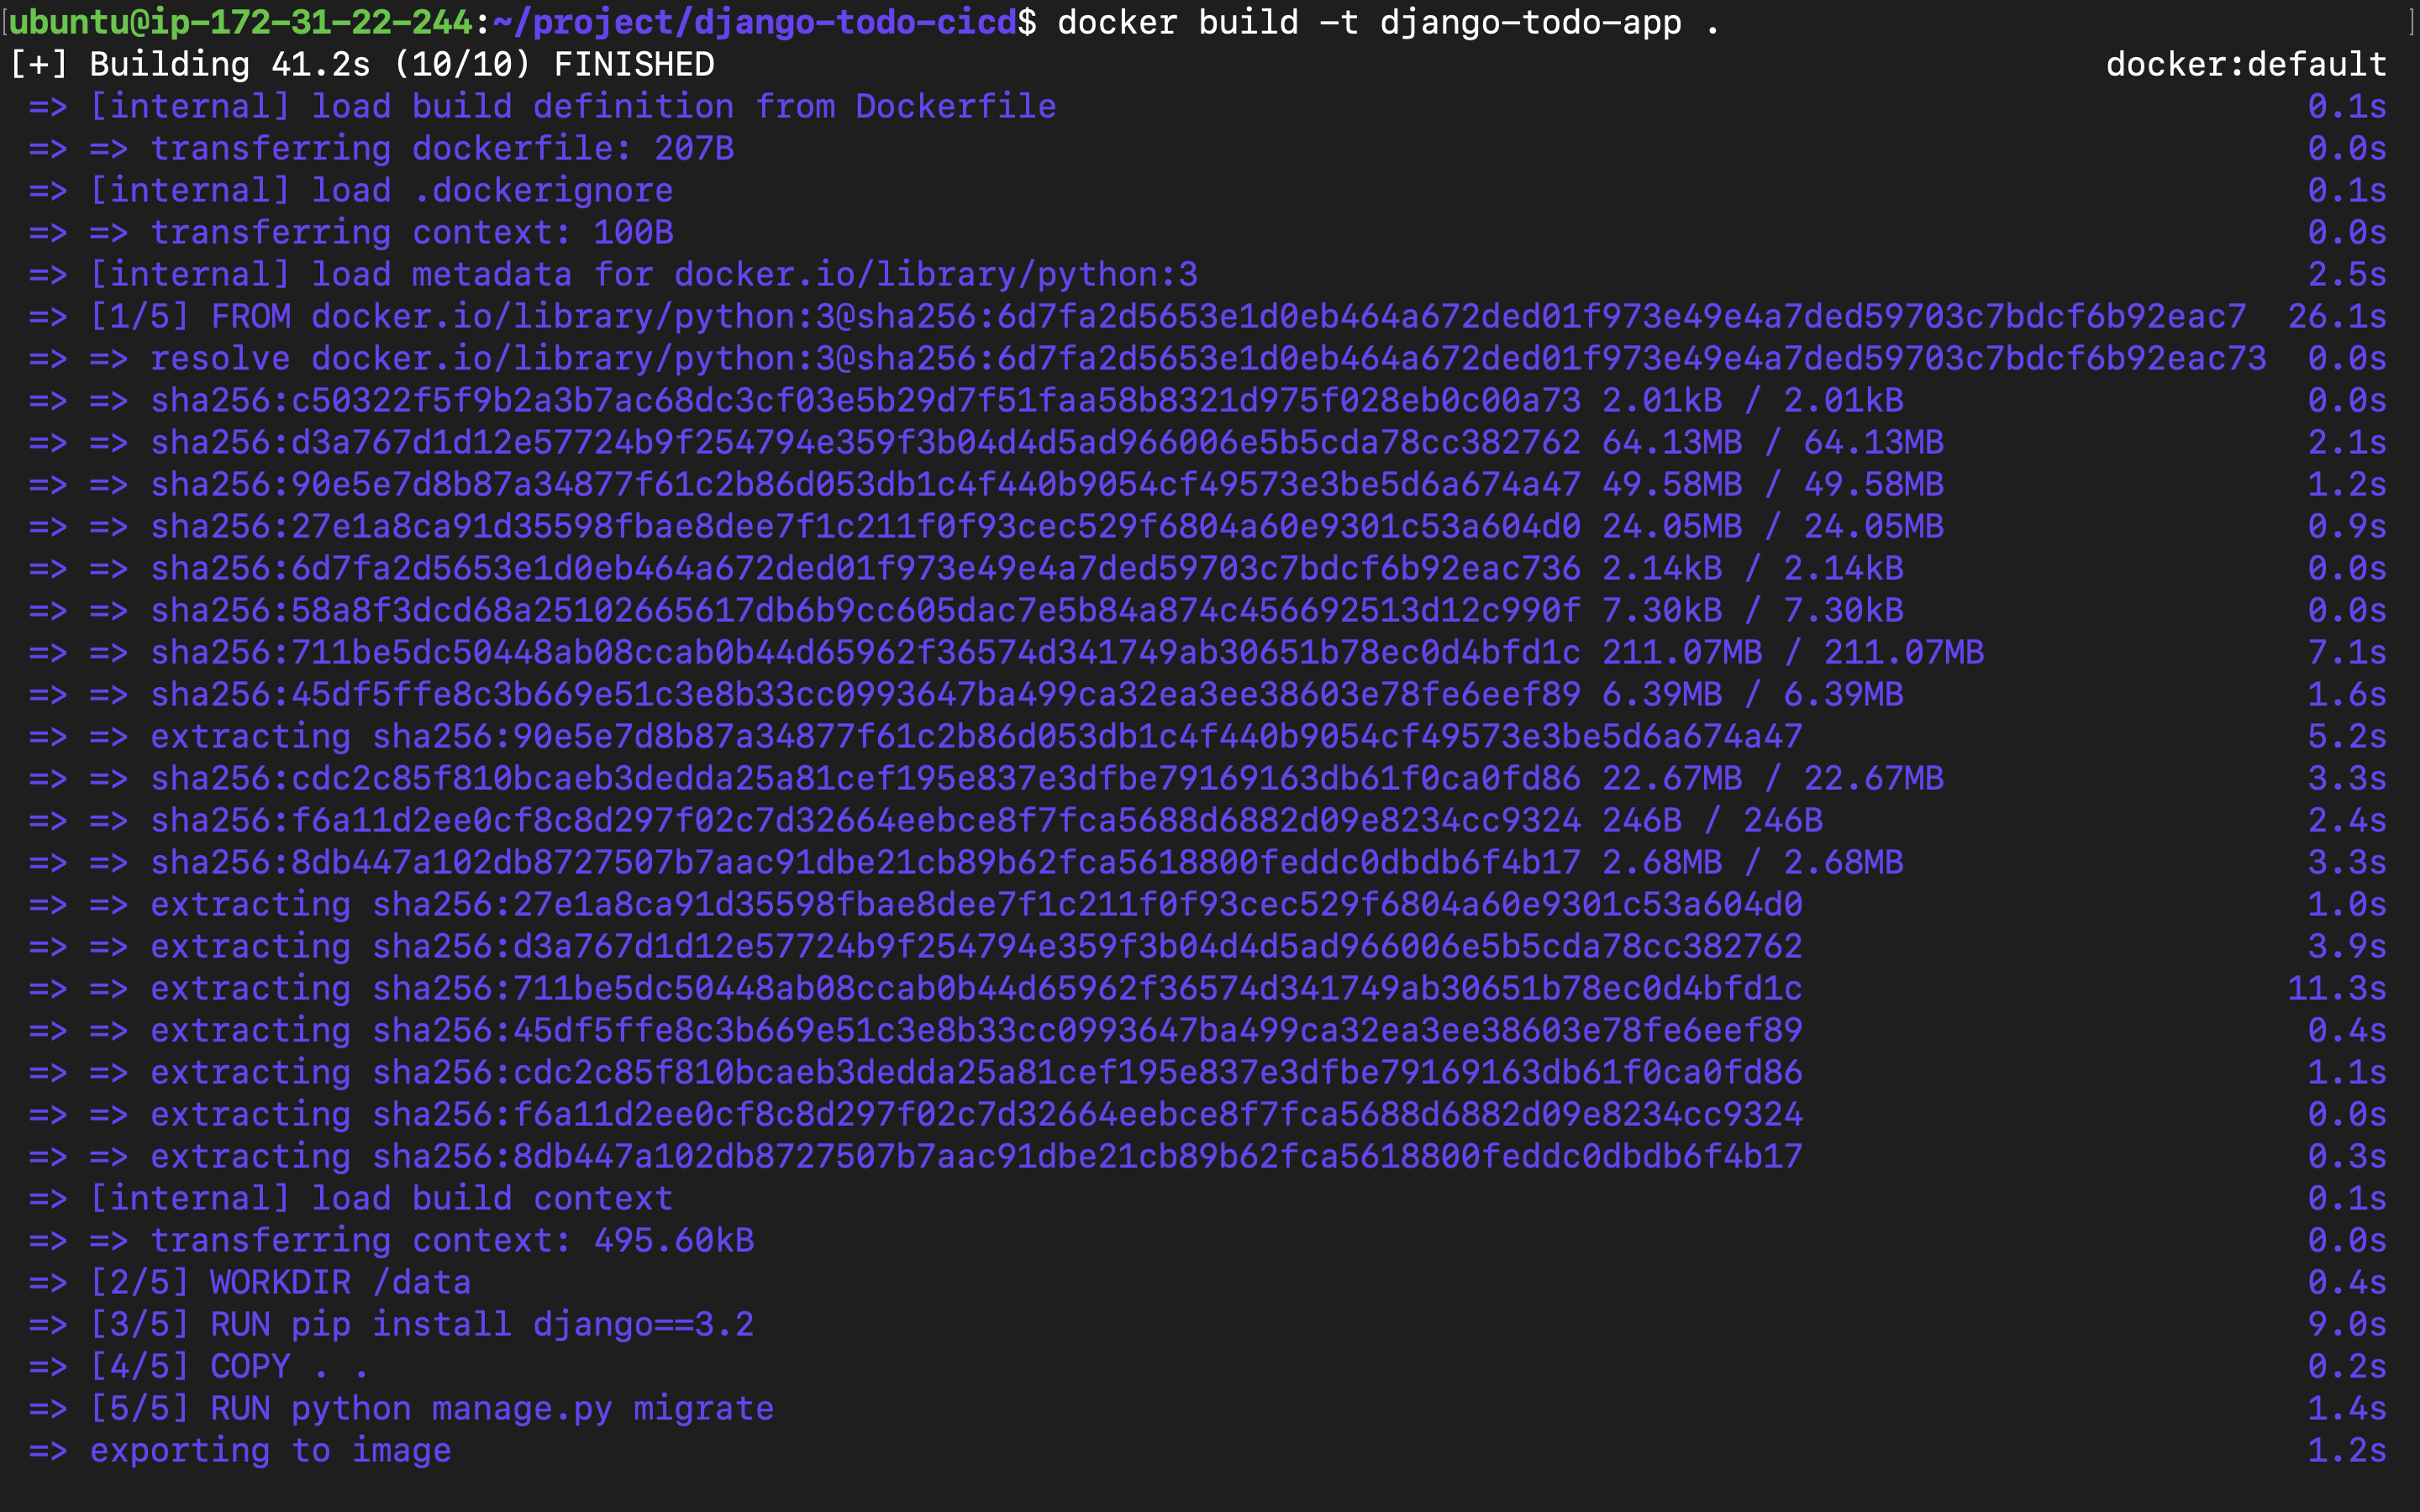
Let's build the file and execute the below command
docker build -t django-todo-app .
docker build: Initiates the build process to create a Docker image.-t django-todo-app: Tags the resulting image with the name "django-todo-app." This is like giving a name to your image..: Specifies the build context, which is the path to the directory containing the Dockerfile and other necessary files for building the image. In this case, the.indicates that the Dockerfile is in the current directory.
Before running this command, make sure you are in the directory containing the Dockerfile for your Django todo app. The Dockerfile should define the necessary instructions for setting up the environment, installing dependencies, and copying your Django app into the image.
You can see now the image is successfully created run the below command
docker images

Let's execute this image which we have builded
docker run -d -p 8000:8000 django-todo-app:latest

docker run: This command is used to run a container based on a specified image.-d: This flag runs the container in the background (detached mode), allowing you to continue using the terminal.-p 8080:8080: This option maps port 8080 on your host machine to port 8080 in the container. This is assuming your Django application inside the container is set to run on port 8080. If your Django app uses a different port, you should adjust the mapping accordingly.django-todo-app:latest: This specifies the image and tag to use for running the container. In this case, it uses the "django-todo-app" image with the "latest" tag.
Now Lets Go to AWS and do some configuration
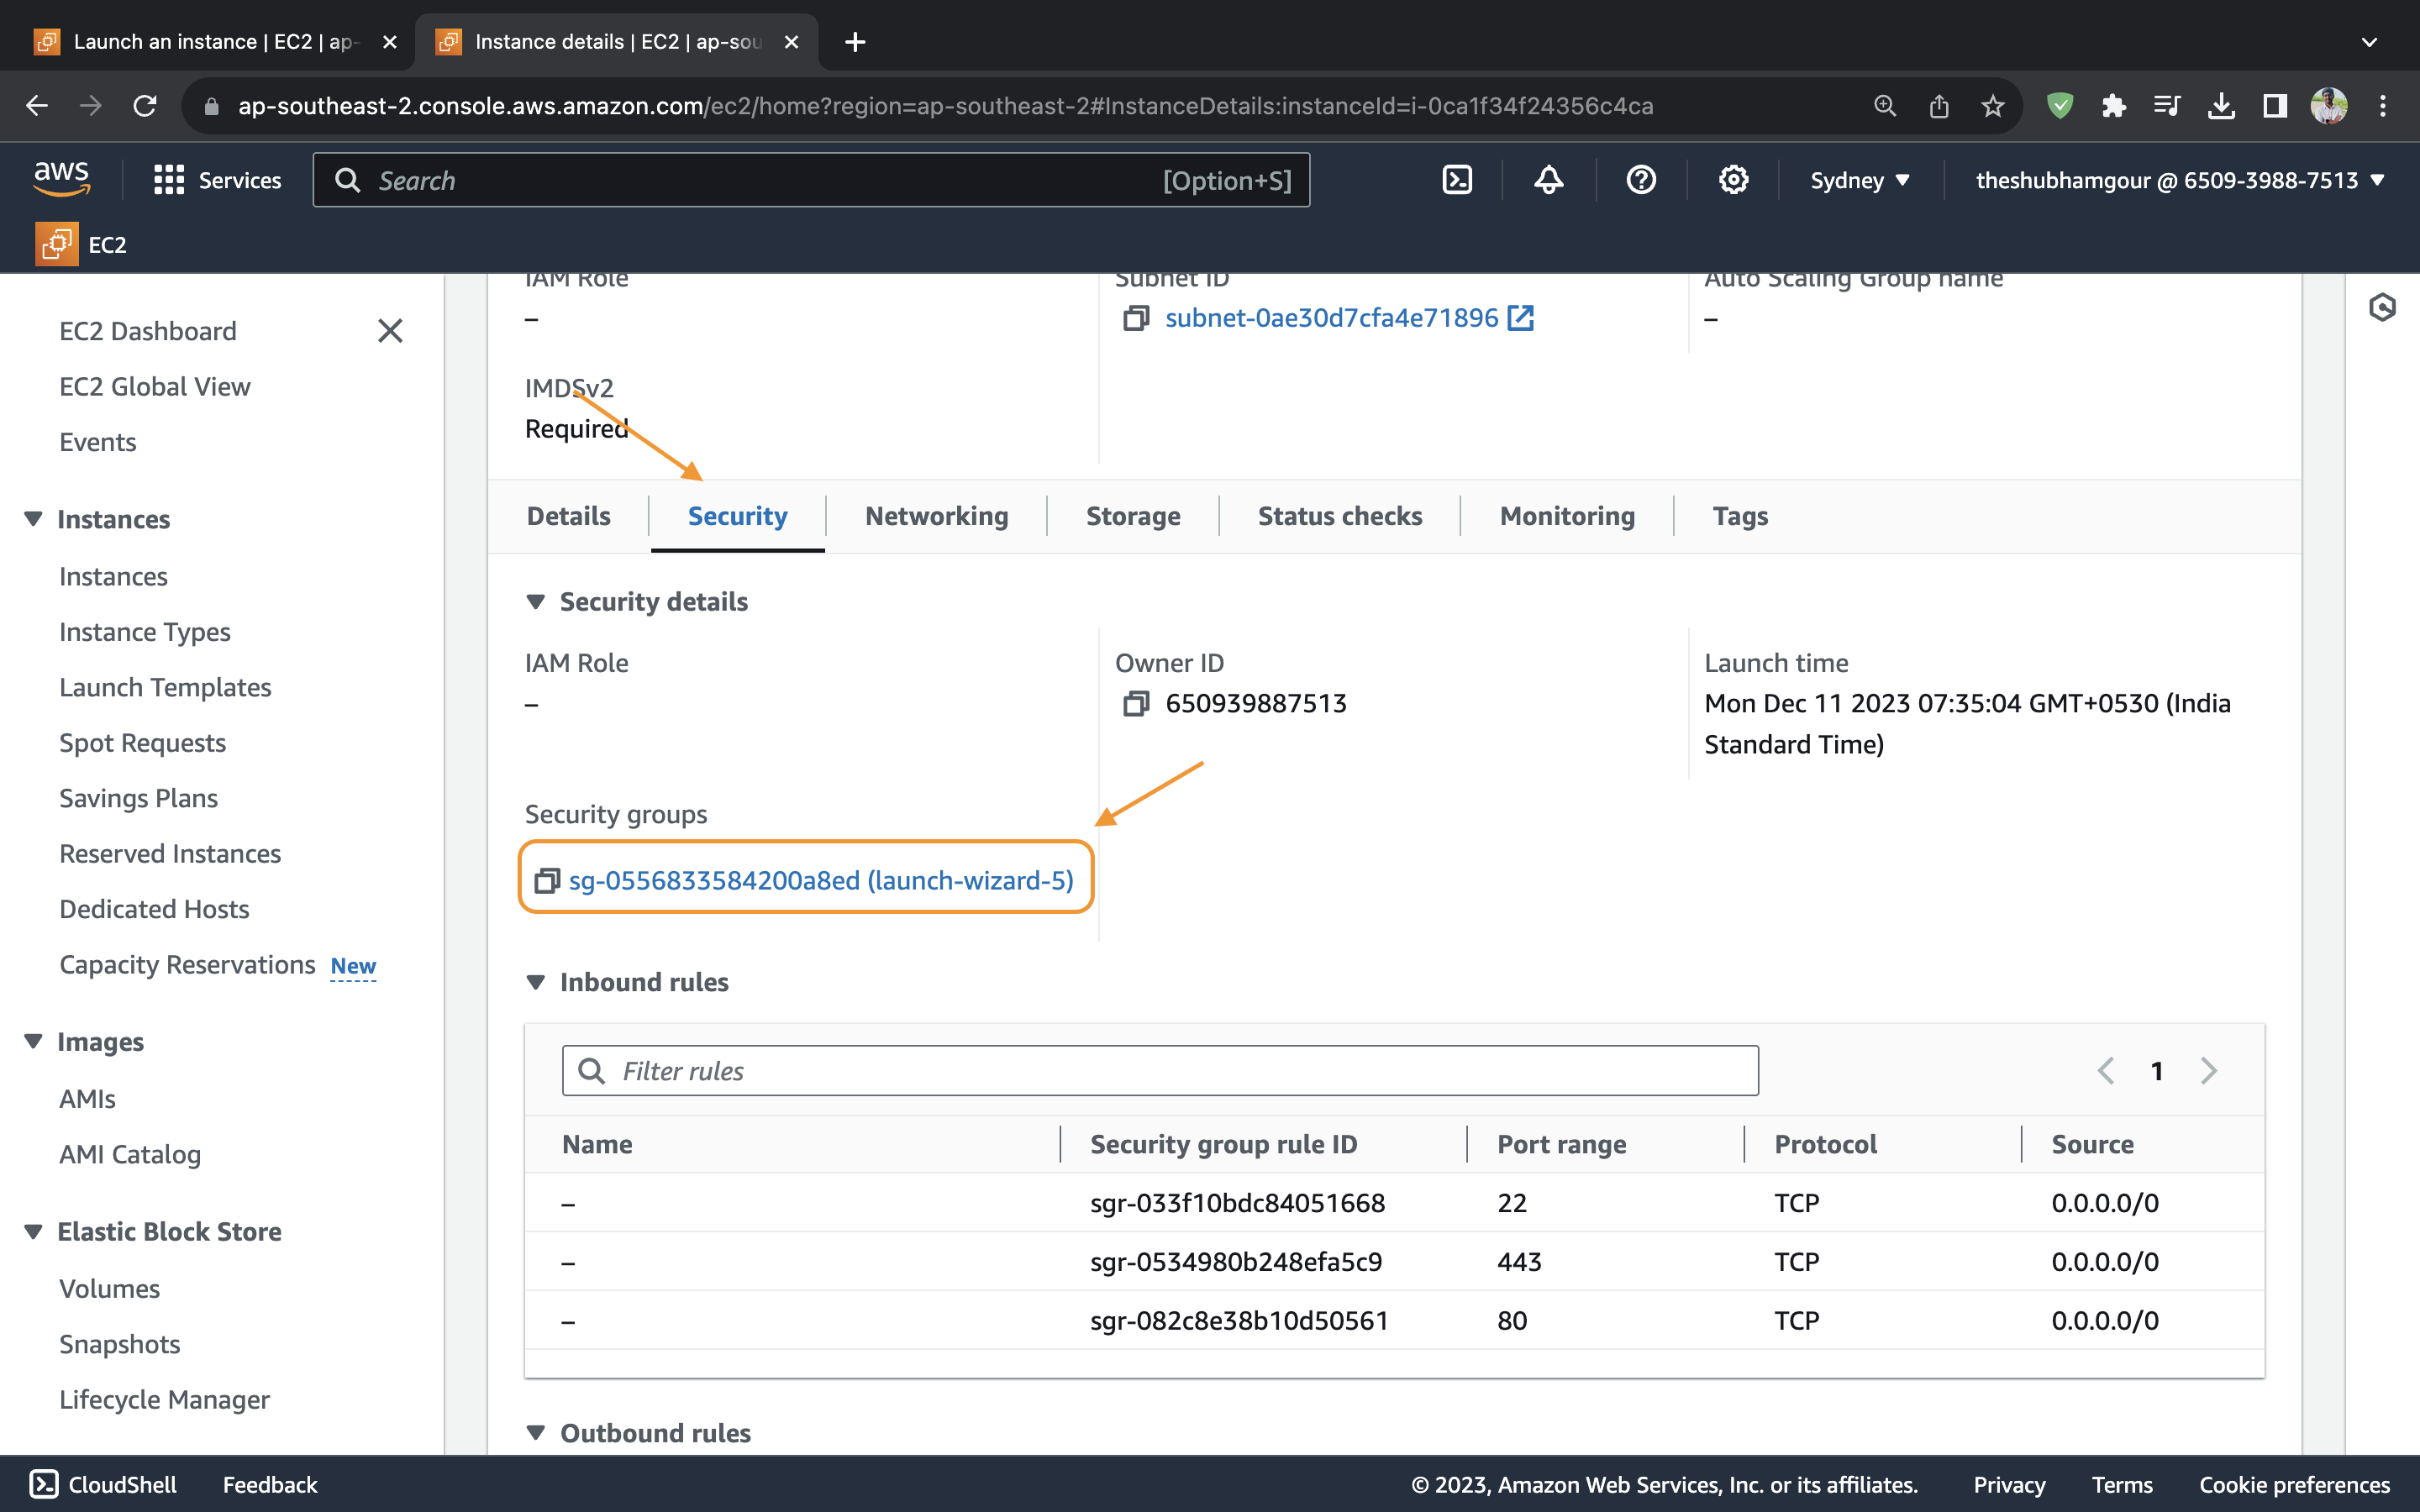

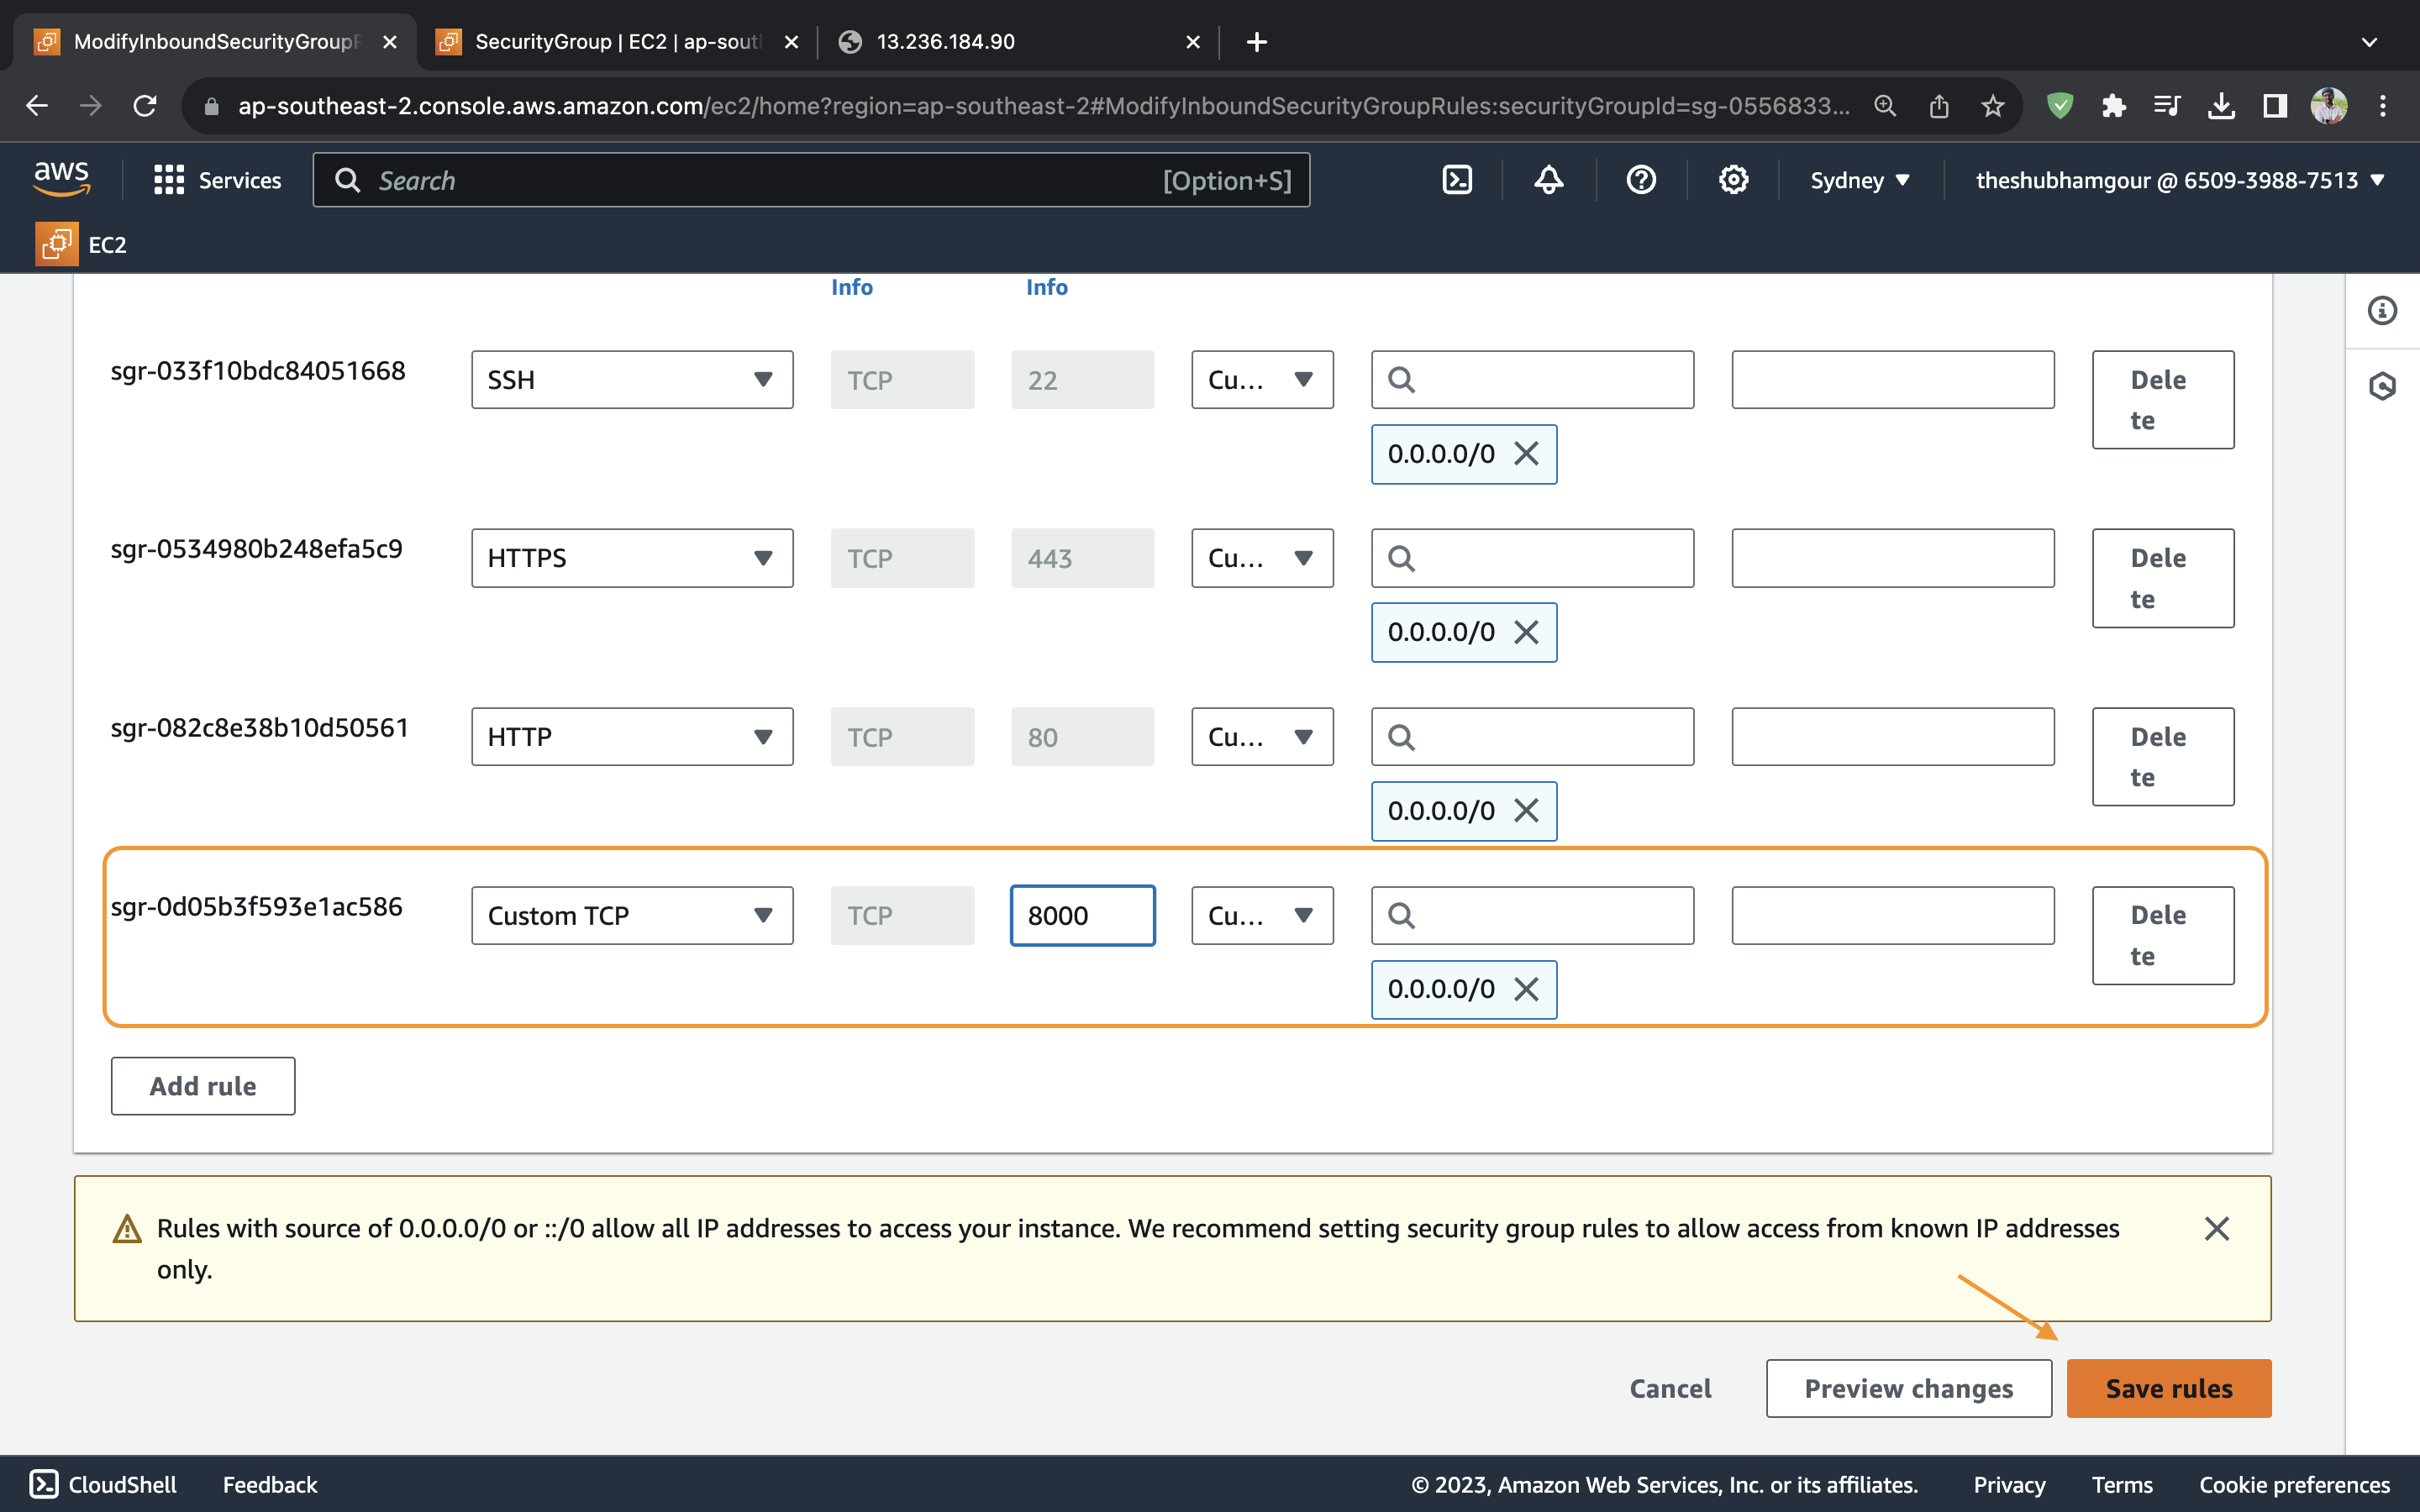
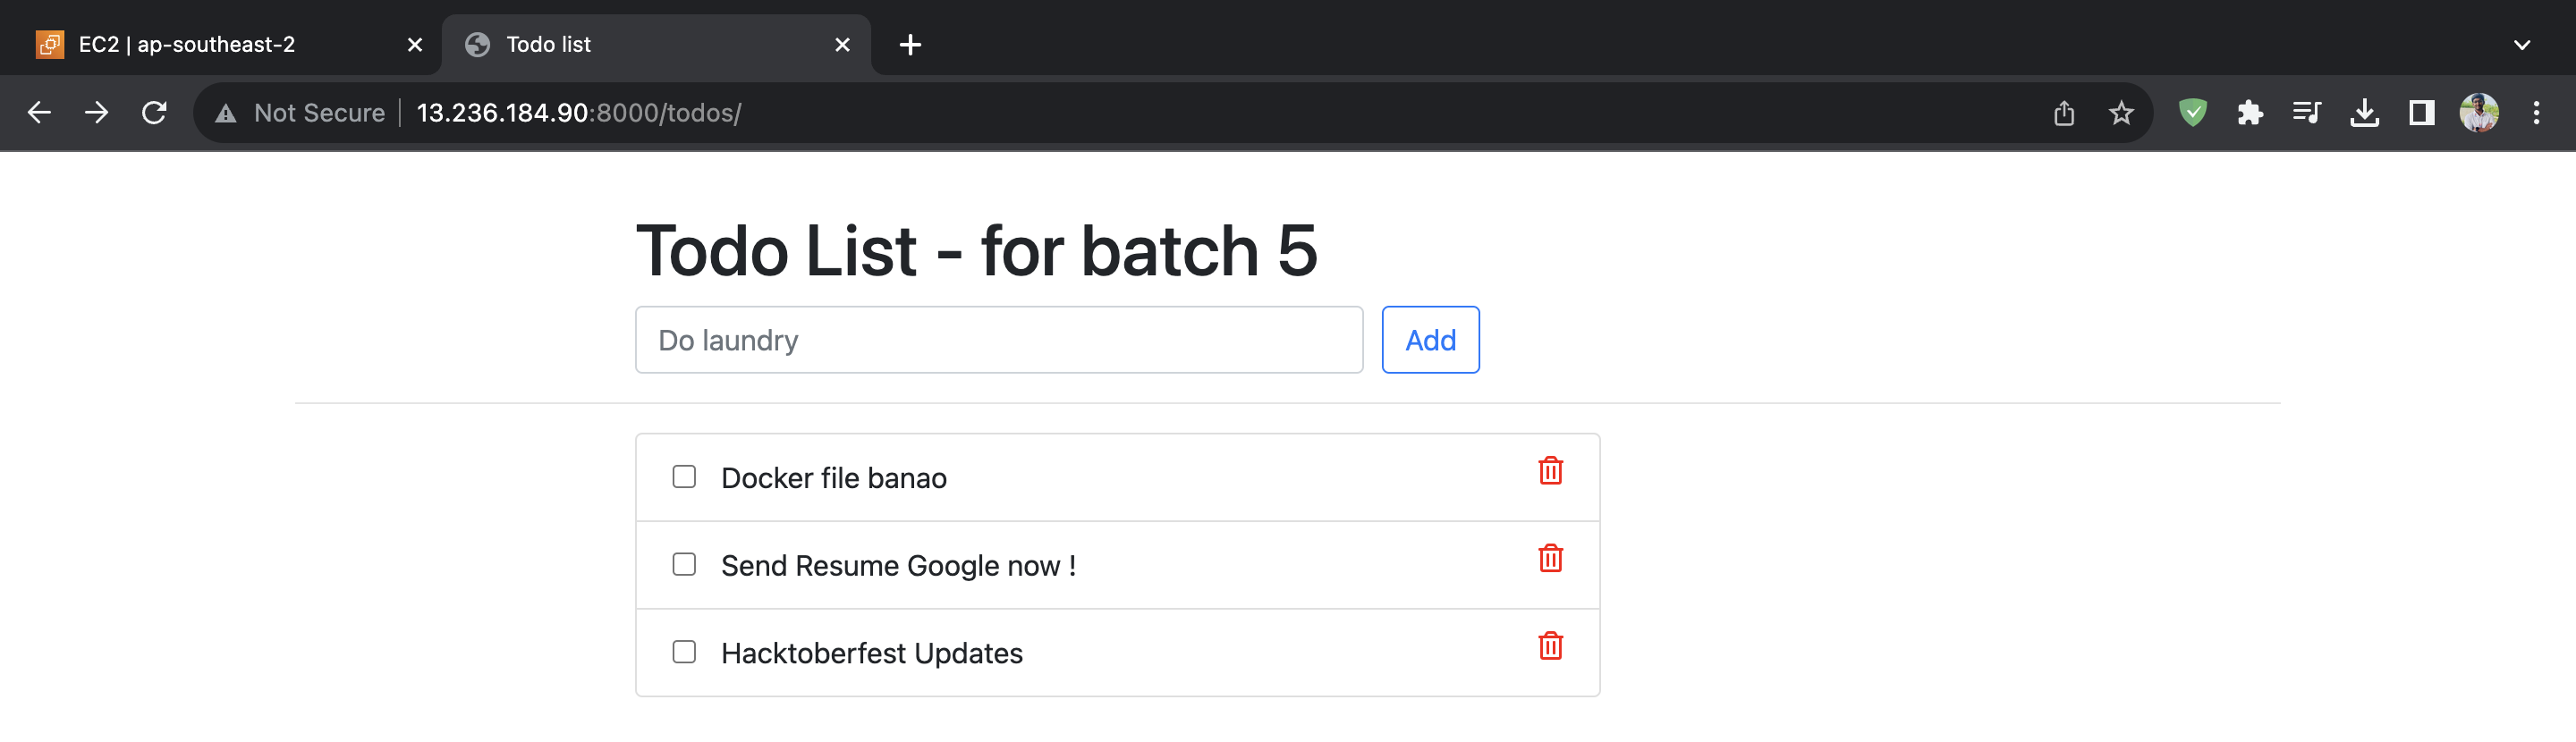
Now to check whether the app is running fine go on the new tab and type
<public-ip>:8000/todos/ you will resemble the below screen
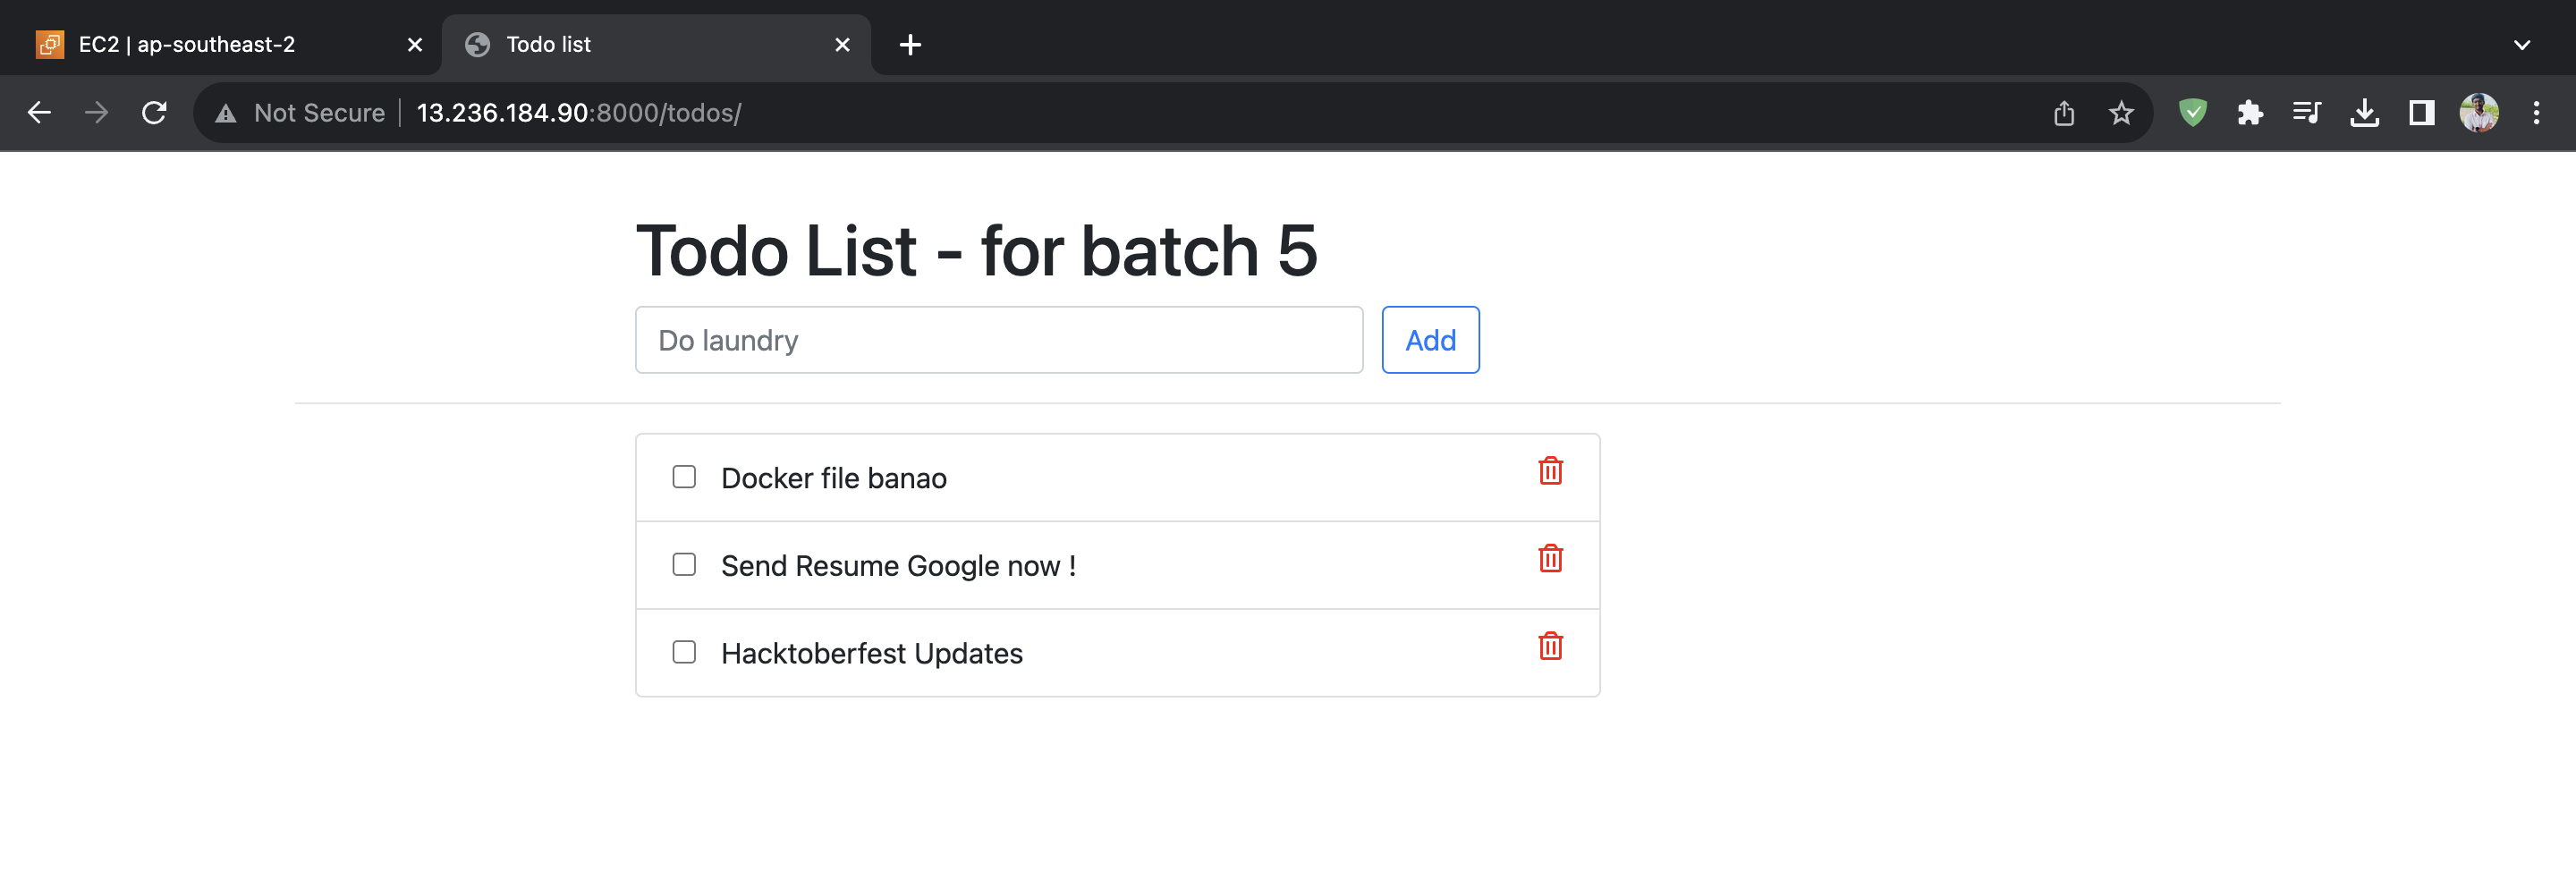
Add some data
Now let's restart the container and see what happens
docker restart <container-id>

Now let's stop and kill the docker container which is running
docker stop <container-id> && docker kill <container-id>

And now run the image again
docker run -d -p 8000:8000 django-todo-app:latest

Now refresh the page the data is gone - THIS CAN BE DANGEROUS
Let's create a storage point - a volume for our application which we will mount to our application
- Here we created a directory name volumes under which we created another directory named django-app which will act as a storage point

/home/ubuntu/project/volumes/django-app
Now let's create the volume for our application which will help us to avoid the data loss
docker volume create --name django-todo-volume --opt type=none --opt device=/home/ubuntu/project/volumes/django-app --opt o=bind

docker volume create: This command creates a new Docker volume.--name django-todo-volume: This specifies the name of the volume, in this case, "django-todo-volume."--opt type=none --opt device=/home/ubuntu/project/volumes/django-app --opt o=bind: These options configure the volume. They specify that the volume type is "none" (indicating that Docker should not manage the volume), the device is the specified path on the host machine (/home/ubuntu/project/volumes/django-app), and the mount options are set to "bind."
This type of volume creation is known as a "bind mount," where a path on the host machine is mounted directly into the container. This is often used when you want to share files or data between the host and the container. In this case, it looks like you are creating a volume for a Django app located at /home/ubuntu/project/volumes/django-app.
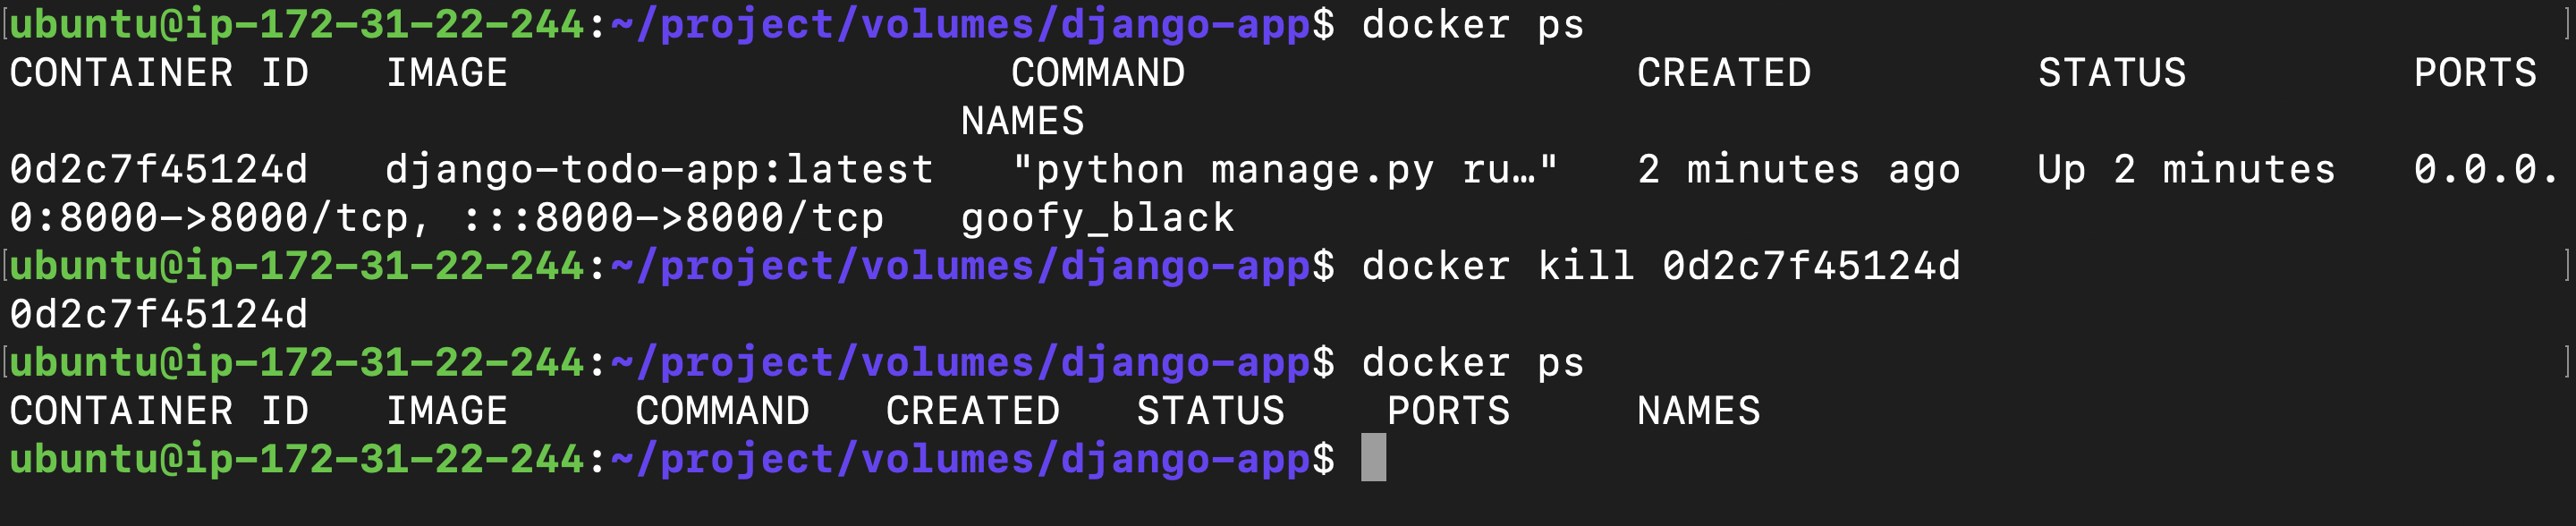
Now Kill the running container
docker kill <container-id>
Now let's mount the volume we created to our docker image and target the working directory which is /data here
docker run -d -p 8000:8000 --mount source=django-todo-volume,target=/data django-todo-app:latest

docker run: This command is used to run a Docker container.-d: This flag runs the container in the background (detached mode), allowing you to continue using the terminal.-p 8000:8000: This option maps port 8000 on your host machine to port 8000 in the container. This is assuming your Django application inside the container is set to run on port 8000. Adjust the mapping accordingly if your Django app uses a different port.--mount source=django-todo-volume,target=/data: This option mounts the volume named "django-todo-volume" into the container at the path "/data". This is a bind mount, where the host path (/home/ubuntu/project/volumes/django-appbased on your earlier command) is mounted directly into the container at "/data".django-todo-app:latest: This specifies the image and tag to use for running the container. In this case, it uses the "django-todo-app" image with the "latest" tag.
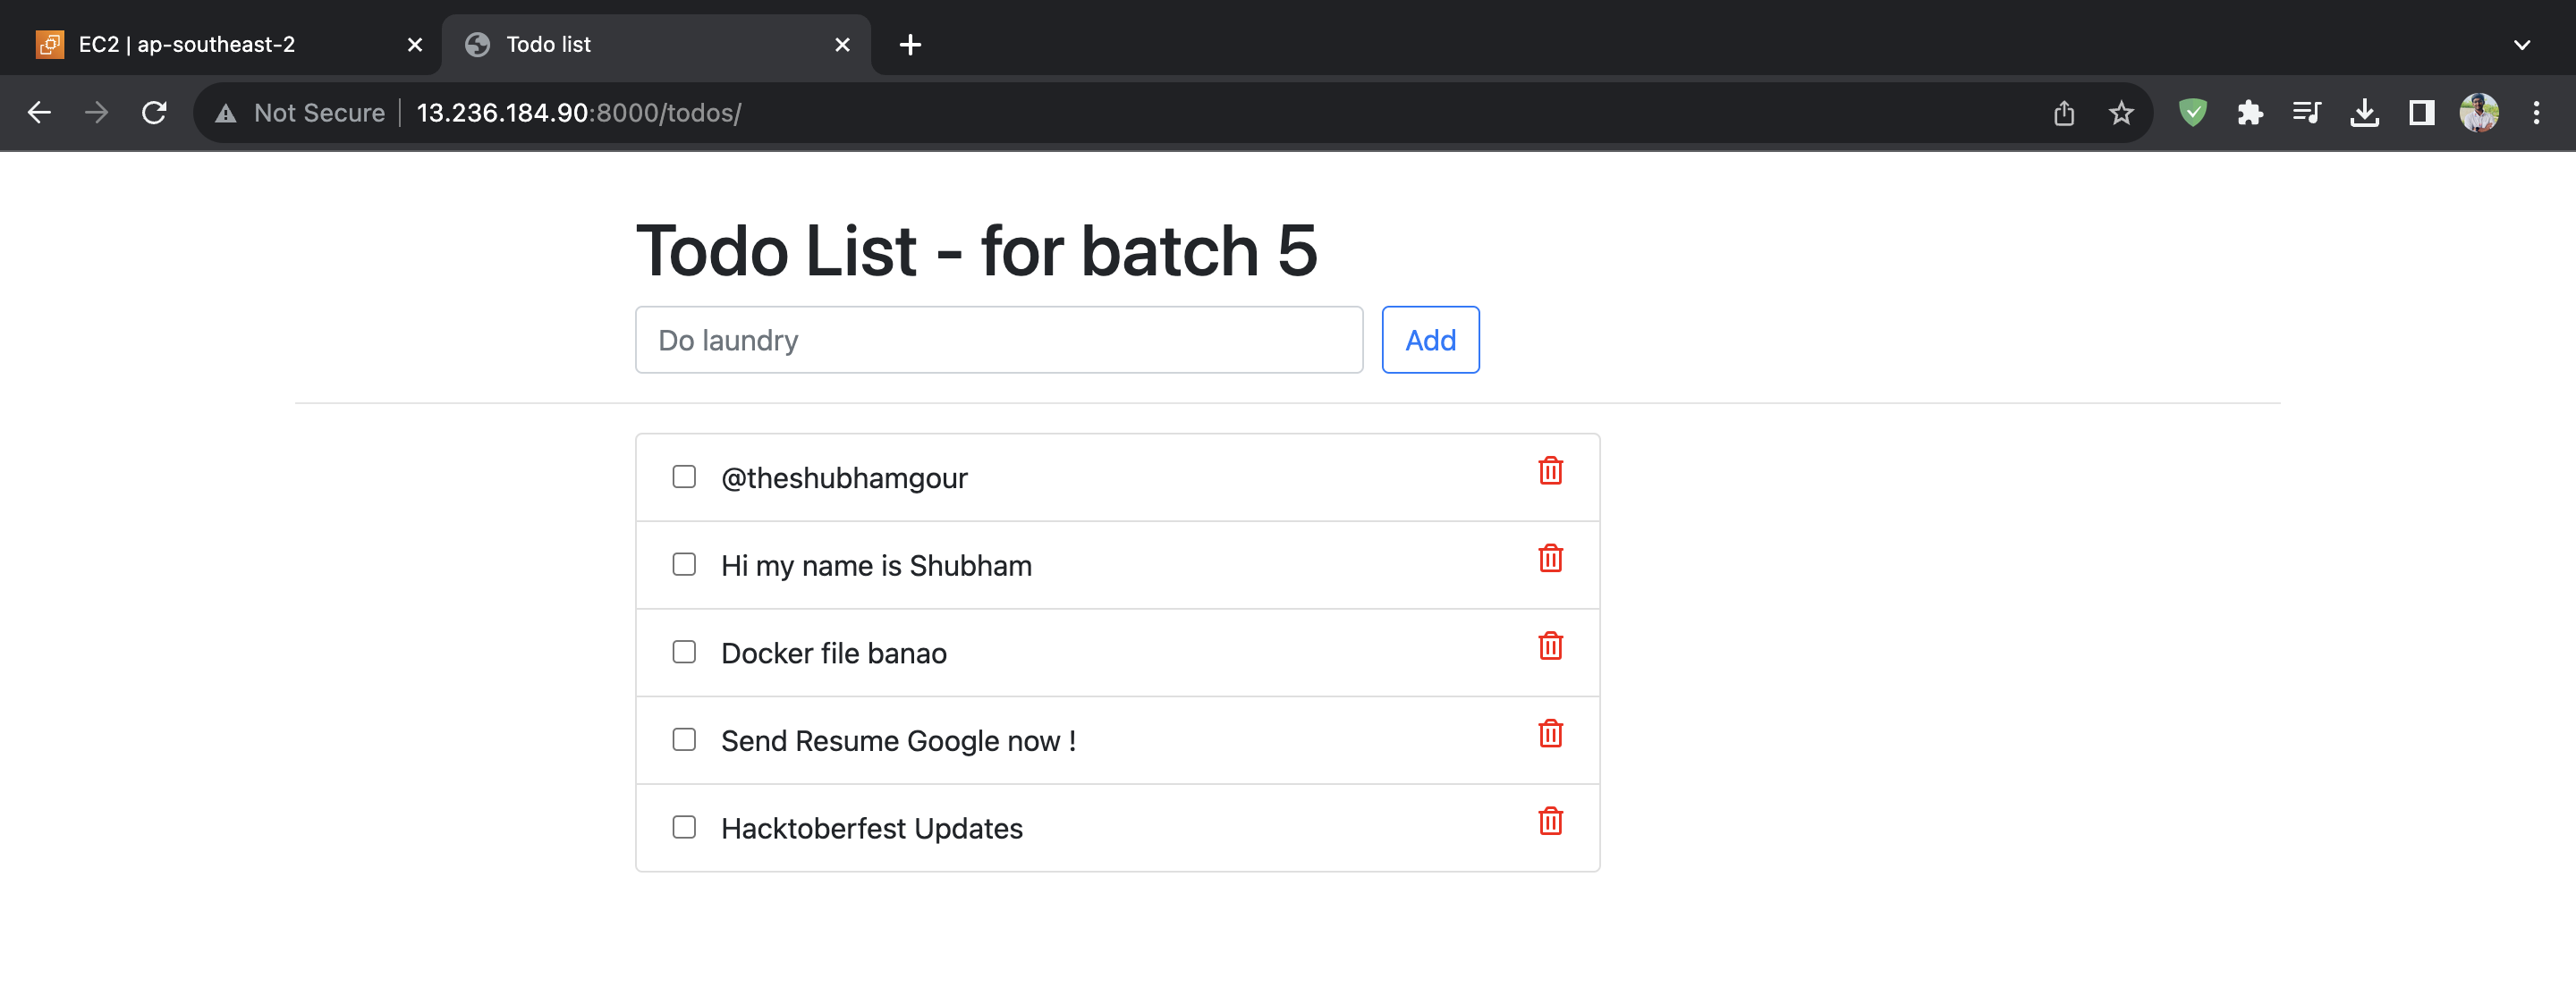
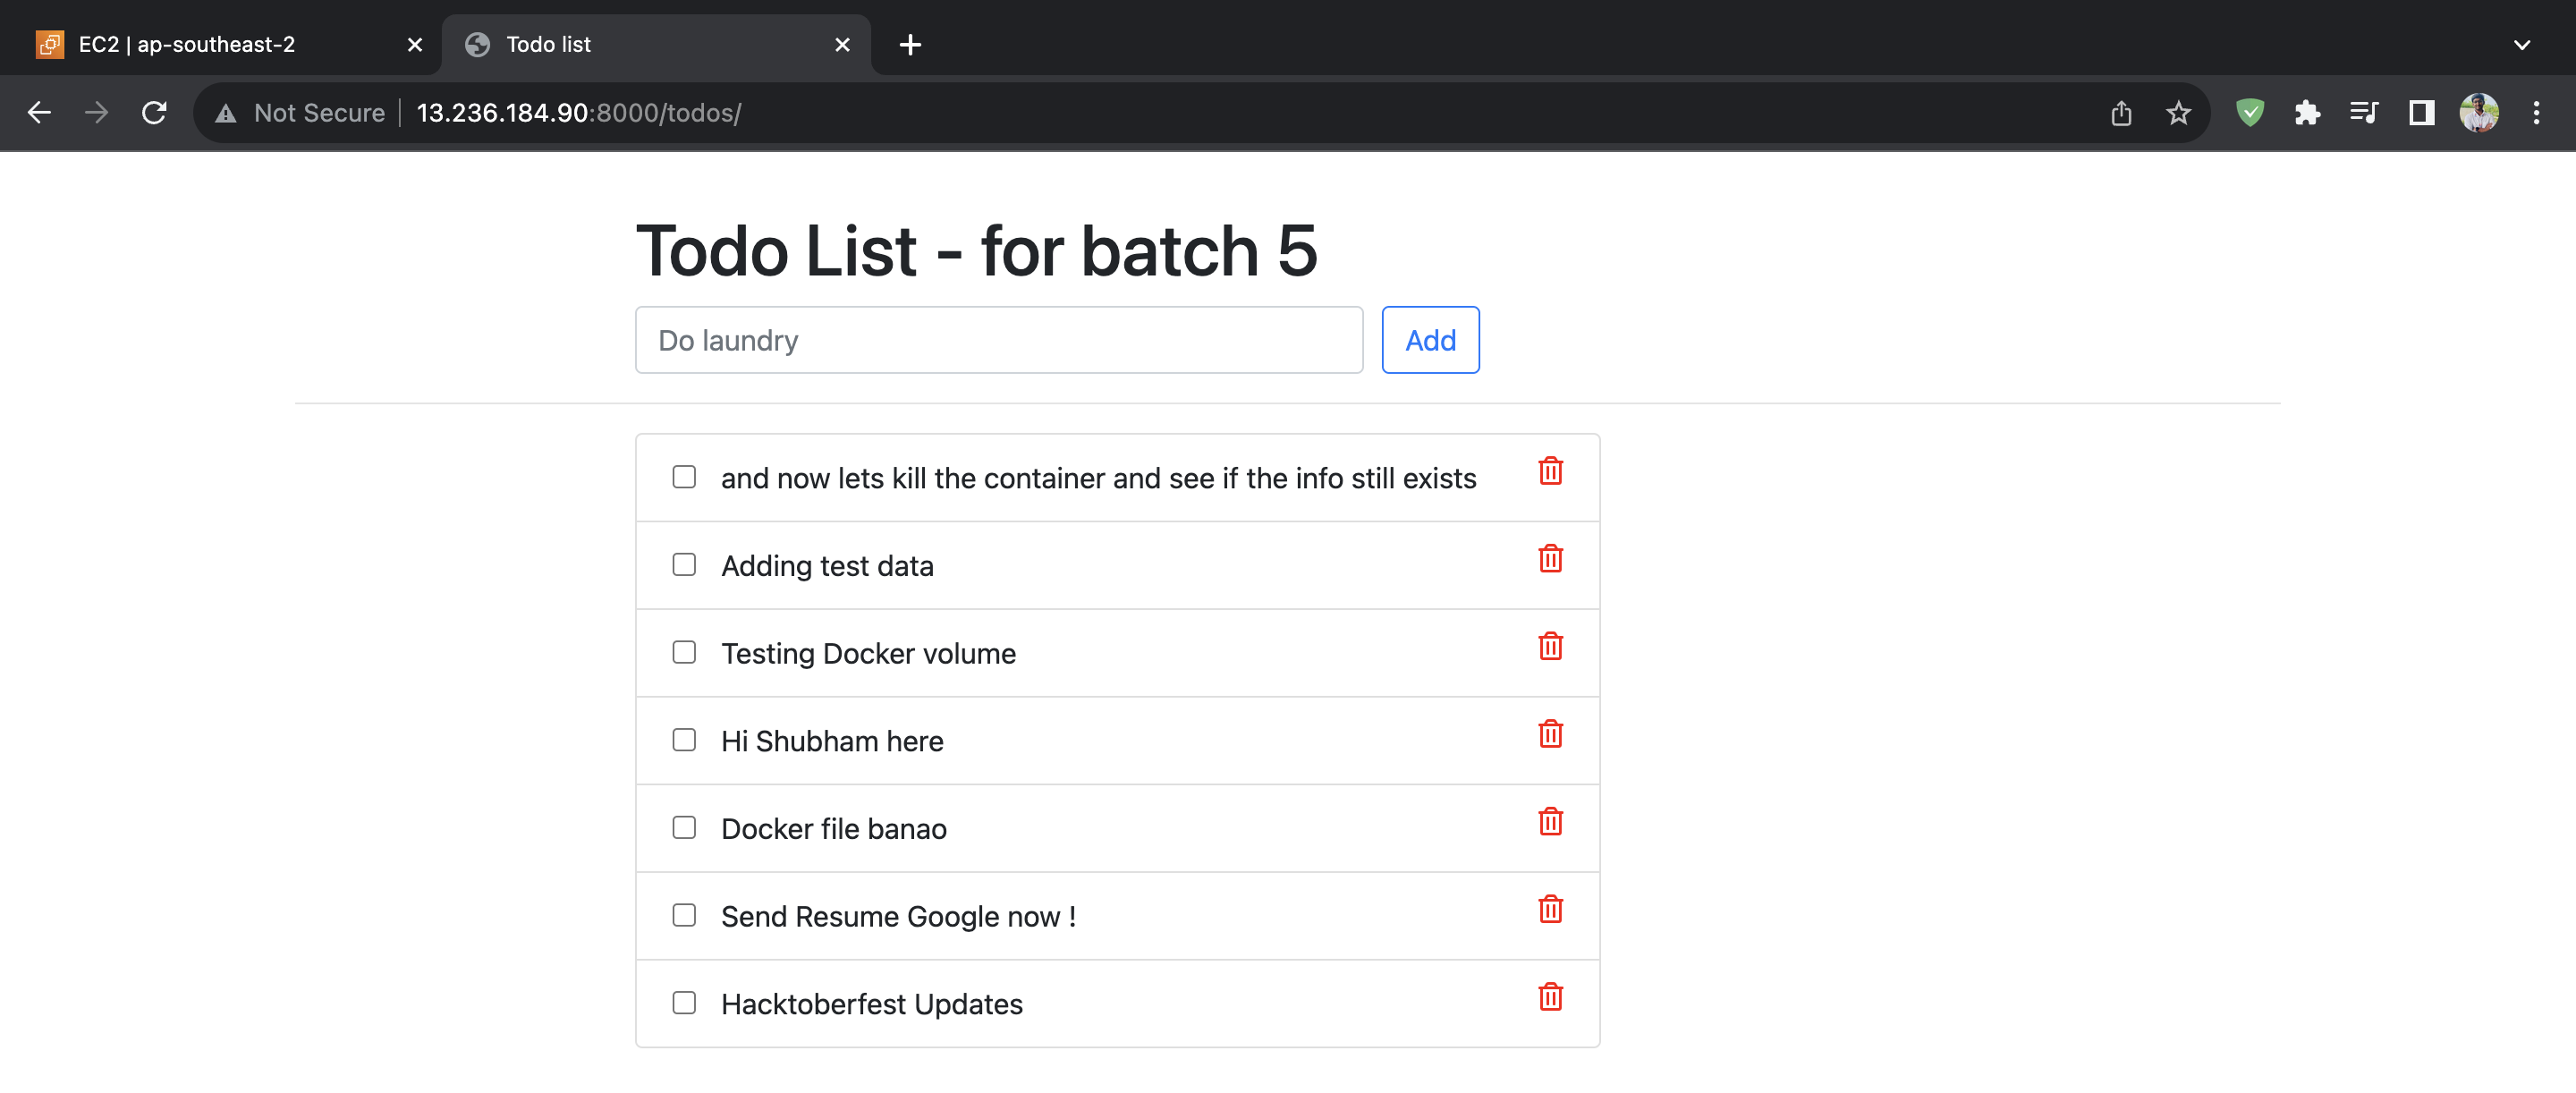
Now visit the volumes directory you will see the files

Now add the data in the todo app
Let's kill the container
docker kill <container-id>
docker rm <container-id>
Now let again run the docker file again and check whether the data is still present on gone
docker run -d -p 8000:8000 --mount source=django-todo-volume,target=/data django-todo-app:latest

BOOM we made it!!
Conclusion
In summary, creating a Docker volume for our Django application has proven to be a crucial step in preserving and securing application data. By implementing a named volume, "django-todo-volume," and utilizing bind mounts, we've established a robust mechanism to protect our data from removal or loss even when containers are updated or removed. Docker volumes not only enhance data integrity but also streamline the deployment and management of our containerized application. This practice ensures a persistent and reliable foundation for our Dockerized Django app, safeguarding its valuable data assets in the ever-changing landscape of container orchestration.


