Day #6: File Permissions and Access Control Lists

Release Management Professional | Transitioning to DevOps
With a proven track record in Release Management, I'm on an exciting journey to transition into the world of DevOps. I specialize in orchestrating the smooth deployment of software and applications, and I'm now gearing up to bridge the gap between development and operations.
My passion lies in optimizing release processes, automating deployments, and ensuring the efficiency of IT operations. I'm actively enhancing my skill set in DevOps practices, including cloud technologies, scripting, and CI/CD pipelines.
I'm keen to connect with professionals who share this enthusiasm and explore opportunities for mutual growth and collaboration in the DevOps domain. Let's connect and exchange insights about the evolving landscapes of Release Management and DevOps!
#ReleaseManagement #DevOps #EfficiencyOptimization
Linux is known for its robust security features, and a fundamental aspect of this security is the management of file permissions and ownership. In this guide, we'll delve into the world of Linux file permissions and ownership, breaking down the concepts into simple terms and providing practical examples.
The Basics of Linux File Permissions
In Linux, every file and directory comes with a set of permissions that control who can read, write, and execute them. These permissions are divided into three categories of users:
Owner: This is the user who created the file. The owner has the most control over the file and can modify its permissions and ownership.
Group: Files and directories belong to a specific group, and all users in that group share the associated permissions.
Others: This category includes all users who don't fall into the owner or group categories. These are users who have access to the system but aren't part of the group.
Checking File Permissions
To understand file permissions, let's create a simple file and use the ls -ltr command to view its details. Here's how to do it:
Create a File: You can create a new file using the
touchcommand. For example:[root@ip-172-31-1-21 ec2-user]# touch content.txtCheck File Details: Use
ls -ltrto list files in long format, including details like permissions, ownership, and more:[root@ip-172-31-1-21 ec2-user]# ls -ltr

This command will show you information about the newly created file, including its permissions.
Changing Ownership and Group
Changing Ownership (chown)
The chown command is used to change the ownership of a file or directory. For instance, if you want to change the owner of a file named content.txt to a user named newUser, you would use the following command:
[root@ip-172-31-1-21 ec2-user]# useradd newUser
[root@ip-172-31-1-21 ec2-user]# chown newUser content.txt

Changing Group (chgrp)
Similarly, you can change the group ownership of a file or directory using the chgrp command. To change the group of content.txt to a group named newGroup, use the following command:
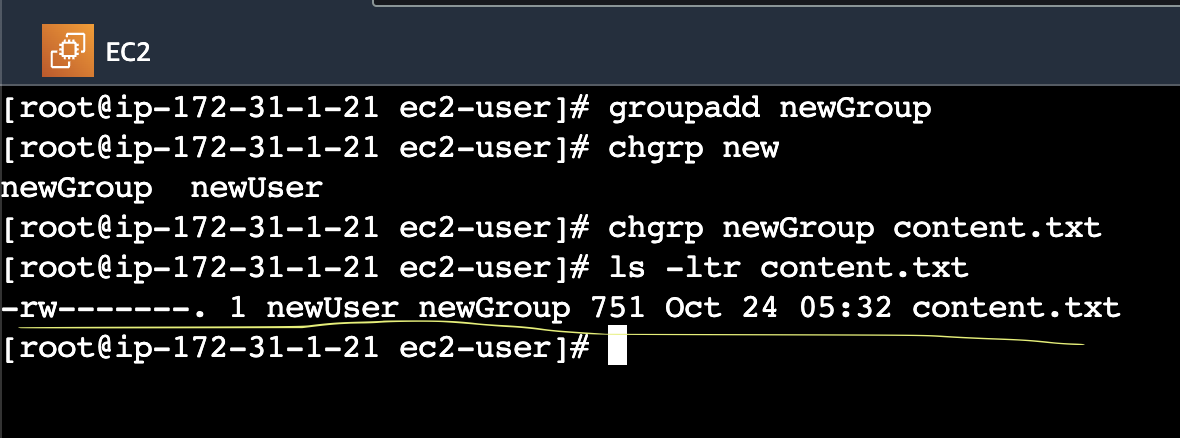
[root@ip-172-31-1-21 ec2-user]# groupadd newGroup
[root@ip-172-31-1-21 ec2-user]# chgrp new
[root@ip-172-31-1-21 ec2-user]# chgrp newGroup content.txt
Modifying Permissions
Changing Permissions (chmod)
The chmod command allows you to modify the permissions of a file or directory. Permissions can be specified using a three-digit octal number or by using symbolic notation.
For example, to give the owner read and write permissions while allowing the group and others to read-only, you can use the symbolic notation as follows:
[root@ip-172-31-1-21 ec2-user]# chmod u=rw,go=r content.txt

Practical Exercise
Let's put this knowledge to use with a practical example. Create a simple file and list its details using ls -ltr. You'll notice the permissions, ownership, and group associated with the file.
Next, try changing the user permissions of the file using the chmod command and note the changes after running ls -ltr again.
Step 1: Create a Simple File
First, let's create a simple text file named myFile.txt using the touch command:
[root@ip-172-31-1-21 ec2-user]# touch myFile.txt
Step 2: Check File Details
Now, let's use the ls -ltr command to list files in long format and view the details, including permissions, ownership, and group associated with the file:
[root@ip-172-31-1-21 ec2-user]# ls -ltr myFile.txt

You will see an output similar to the above, where the details of the myFile.txt are displayed
rw-r--r--: These are the permissions for the owner, group, and others, respectively.root: The owner of the file.root: The group that owns the file.
Step 3: Change User Permissions
Now, let's change the user permissions for the file using the chmod command. To give the owner read and write permissions while allowing the group and others to have read-only access, you can use the following command:
[root@ip-172-31-1-21 ec2-user]# chmod u=rw,go=r myFile.txt
This command translates as:
u=rw: Give read and write permissions to the owner.go=r: Give read-only permissions to the group and others.
Step 4: Check File Details Again
After changing the permissions, let's run ls -ltr again to see the updated permissions:
[root@ip-172-31-1-21 ec2-user]# ls -ltr myFile.txt
You'll notice that the permissions for myFile.txt has changed to reflect the modifications you made. The output might now look like the below:
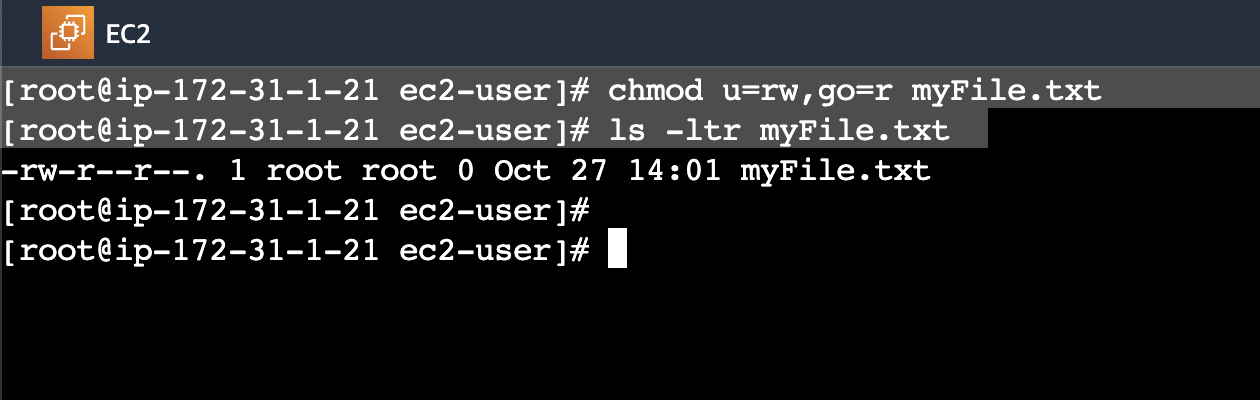
The owner (root) has read and write permissions (rw), while the group and others have read-only permissions (r).
You've successfully created a file, inspected its details, changed user permissions, and observed the changes. This hands-on experience reinforces your understanding of Linux file permissions.
Understanding Advanced Concepts
Access Control Lists (ACL)
ACLs extend the traditional file permission system by allowing you to set permissions for individual users or groups, making it more flexible and suitable for complex access control requirements. An ACL can be applied to files and directories, and it provides additional entries beyond the standard user, group, and others.
Using getfacl to View ACLs
The getfacl command is used to display the ACLs for a file or directory. Here's how you can use it:
To view the ACL of a file, simply run:
getfacl /path/to/your/file
For example, if you want to view the ACL of a file named myFile.txt located in your home directory, you would use:
[root@ip-172-31-1-21 ec2-user]# getfacl myFile.txt
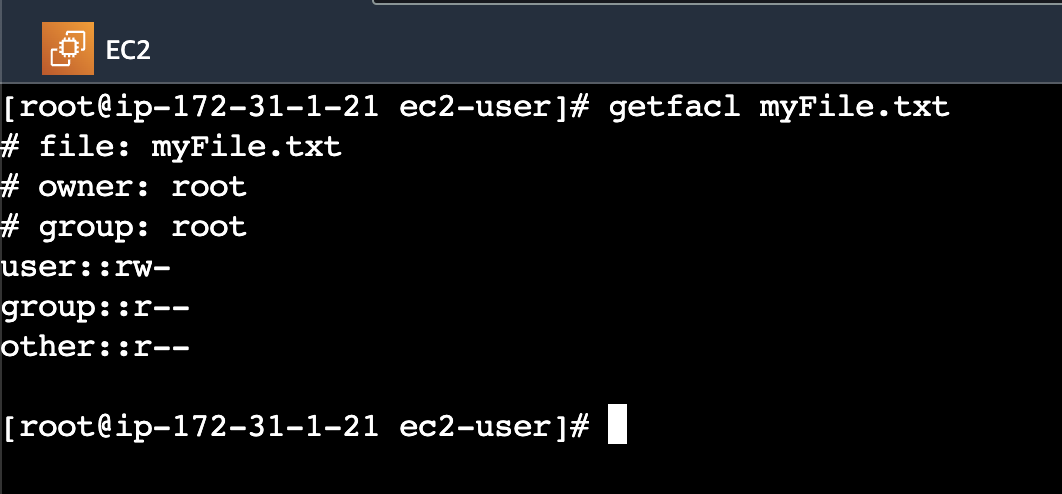
The getfacl command will display the ACL entries for the specified file, including the owner, group, and additional users or groups with specific permissions.
Using setfacl to Modify ACLs
The setfacl command is used to set or modify ACL entries for a file or directory. You can use it to add, modify, or remove ACL entries. Here's the basic syntax:
setfacl -m user:userA:permissions /path/to/your/file
user:userAis the user or group to which you want to grant or modify permissions.permissionsare the permissions you want to set, such asrfor read,wfor write, andxfor execute.
For example, if you want to grant user shubham read and write permissions to the file myFile.txt, you would use:
[root@ip-172-31-1-21 ec2-user]# setfacl -m user:shubham:rw myFile.txt

The setfacl command can also be used to remove ACL entries. To remove all permissions for shubham, you can use:
[root@ip-172-31-1-21 ec2-user]# setfacl -x user:shubham myFile.txt

Conclusion
Linux file permissions and ownership are essential components of system security. Understanding how to manage them is crucial for maintaining a secure and organized Linux environment. With practice and exploration, you can harness the power of file permissions and effectively control access to your files and directories.


