Day #5: Advanced Linux and Shell Scripting with User management

Release Management Professional | Transitioning to DevOps
With a proven track record in Release Management, I'm on an exciting journey to transition into the world of DevOps. I specialize in orchestrating the smooth deployment of software and applications, and I'm now gearing up to bridge the gap between development and operations.
My passion lies in optimizing release processes, automating deployments, and ensuring the efficiency of IT operations. I'm actively enhancing my skill set in DevOps practices, including cloud technologies, scripting, and CI/CD pipelines.
I'm keen to connect with professionals who share this enthusiasm and explore opportunities for mutual growth and collaboration in the DevOps domain. Let's connect and exchange insights about the evolving landscapes of Release Management and DevOps!
#ReleaseManagement #DevOps #EfficiencyOptimization
Hello and welcome to #90DaysOfDevOps! In this blog, we'll delve into the realm of Bash scripting and its critical role in DevOps. We'll tackle four essential tasks to enhance your DevOps skills. Let's get started!
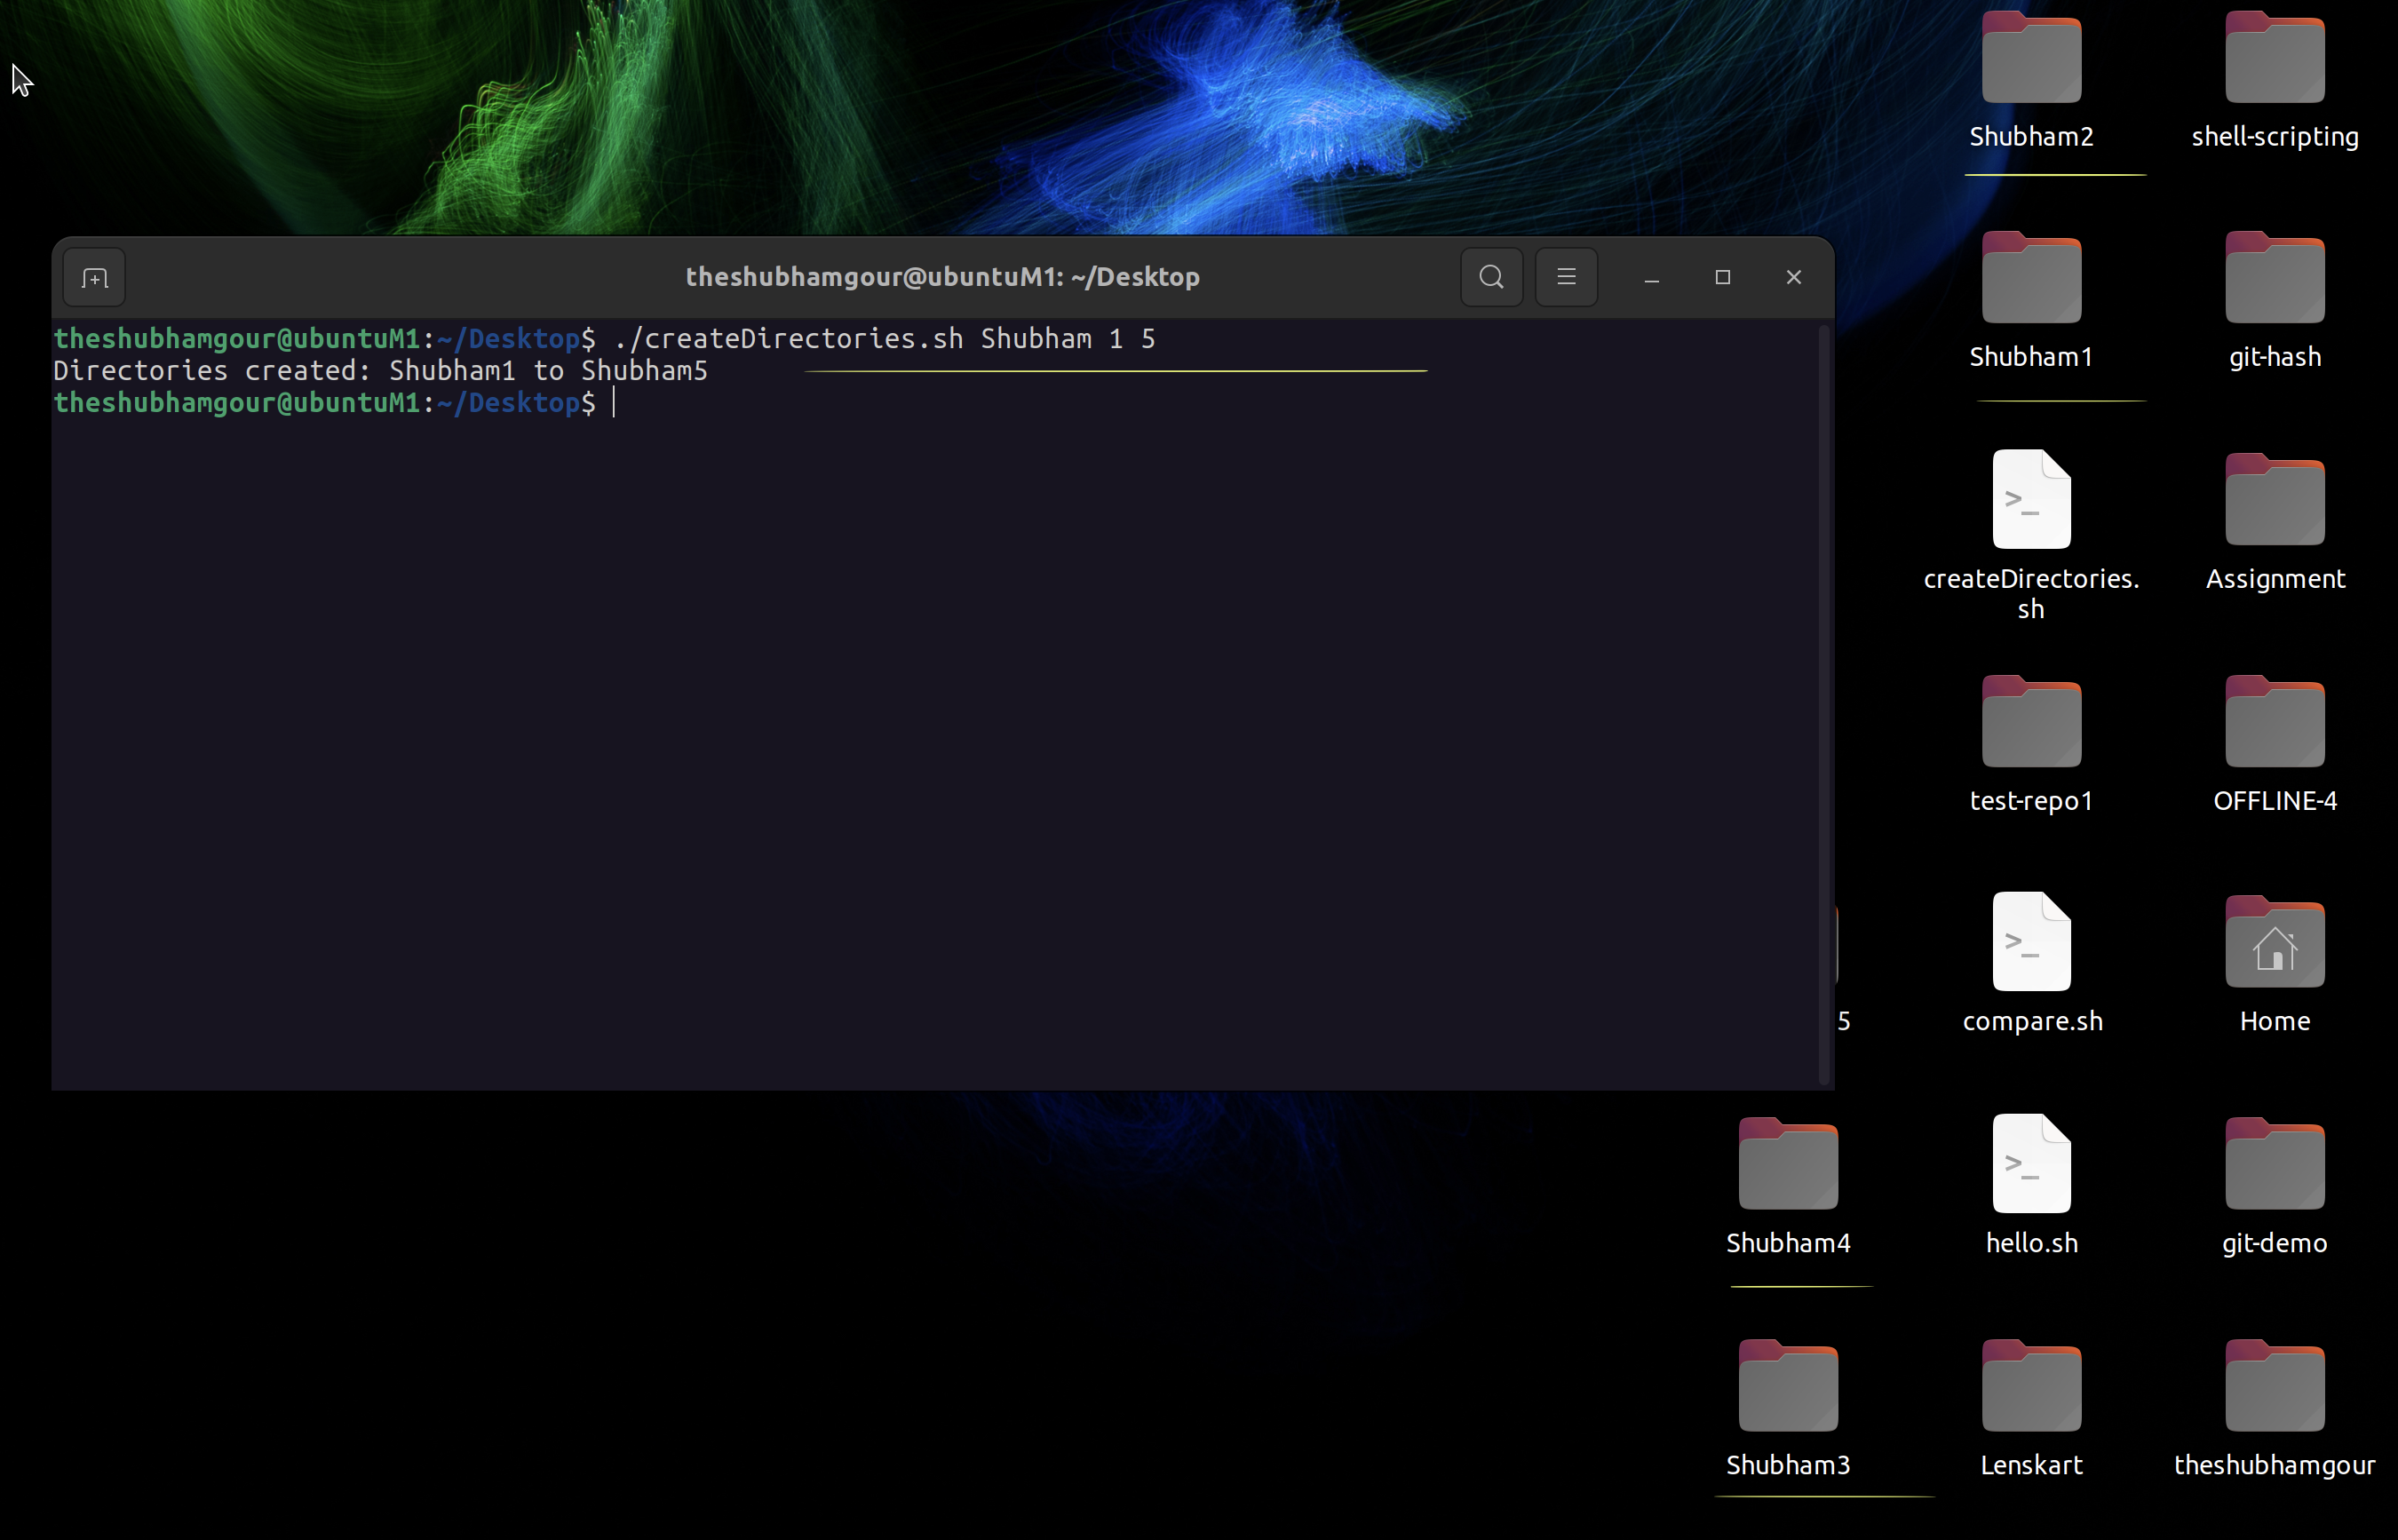
Task 1: Creating Directories with Dynamic Names
Write a bash script create directories.sh , when the script is executed with three given arguments (one is the directory name and second is start number of directories and the third is the end number of directories ) it creates a specified number of directories with a dynamic directory name.
Example : When the script is executed as
./createDirectories.sh day 1 90
then it creates 90 directories as day1 day2 day3 .... day90
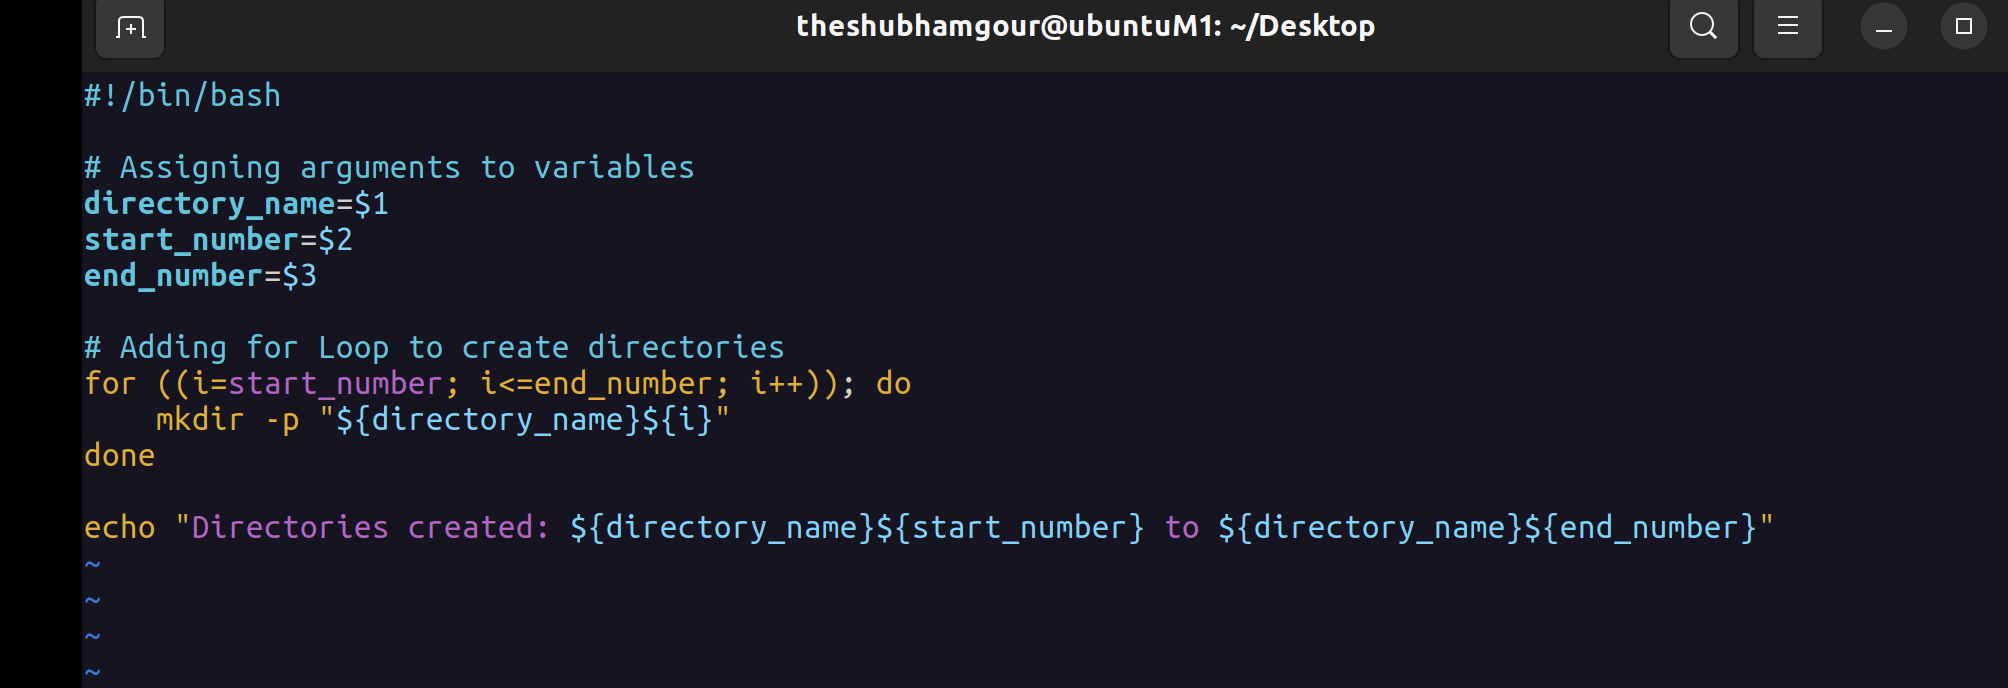
#!/bin/bash

# Assigning arguments to variables
directory_name=$1
start_number=$2
end_number=$3

# Adding for Loop to create directories
for ((i=start_number; i<=end_number; i++)); do
    mkdir -p "${directory_name}${i}"
done

echo "Directories created: ${directory_name}${start_number} to ${directory_name}${end_number}"
theshubhamgour@ubuntuM1:~/Desktop$ chmod 777 createDirectories.sh
`jo2X9
Task 2: Automating Backups
We'll create a Bash script named backup.sh to create backups of specific directories or files. The script takes a source directory and a destination directory as arguments and copies the contents from the source to the destination.
theshubhamgour@ubuntuM1:~/Desktop$ ./backup.sh /home/theshubhamgour/Desktop/Assignment/ /home/theshubhamgour/Downloads/

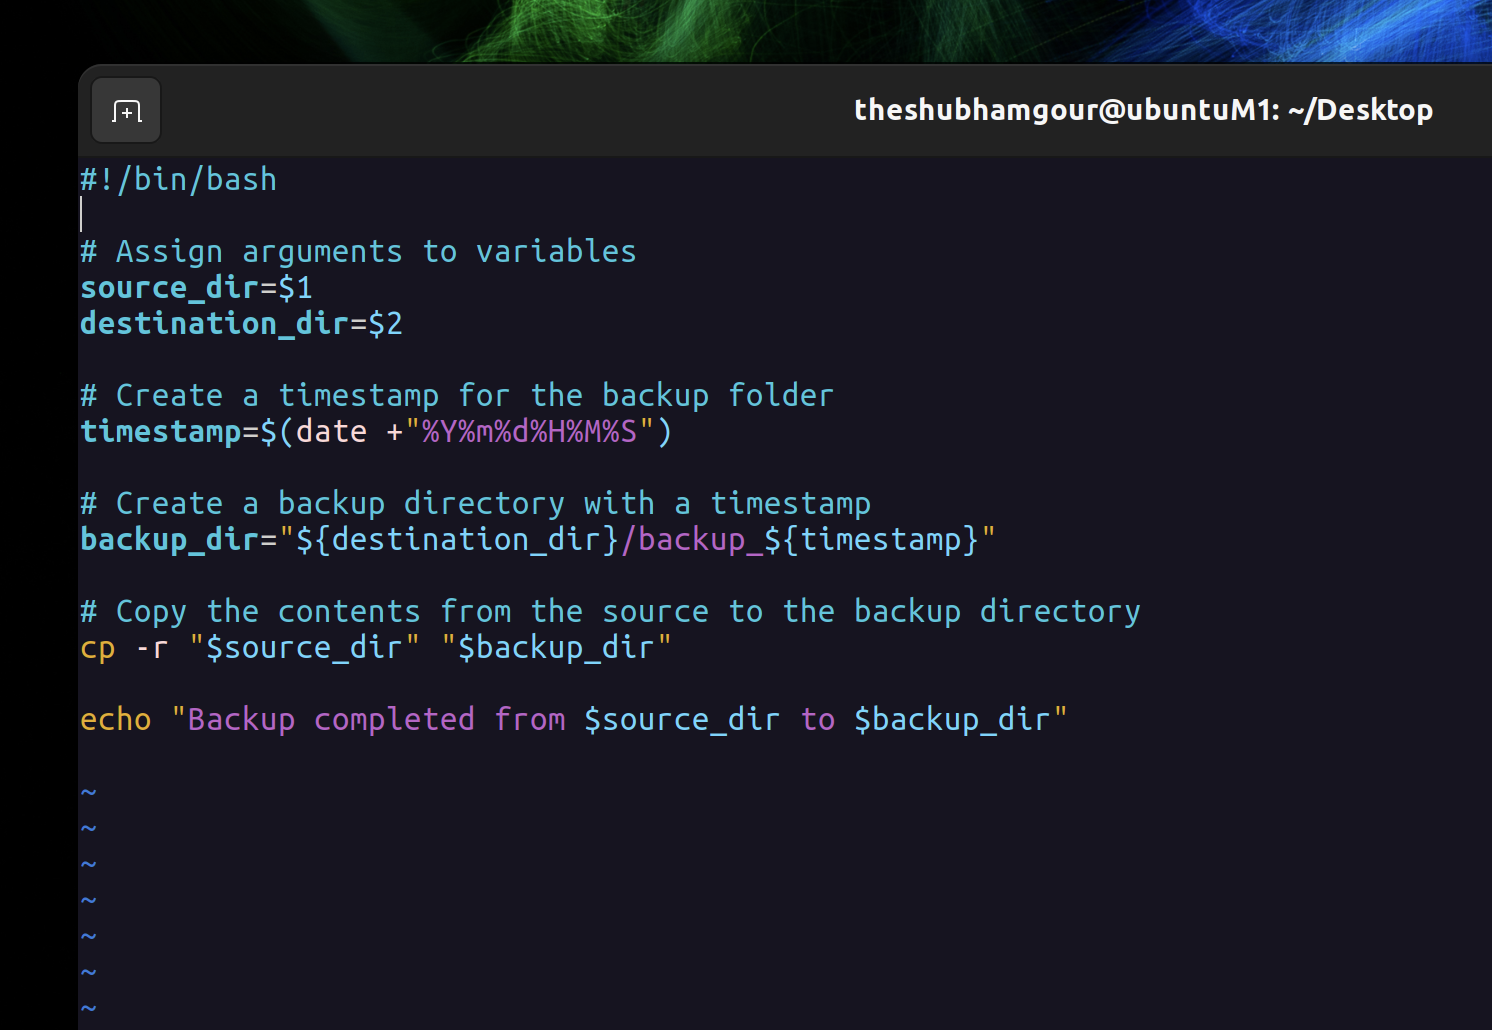
#!/bin/bash

# Assign arguments to variables
source_dir=$1
destination_dir=$2

# Create a timestamp for the backup folder
timestamp=$(date +"%Y%m%d%H%M%S")

# Create a backup directory with a timestamp
backup_dir="${destination_dir}/backup_${timestamp}"

# Copy the contents from the source to the backup directory
cp -r "$source_dir" "$backup_dir"

echo "Backup completed from $source_dir to $backup_dir"
Task 3: Automating Backups with Cron
To further enhance the automation of backups, you can use Cron, a scheduling tool in Linux. Cron allows you to schedule tasks to run at specific times or intervals.
What is Cron ?
Cron is a time-based job scheduler in Unix-like operating systems. It allows you to schedule tasks to run at specific times or intervals. These tasks can include running scripts, performing backups, sending emails, and much more.
Cron operates in the background and runs tasks automatically based on a predefined schedule. The schedule is defined in a configuration file, typically called crontab, which contains entries that specify when and how often a task should be executed.
What is Crontab?
Crontab is the command used to interact with the Cron daemon. With crontab, you can list, edit, and manage scheduled tasks. Each user on a Unix-based system can have their own crontab, and system-wide cron jobs can also be defined.
Here's a basic overview of how to use Crontab to automate your backup script:
Open the Crontab for Editing: To create or edit your crontab, you can use the following command:
theshubhamgour@ubuntuM1:~/Desktop$ crontab -eThis will open the user's crontab in your default text editor (usually
viornano).Define the Schedule: In the crontab file, you specify the schedule for your backup script. A typical crontab entry has five fields, representing minutes, hours, days of the month, months, and days of the week. For example:
* * * * * /home/theshubhamgour/Desktop/backup.sh /home/theshubhamgour/Desktop/git-hash /home/theshubhamgour/Desktop/git-demo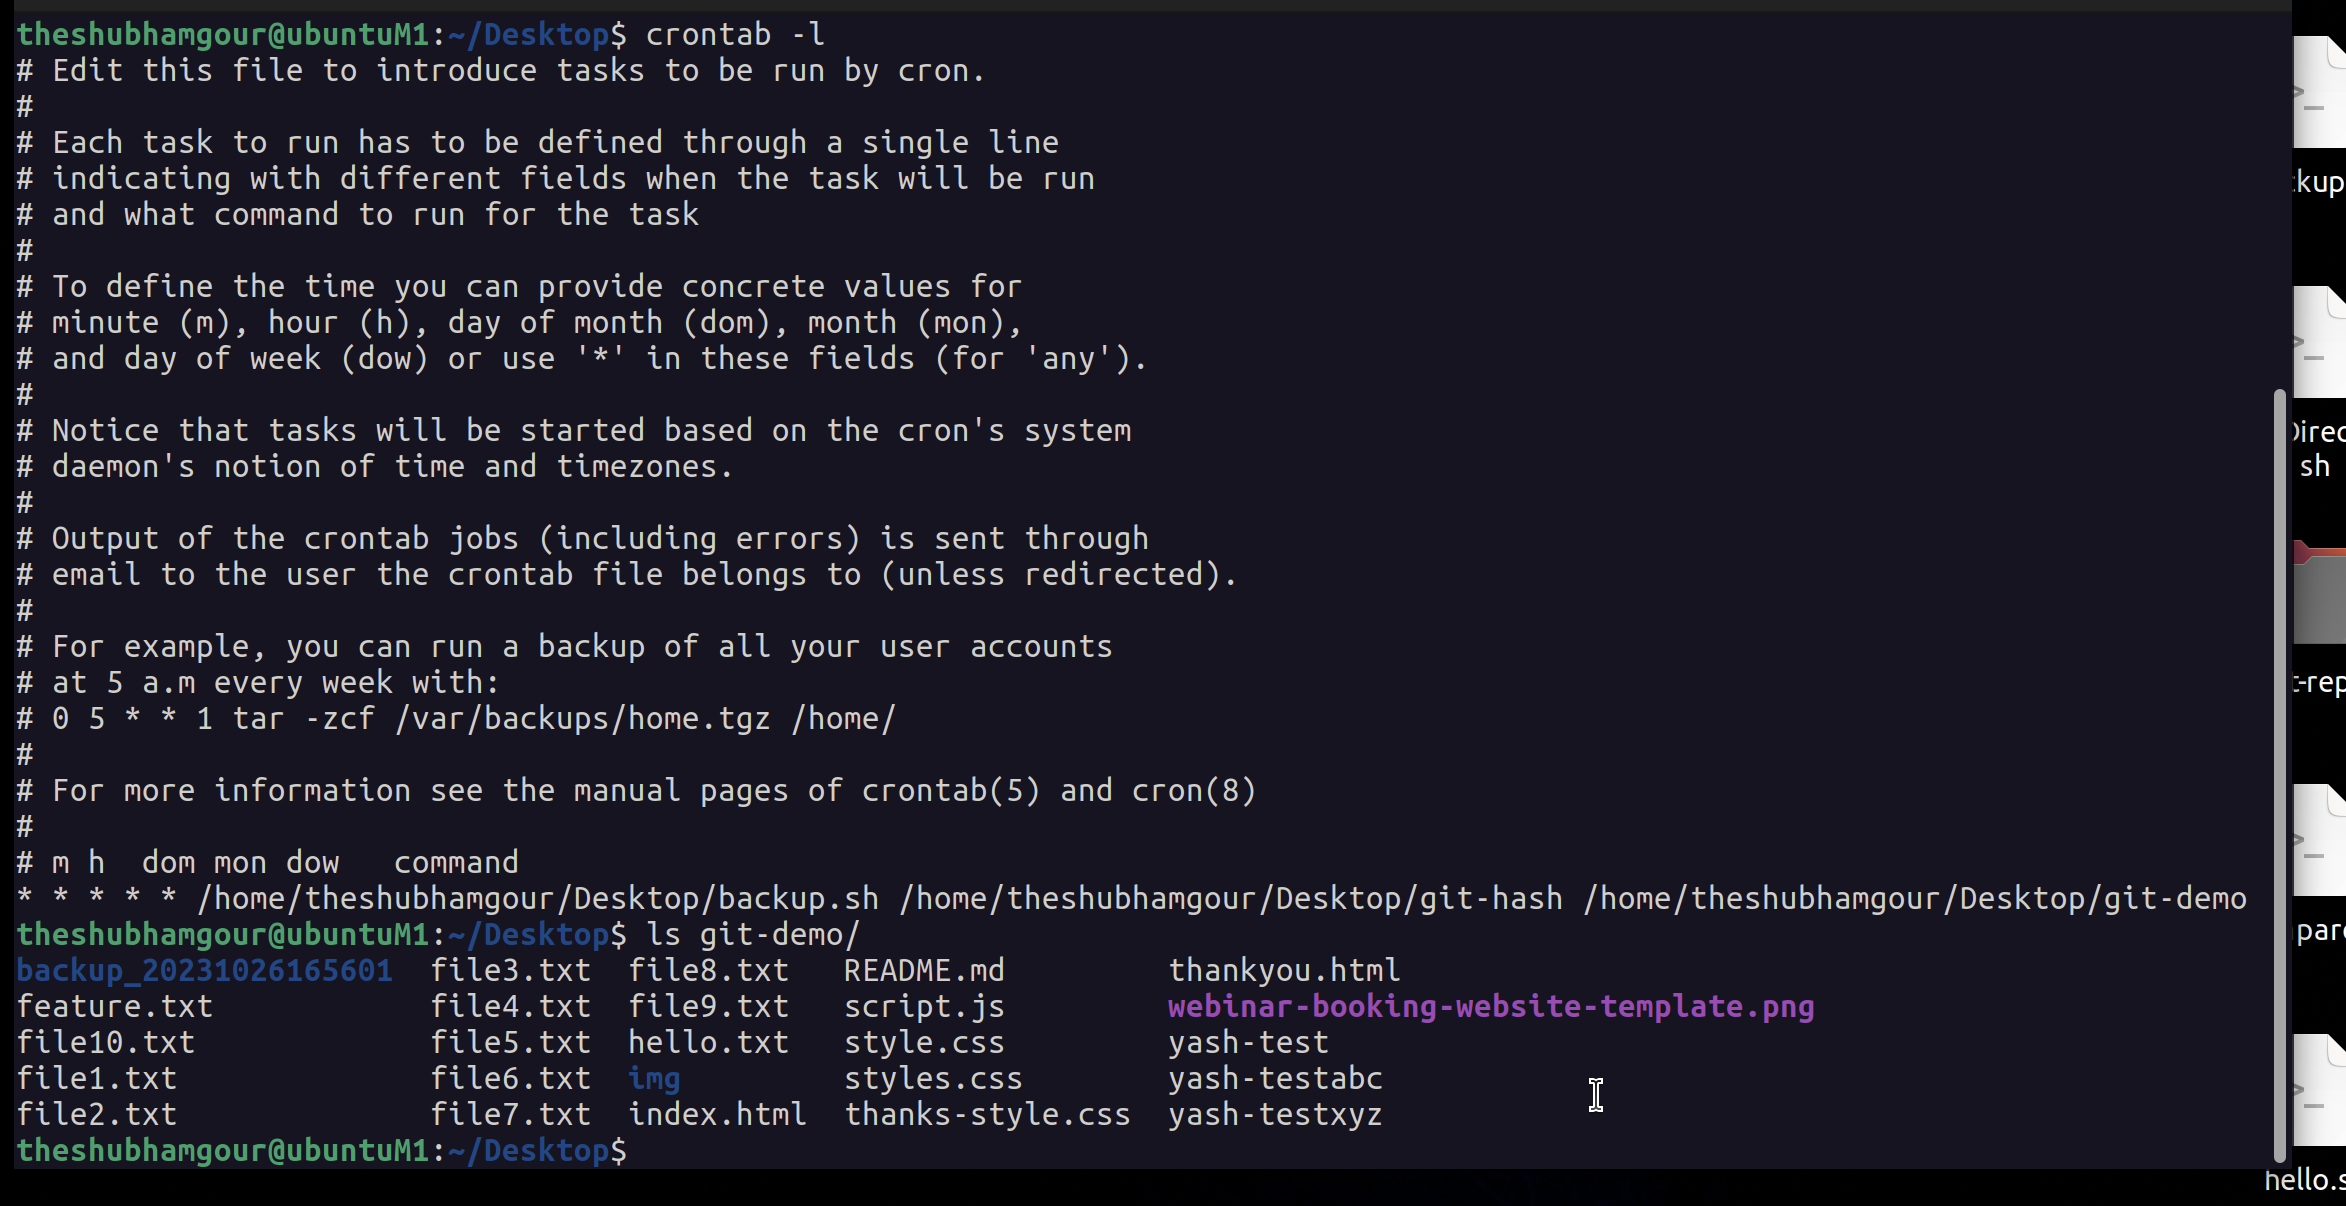
* * * * *: This is the time specification part of the crontab entry. Each asterisk (*) represents a time unit, from left to right: minutes, hours, days of the month, months, and days of the week. Using asterisks for all fields means the script will run every minute of every hour, every day, every month, and every day of the week./home/theshubhamgour/Desktop/backup.sh: This is the path to the script you want to run. It should be the absolute path to thebackup.shscript./home/theshubhamgour/Desktop/git-hashand/home/theshubhamgour/Desktop/git-demo: These are the source and destination directories that you provided as arguments to the script. The script will back up the contents of thegit-hashdirectory to thegit-demodirectory.
As a result, with this crontab entry, the backup.sh script will run every minute, copying the contents of the git-hash directory to the git-demo directory. Please ensure that the script paths and directories are correctly specified and that the script itself is designed to handle the backup process as intended.Save and Exit: Save your changes and exit the text editor. In vi, you would typically press Esc followed by :wq. In nano, you can press Ctrl+X, then Y to confirm the changes and Enter to save.
View or List Crontab Entries: To view your current crontab entries, you can use the following command:
theshubhamgour@ubuntuM1:~/Desktop$ crontab -lThis will list all the scheduled tasks for the current user.
Remove Crontab Entries: To remove all your scheduled tasks, you can use the following command:
theshubhamgour@ubuntuM1:~/Desktop$ crontab -rBe cautious when using this command, as it will delete all your scheduled tasks.
Cron provides a flexible and powerful way to automate tasks, making it a valuable tool for scheduling regular backups, log rotation, and other routine activities in a DevOps or system administration context. It's essential to understand the syntax of crontab entries and to regularly check the execution of your scheduled tasks to ensure they are running as expected.
Task 4: Create 2 users and just display their Usernames
To create two users and display their usernames in a Linux-based operating system, you can use the useradd command to create the users and then use the /etc/passwd file to extract their usernames.
Open a terminal on your Linux system.
To create a user, use the
useraddcommand. For example, to create two users nameduser1anduser2, you can run:theshubhamgour@ubuntuM1:~/Desktop$ sudo useradd shubham theshubhamgour@ubuntuM1:~/Desktop$ sudo useradd siddharth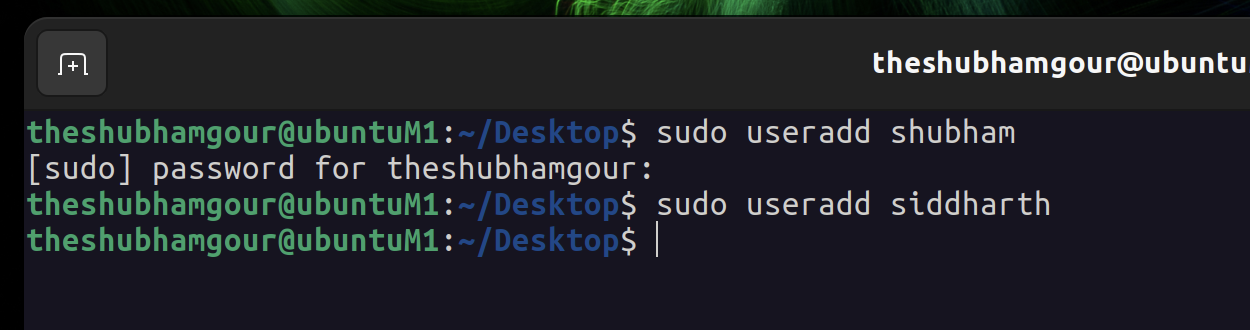
You'll need superuser privileges (sudo) to create new users.
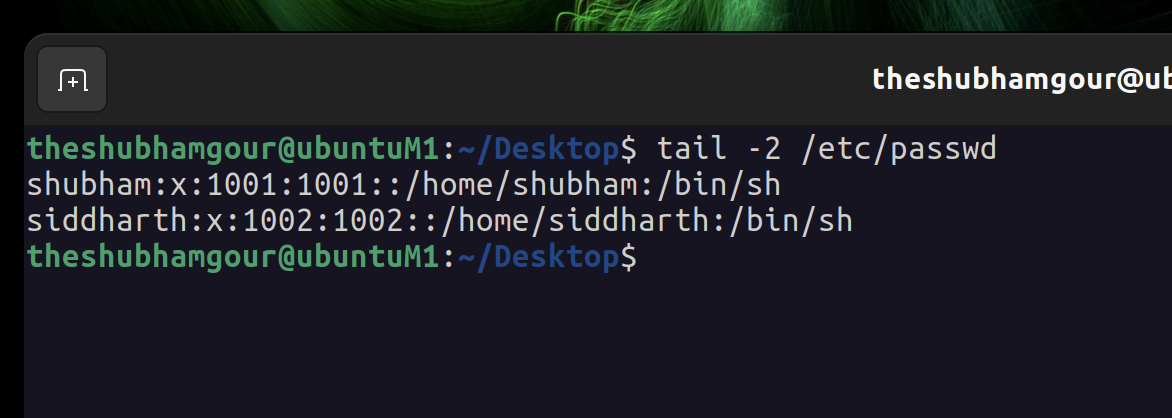
Now to validate whether the users are created you will need to execute the below command :
theshubhamgour@ubuntuM1:~/Desktop$ tail -2 /etc/passwd
Conclusion
In this blog covered the creation of dynamic directories using a Bash script and the importance of backups in DevOps. We discussed scheduling tasks with Cron and the fundamentals of user management in a Linux system.


