


![Dockerize Your World: A Hands-On Lab [A Beginner friendly guide]](https://cdn.hashnode.com/res/hashnode/image/stock/unsplash/HSACbYjZsqQ/upload/61181f955f97cd9b83157058c2fcf6e1.jpeg?w=1600&h=840&fit=crop&crop=entropy&auto=compress,format&format=webp)

Table of contents
Introduction
Docker is a revolutionary open-source platform that empowers developers to effortlessly build, package, and deploy applications using containers. Picture containers as compact, self-contained units that encapsulate everything your software needs to run, from dependencies to configurations. This exceptional portability allows you to seamlessly move your applications between different environments.
In this immersive hands-on lab, I'll guide you through the exciting world of Docker. Together, we'll embark on a journey where you'll learn how to create and run your first containerized application. We'll delve into the fundamentals of Docker architecture, explore essential commands, and master workflows that will boost your productivity.
Are you ready to unlock the remarkable potential of Docker? Let's dive in and harness the power of containers to streamline your development process and supercharge your application deployment!
Prerequisite
If you're eager to explore the wonders of Docker in a cloud environment, there are a few things you'll need to have in place beforehand. Don't worry, I'll walk you through it all in a friendly and approachable way!
AWS Account: To dive into Docker in the cloud, you'll need an AWS (Amazon Web Services) account. If you don't have one yet, no worries! Simply head over to the AWS website and sign up for an account. It's quick and easy, I promise!
Cloud Know-How: It's handy to have some basic knowledge of cloud computing concepts. Don't fret if you're not an expert just yet. Familiarize yourself with terms like virtual machines (EC2 instances), storage options (S3, EBS), and networking concepts (VPC, subnets). Trust me, it'll make your Docker cloud journey even more enjoyable!
Command-Line Confidence: We'll be using the AWS Command-Line Interface (CLI) and Docker Command-Line Interface (CLI) to manage and interact with our cloud resources and Docker containers. Don't worry if you're not a command-line wizard just yet. I'll guide you through the essential commands, and you'll be cruising along like a pro!
By fulfilling these friendly prerequisites, you'll be fully equipped to harness the immense power of Docker in the cloud. With AWS services at your fingertips, you'll effortlessly deploy, scale, and manage your containerized applications like a champ. So let's get ready, dive in, and unlock the incredible potential of Docker in the cloud. Exciting times await!
Docker Installation
First things first, let's get you signed in to your AWS console. Once you're there, we'll guide you through launching an instance with the perfect configuration. Don't worry, we've got your back!
For this setup, we recommend using the Amazon Linux Machine, which is available in the free tier account. However, if you prefer Ubuntu or RedHat (or any other flavor of Linux), feel free to go with what you like best. It's all about finding the flavor that suits your taste!
So, let's jump right in and start by signing in to your AWS console. Once you're in, we'll embark on this exciting journey of launching your instance with just the right configuration. Don't worry, it's going to be a breeze!
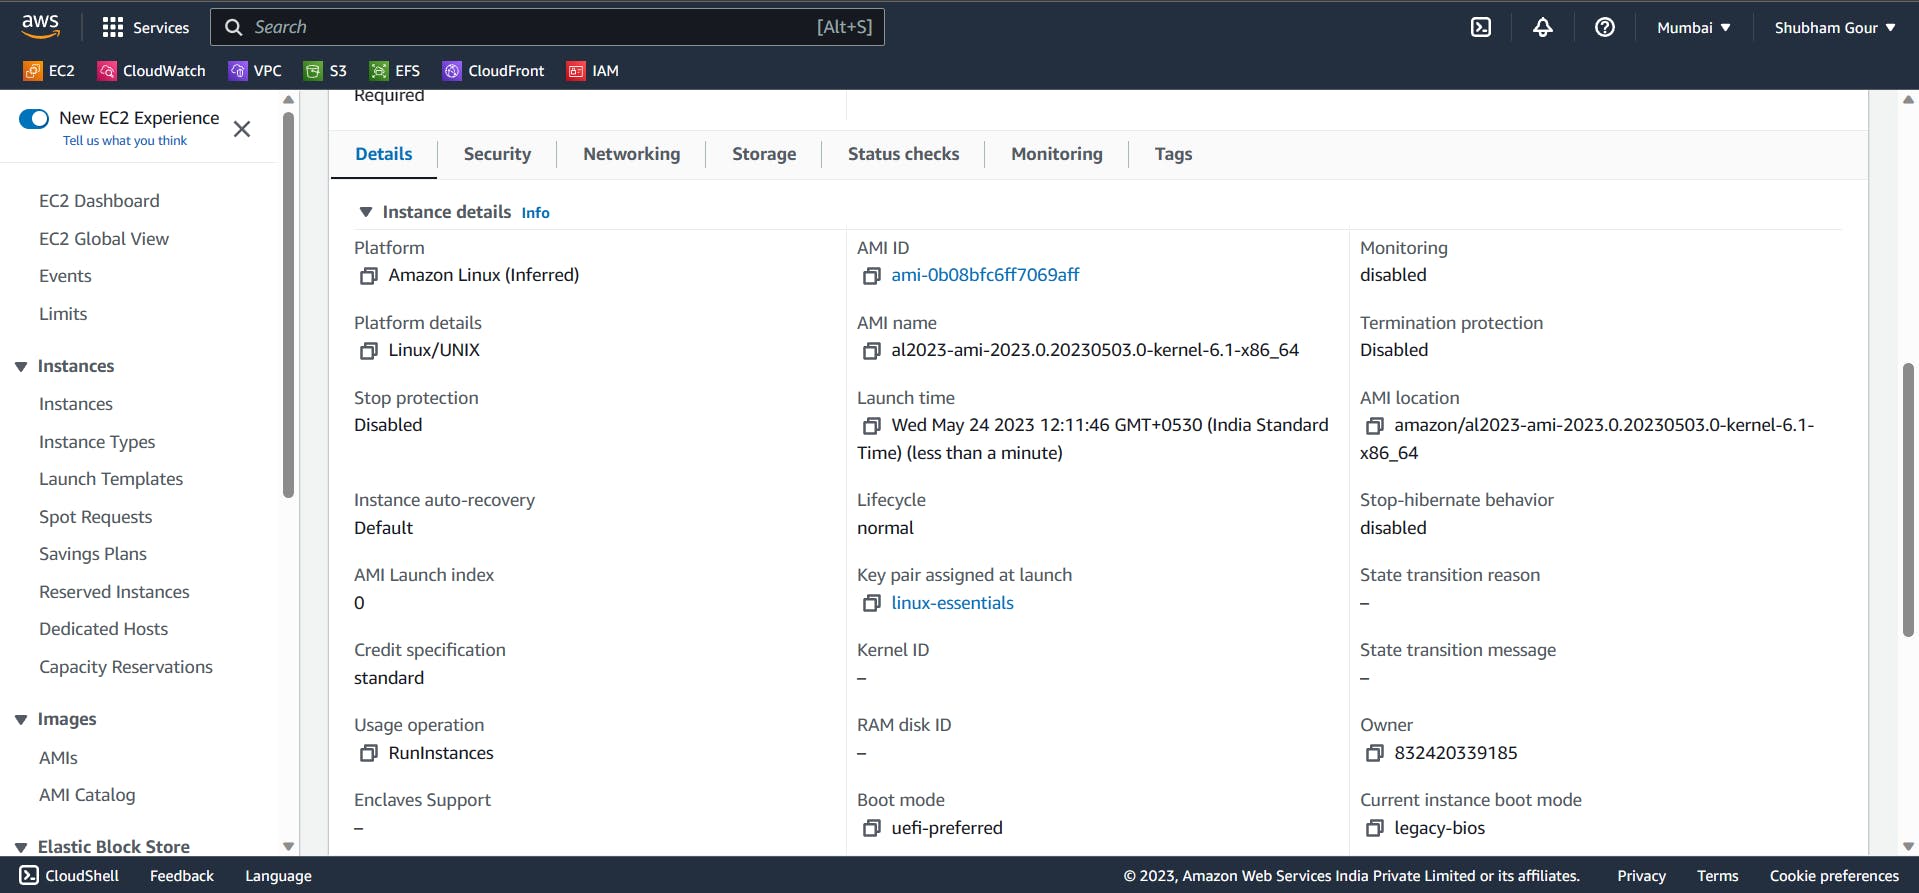
Great job on creating your instance! Now it's time to launch it and get things rolling.
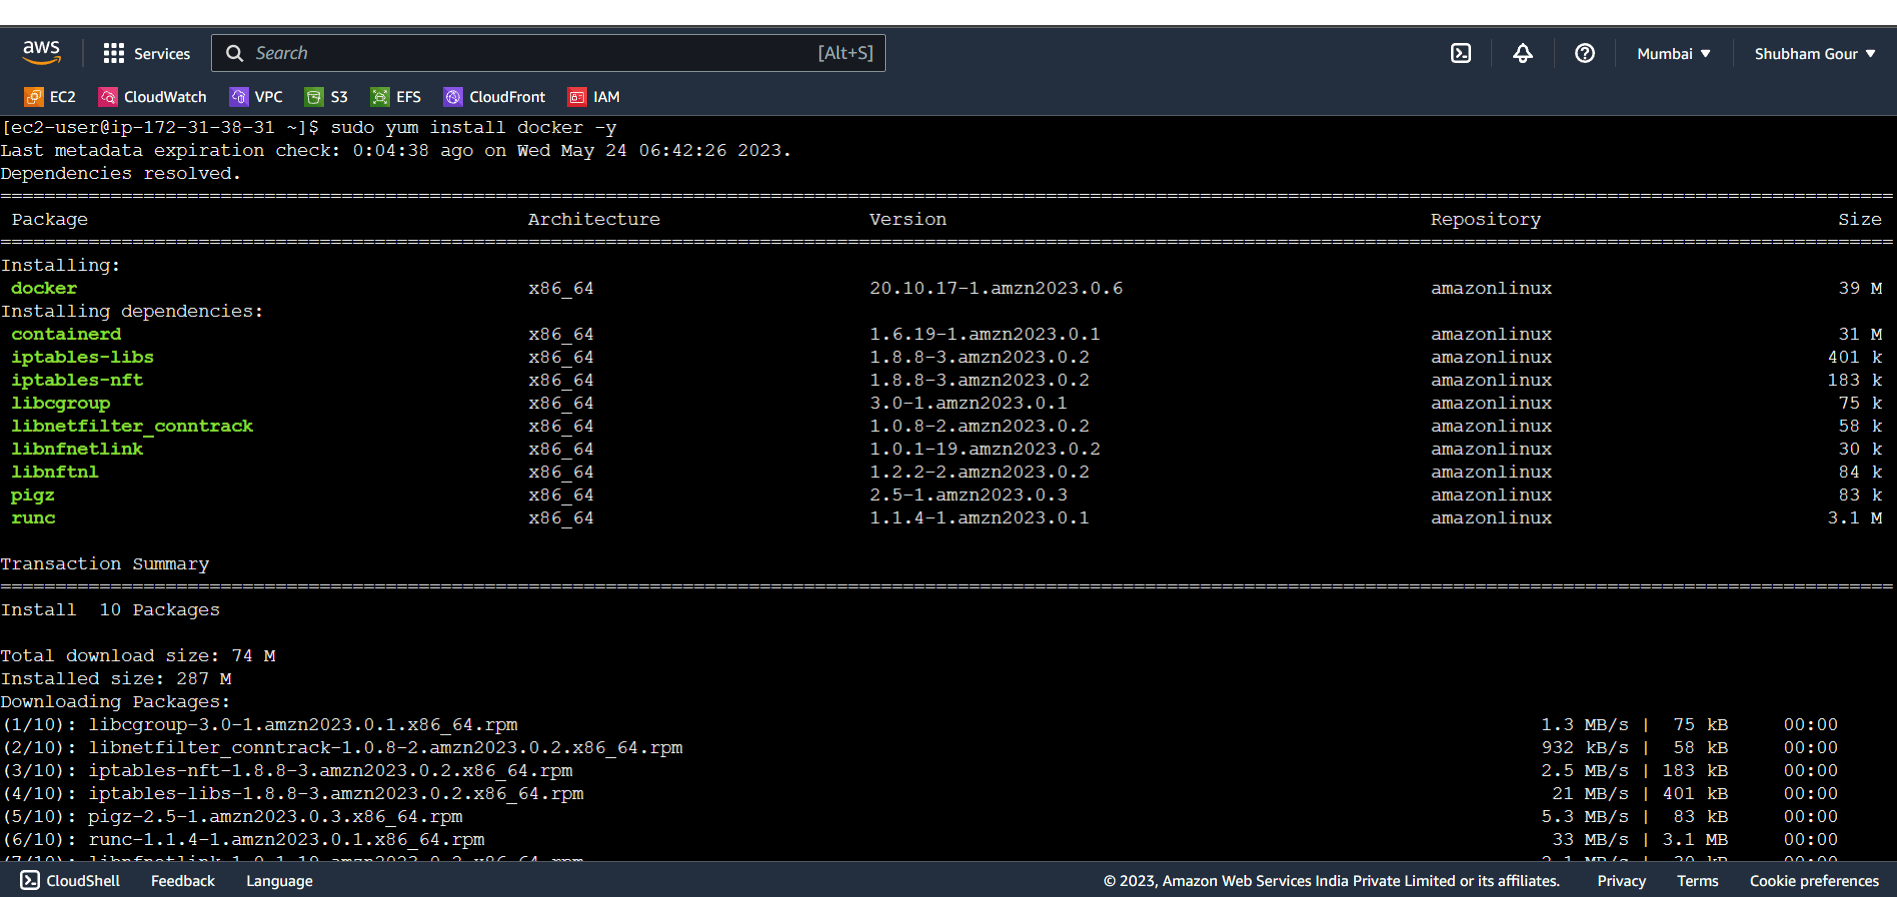
Once your instance is up and running smoothly, it's time to dive into the next step: installing Docker. Don't worry, I'll guide you through it with a simple command
sudo yum install docker -y
once the above command is executed your screen will resemble like the below
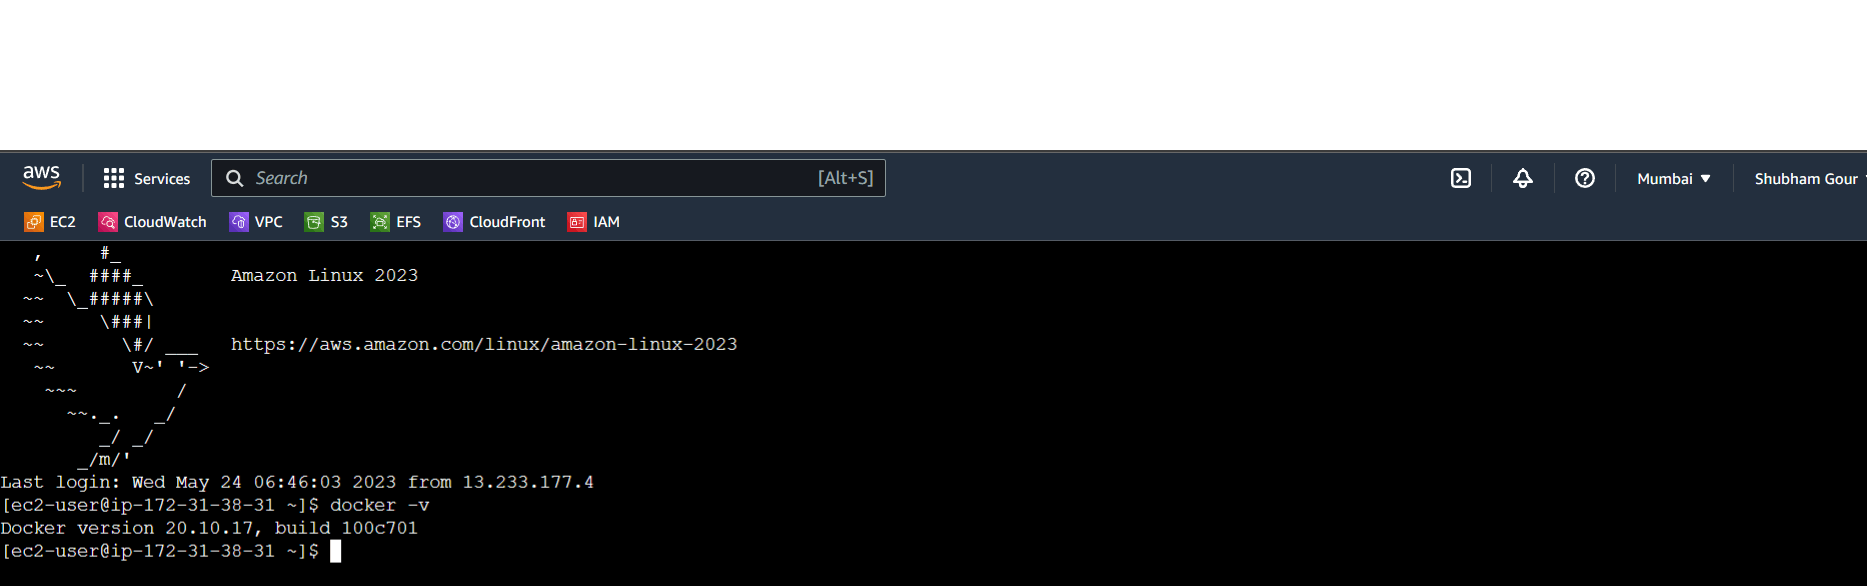
To make sure Docker is installed and ready to go on your AWS machine, let's run a quick command to verify it.
docker -v
(or you may also make use of the below)
docker --version
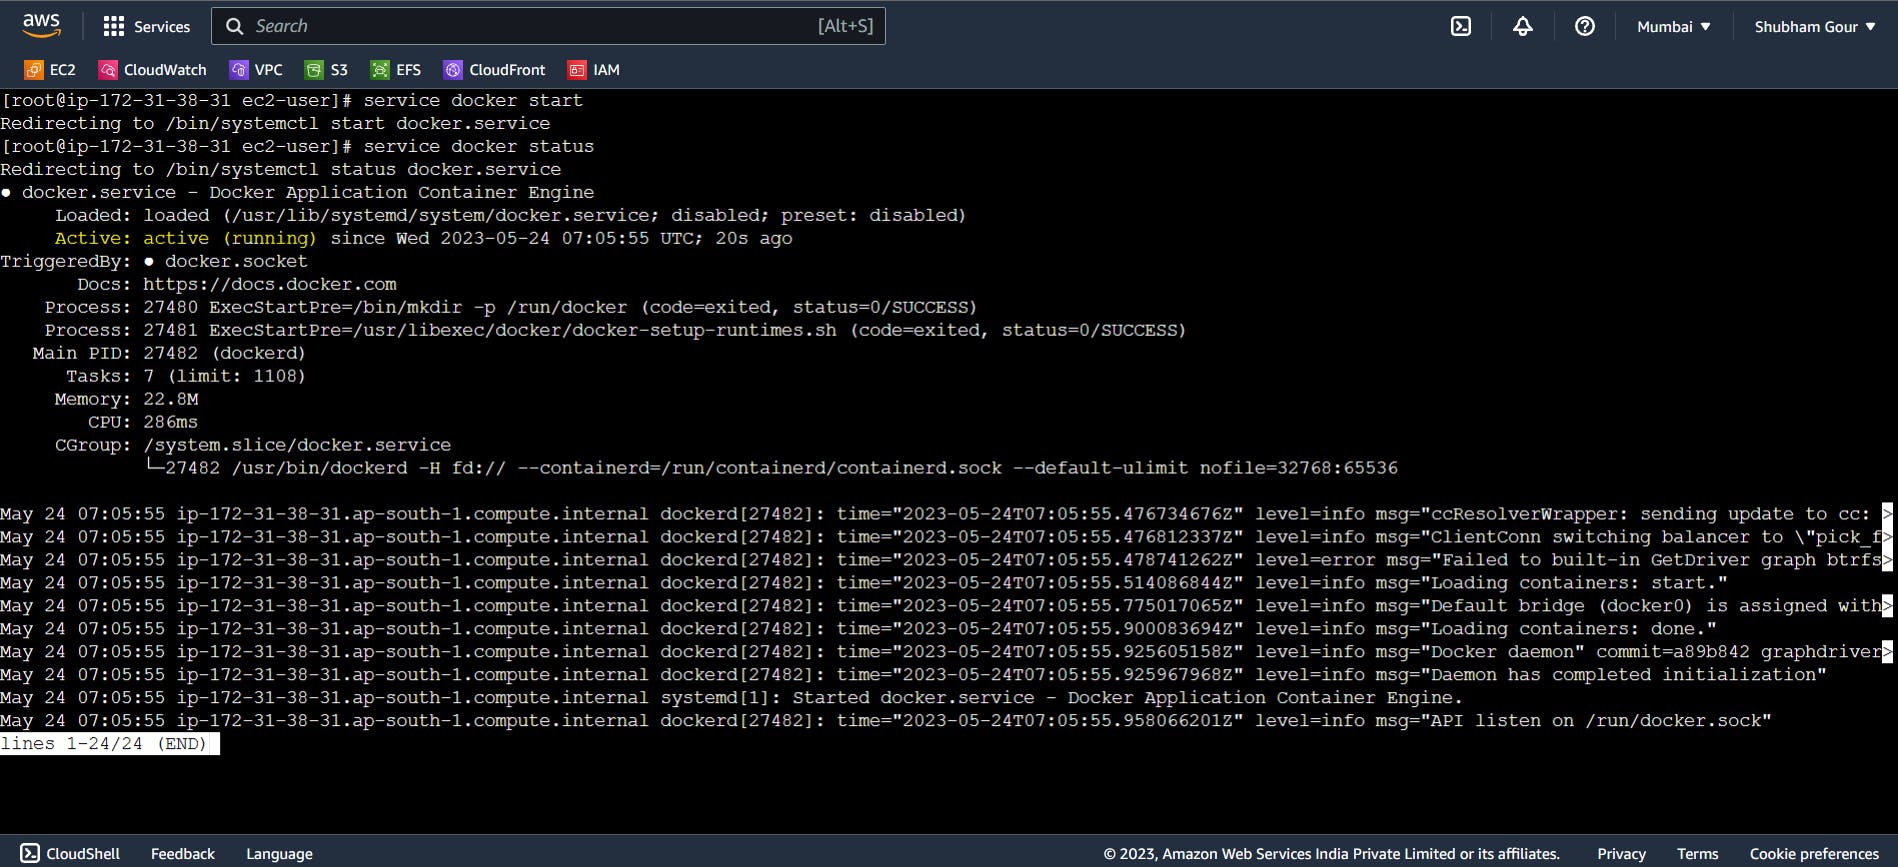
to check the status of docker you can execute the below command by default it is inactive
service docker status

sudo service docker start
By executing this command, you're instructing the system to start the Docker service, which enables you to manage and run containers. Docker will spring into action, initializing the service and preparing it for your container-related adventures.
Remember to run the command with administrative privileges (using sudo) to ensure proper access and control over the Docker service.
Inorder to check the system configuration in which you're running the docker command, here we make use of docker info command just execute like the below on the Linux CLI
docker info
After executing the command I mentioned earlier, you should see an output that resembles the following if you're following along with this documentation:
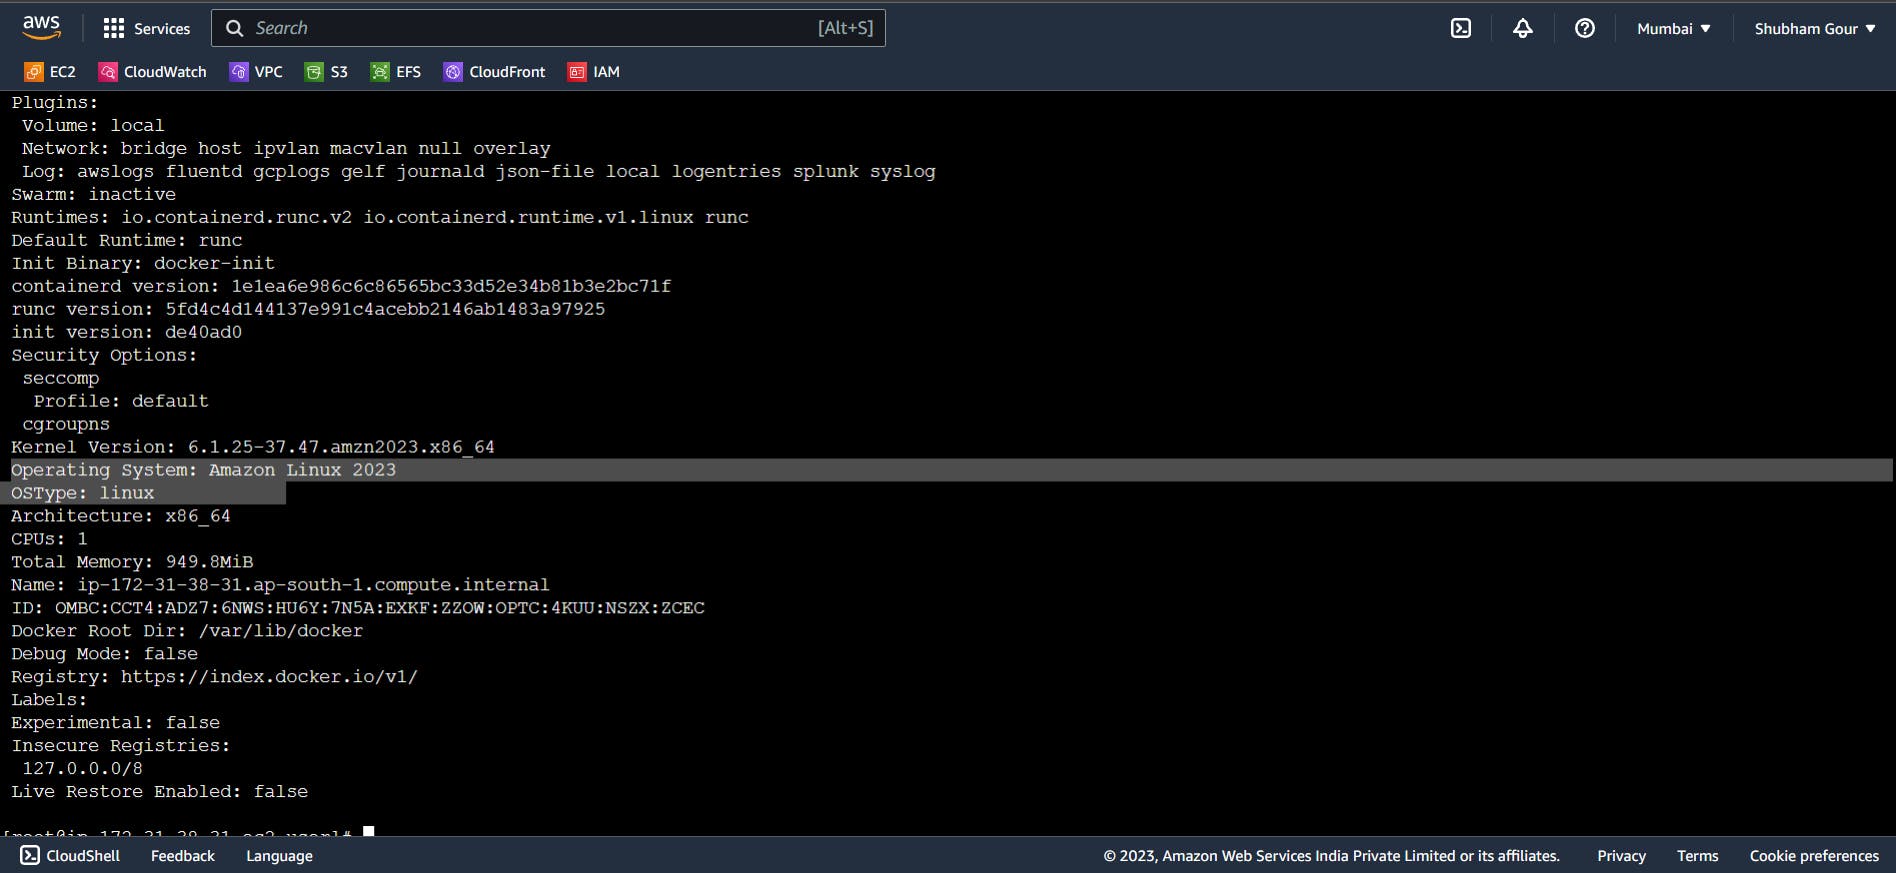
If you spot this cheerful message, it means Docker has sprung to life on your machine, and everything is looking A-OK! You're on the right track, my friend!
Now that Docker is up and running, you're all set to unleash the power of containerization and embark on exciting adventures in the world of software development. Get ready to create, deploy, and manage your applications like a pro!
Remember, if you encounter any hurdles along the way, don't hesitate to reach out. I'm here to help you navigate through any Docker-related challenges.
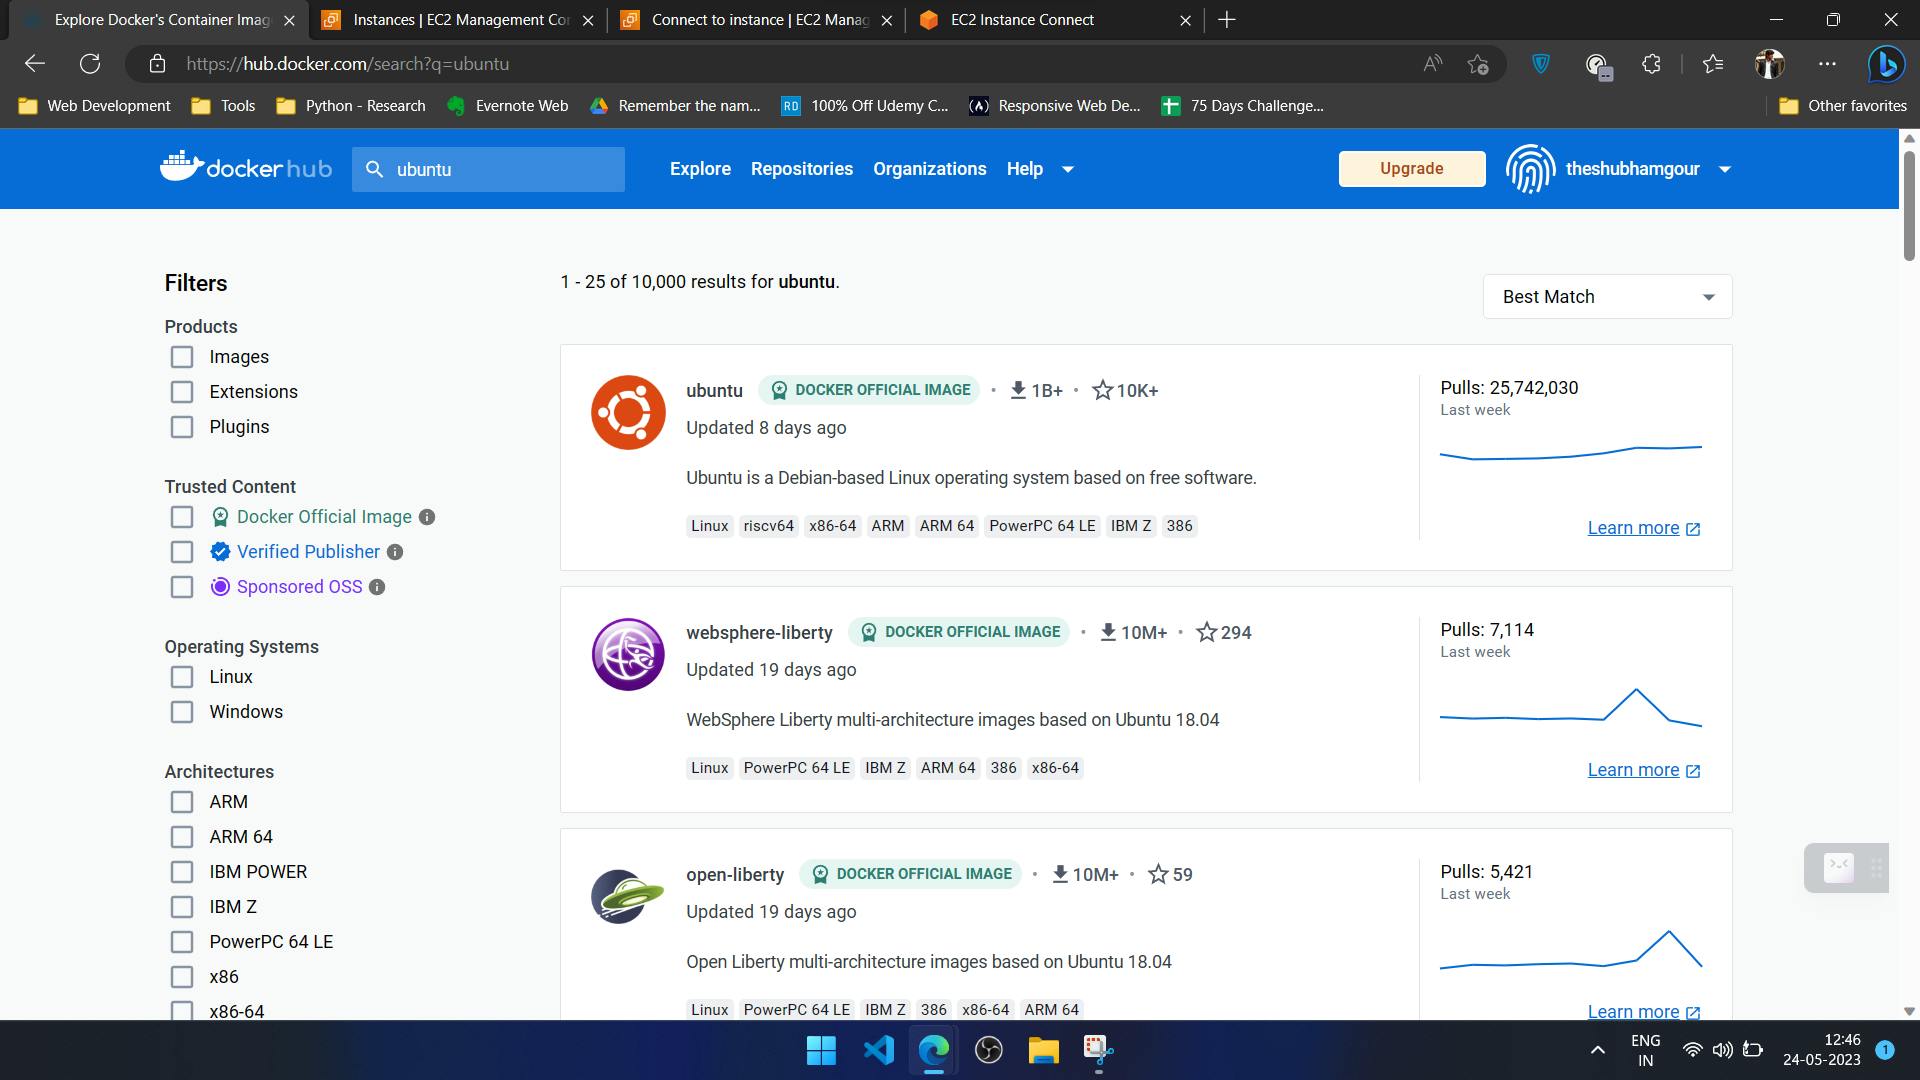
Once you're done with the above i would like you to create an account on Docker Hub
for creating an account visit here: https://hub.docker.com/signup
Post creation of your account you will see a huge world of images lying out there. waiting for you guys. your output will resemble like the below
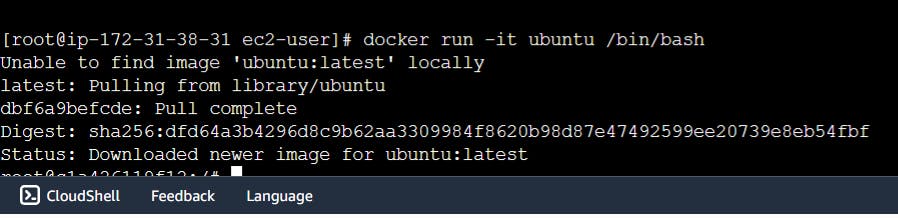
Now come back to your Linux terminal and pull one of the images here we will pull the Ubuntu image which we searched on Dockerhub, now to do the same we will need to fire the below command which is as simple as ABCD...
docker run -it ubuntu /bin/bash
This command allows you to run an interactive session within a Docker container based on the Ubuntu image. It's like stepping into a virtual Ubuntu environment!
Let's break it down:
docker runis the command that starts a new container from an image.-itis a combination of two options:-i(interactive) and-t(terminal). These options ensure that you can interact with the container and have a terminal to work with.ubuntuspecifies the name of the Docker image we want to use. In this case, it's the official Ubuntu image. [You may change this as per your requirement]/bin/bashis the command we want to run inside the container. It launches the Bash shell, providing you with a familiar command-line environment.
So, when you execute this command, you'll find yourself inside an interactive session within a fresh Ubuntu container. It's like having your own little Ubuntu playground to explore and experiment with!
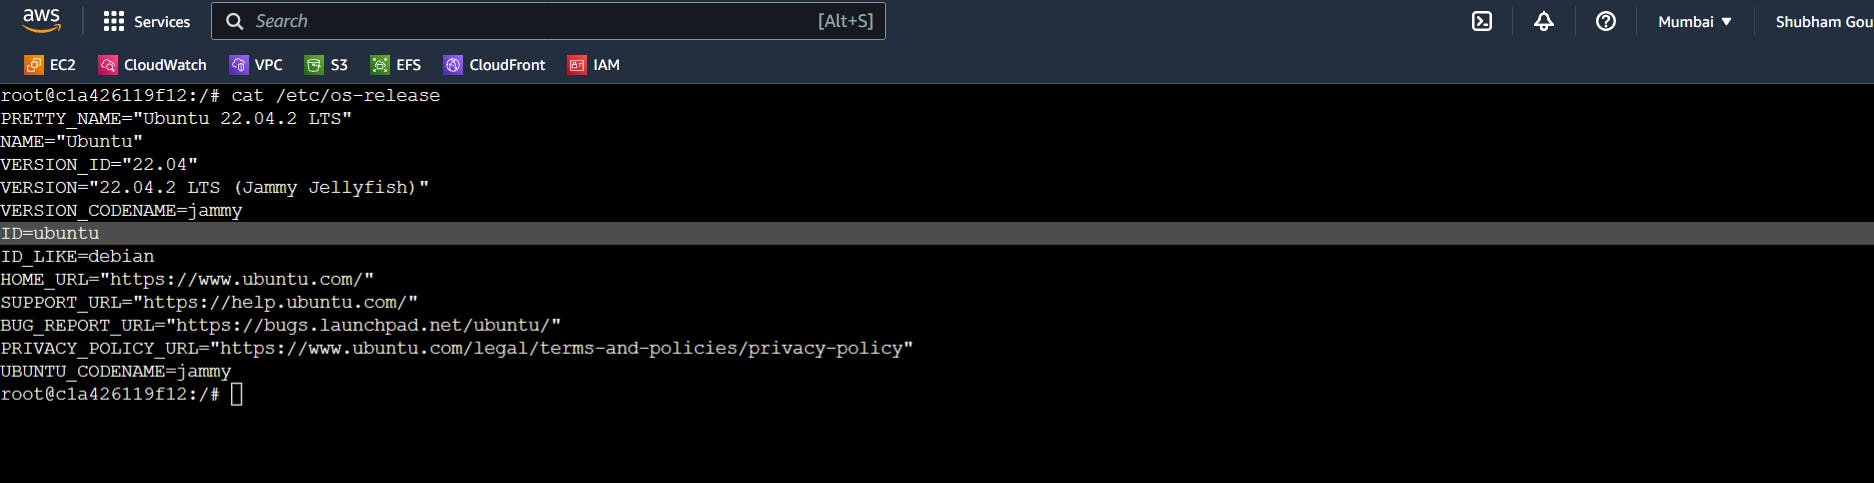
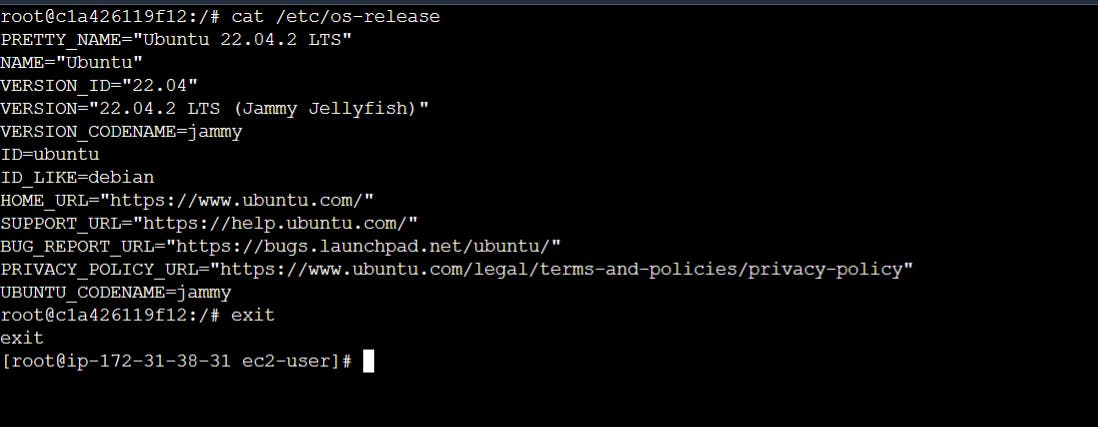
Now you're inside your Ubuntu container this can be verified by checking root@c1a426119f12:/# Once this is verified you can execute the below command to check the OS image information
cat /etc/os-release
Here is the place where you can do any operation you want. This Linux(Ubuntu) Image is all yours once done and if you want to get out of the container execute the below simple command
exit
Now if you want to check how many images you have pulled you can check the same by executing the below command
docker images
Once the above is executed your output will resemble the below:NOTE: Here we can see only one image since we pulled only one - it might differ in your case if you have pulled multiple images those will be listed right here
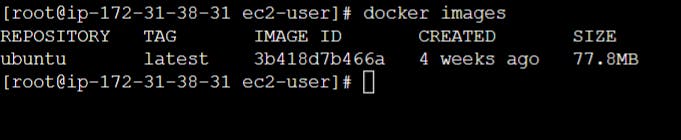
When you run the command I mentioned earlier, docker run -it ubuntu /bin/bash, you might notice that only one image is displayed. No worries, it's totally normal!
In this case, we pulled and used the Ubuntu image, so you'll see it listed as the only image available. However, in your case, if you've pulled multiple images before, you'll see all of them listed right here.
The list of images will give you a snapshot of the various images you've pulled and stored on your system. Each image represents a unique software package or application that you can spin up as a container whenever you need it.
So, don't be surprised if you see different images listed. It simply means you've been actively exploring and experimenting with various Docker images. It's all part of the exciting Docker journey!
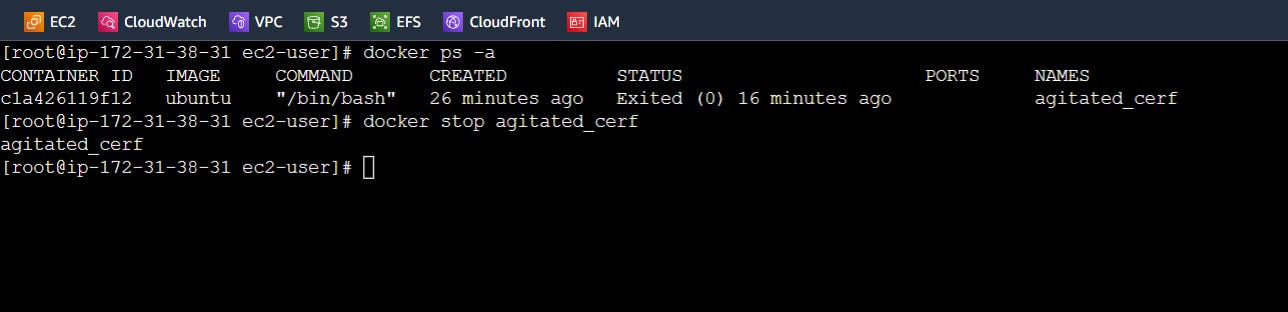
Now if you want to check how many containers are running and are stopped you can execute the below command
docker ps -a
By executing the above it will list all the running containers and the stopped containers and you will resemble the below

Now it's time to stop the container we are running, and inorder to do so you can execute the below command
docker stop agitated_cerf
here the name agitated_cerf is the tag value given to the container which can be customized which we will learn in the upcoming blog
If you've successfully stopped your container you will resemble the below
Now it's time to remove the container inorder to do so we may use the below command
docker rm agitated_cerf
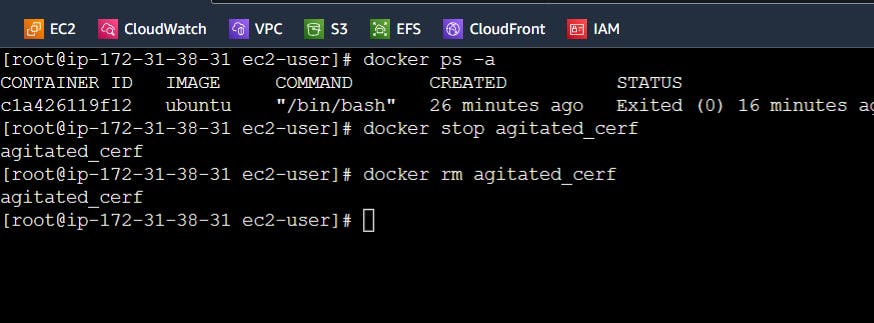
The command we're going to use is docker rm agitated_cerf. Now, you might be wondering, "What does that do?" Well, let me explain!
When you execute this command, Docker will remove a specific container called "agitated_cerf". But don't worry, it won't cause any harm. It simply means that we're telling Docker to clean up and remove this container from your system.
Think of it as tidying up your Docker environment. By removing containers you no longer need, you're freeing up resources and keeping your system nice and organized.
Now, keep in mind that "agitated_cerf" is just an example container name. In your case, you might have different container names listed. Feel free to replace "agitated_cerf" with the actual name of the container you want to remove.
So, when you're ready to say goodbye to a specific container, execute docker rm <container_name>. Docker will do its magic and remove it from your system, leaving things neat and tidy!
Remember, don't be afraid to experiment and try out different containers also make sure you're termination your AWS session after playing with Docker. And when you're done with them, simply use the docker rm command to bid them farewell. Happy container cleanup!
Conclusion
🎉 Congratulations! You've reached the end of our Docker tutorial journey. I hope this guide has provided you with a solid foundation for understanding and working with Docker. From learning the basics of Docker architecture to creating and running containerized applications, you've come a long way! 🚀
Throughout this tutorial, we've explored the power and versatility of Docker, enabling you to package and deploy applications with ease. We've covered essential concepts such as images, containers, Dockerfiles, and even ventured into the world of Docker in the cloud. ☁️
But this is just the beginning! Docker has so much more to offer, and there's a whole universe of possibilities waiting for you to explore. In our upcoming tutorials, we'll delve deeper into advanced Docker topics, container orchestration with tools like Kubernetes, and much more. 🌟
Remember, I'm here to support you on your Docker journey. If you have any questions, need clarifications, or want to discuss anything related to Docker or cloud technologies, feel free to reach out to me on LinkedIn. Connect with me at Shubham Gour, and I'll be more than happy to assist you. 😊
So keep learning, keep experimenting, and embrace the power of Docker to transform the way you develop and deploy applications. The future is bright, and I'm excited to accompany you on this amazing tech adventure! 🎯
Happy Dockerizing! 🐳